Remove the gearbox for repair or replacement
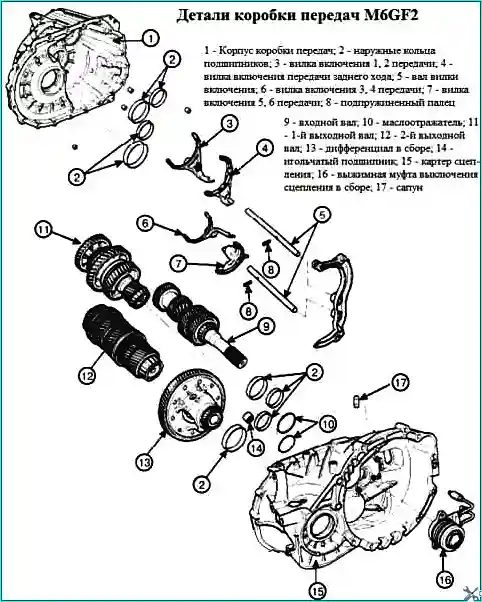
Prepare the car for the task and install it on a lift or inspection pit
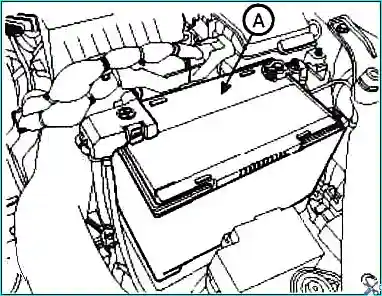
Disconnect the battery terminals and remove the battery
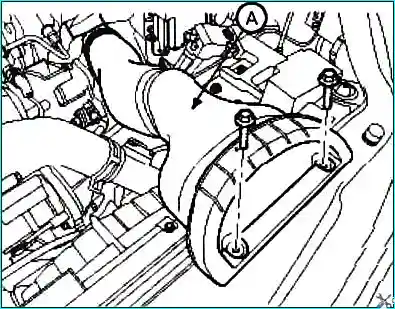
Unscrew the mounting bolts and remove the air duct assembly (A)
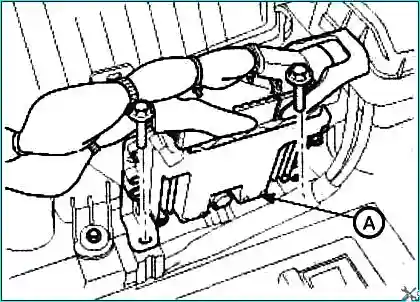
Unscrew the mounting bolts and disconnect the control unit (ECM) (A)
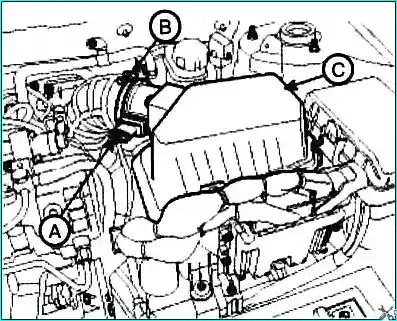
Removing the air filter assembly (C) after disconnecting the ground wire connector (A) and the clamp (B)
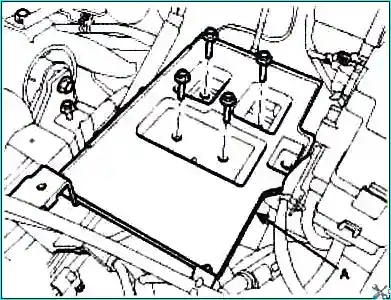
Removing battery shelf (A)
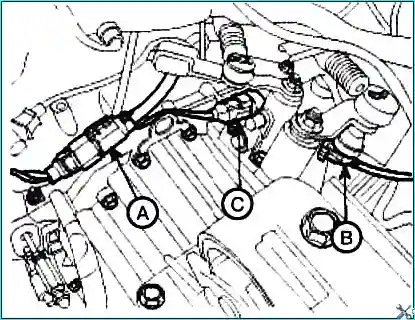
Disconnect the combined connector of the vehicle speed sensor (A), the reverse lamp switch (B) and the neutral gear switch (C)
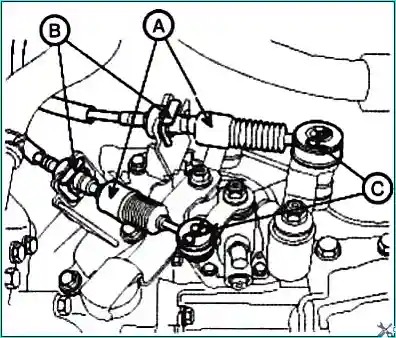
Remove the spring pins (C), remove the clamps (B), then disconnect the gear selection and engagement cables (A).
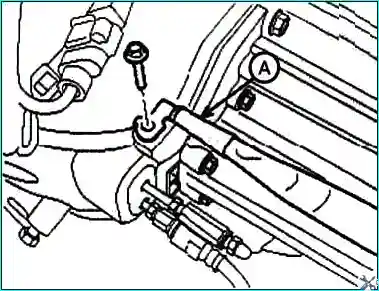
Unscrew the bolt and disconnect the ground wire (A)
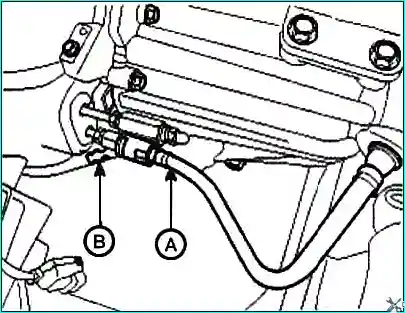
After removing the clamp (B) with the auxiliary cylinder pipe, disconnect the pipe (A)
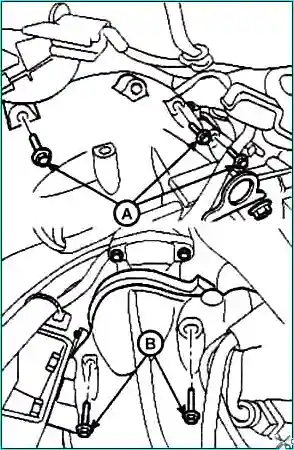
Unscrew the upper gearbox mounting bolts
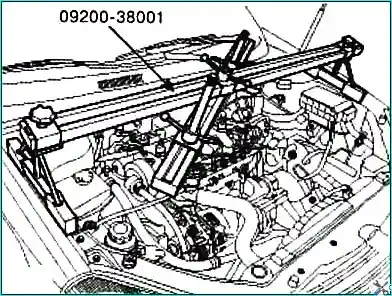
Using the 09200-38001 tool, fix the powertrain
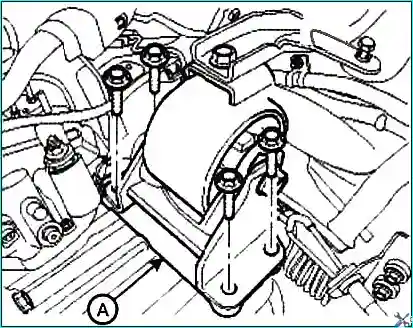
Unscrew four bolts and remove the gearbox mounting bracket (A)
Remove the front wheels
Unscrew the steering column shaft joint mounting bolt
Remove the powertrain protection
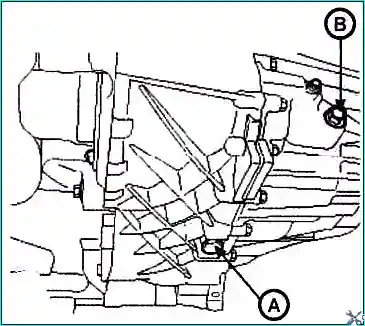
Unscrew the plug (A) and drain the transmission oil. Unscrew the filler cap
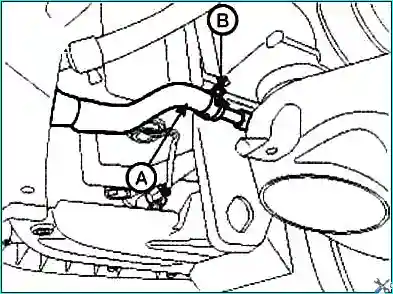
Unscrew the bolt (B) of the hose for supplying fluid under pressure (A)
Unscrew the bolts of the lower arm ball joint
Unscrew the bolts of the stabilizer bar
After removing the steering knuckle and the nut from the tie rod end, disconnect it
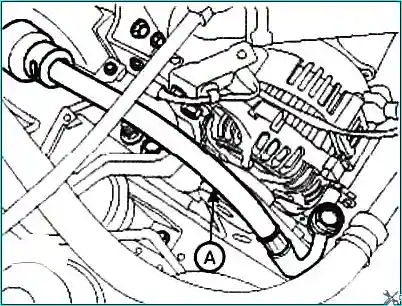
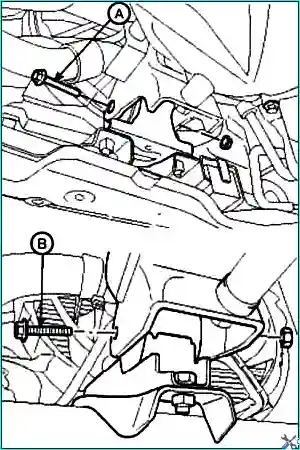
Unscrew the engine mounting bolts (A, B)
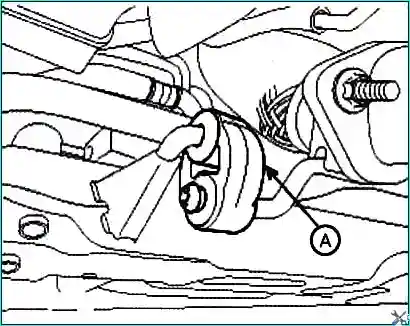
Disconnect the rubber muffler mounting bracket (A)
Support the subframe with a jack and unscrew the mounting bolts
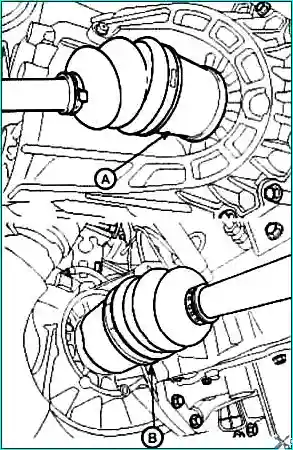
Disconnect the drive shafts (A, B) from the gearbox, as shown in the figure
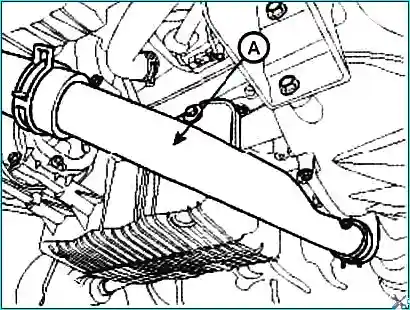
Unscrew the two bolts and remove the clamp, then remove the intercooler pipe (A)
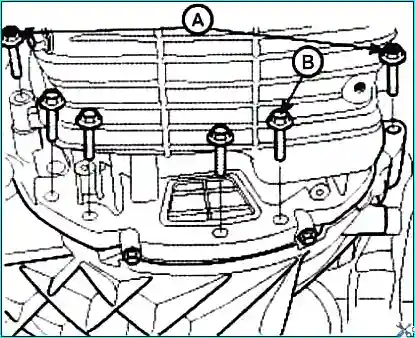
Supporting the gearbox with a jack, unscrew the lower bolts securing the gearbox
Slowly lowering the jack, disconnect the gearbox from the engine
Installing the gearbox
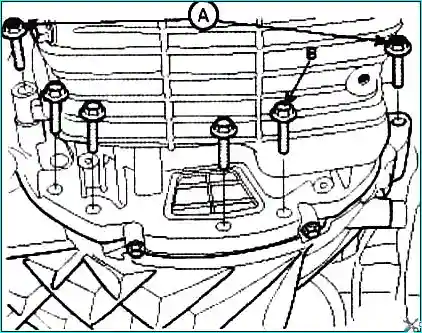
Connecting gearbox to the engine and bait the lower mounting bolts
Tighten the bolts with a torque of 80-100 Nm (bolt A), 30-42 Nm (bolt B)
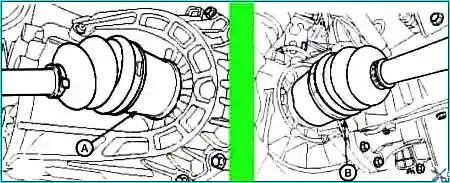
Connect the drive shafts (A, B) to the gearbox
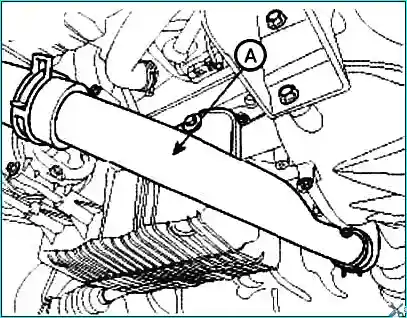
We screw in two bolts and tighten the clamp, then install the intercooler pipe (A)
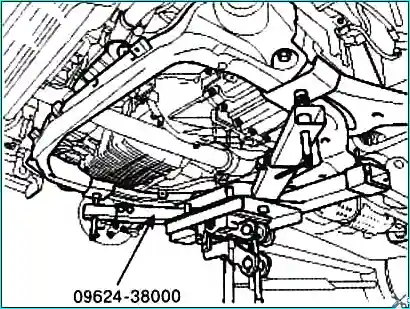
We support the subframe (A) with a jack, then install the support mounting bolts. Tightening torque 140-160 Nm
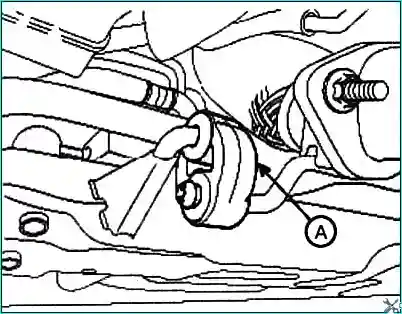
Connecting the rubber kr muffler mounting bracket (A)
Install the support bracket mounting bolts. Tighten the mounting bolts to a torque of 50-65 Nm
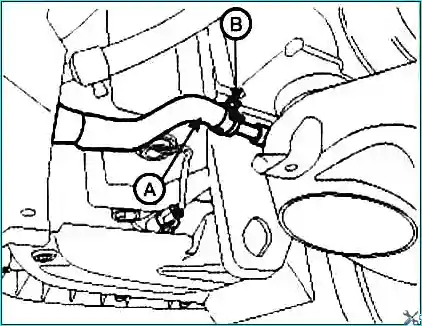
Tighten the clamp (B), then connect the return hose (A) of the steering rod
Install the rod on the hinge. Tighten the mounting bolts to a torque of 24-34 Nm
Screw in the stabilizer strut mounting bolts. Tightening torque 100-120 Nm
Tighten the lower arm ball joint bolts
Fill in the transmission fluid through the filler hole. Tightening torque of the plug 30-35 Nm
Tighten the steering rod joint bolt. Tightening torque 18-25 Nm
Install the powertrain protection
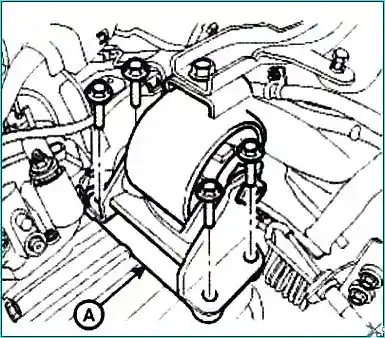
Tighten the bolts (A) of the gearbox mounting bracket. Tightening torque 60-80 Nm
Remove the support device 09200-38001
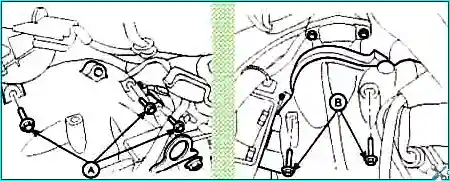
Tighten the upper gearbox mounting bolts (A, B). Tightening torque 43-55 Nm
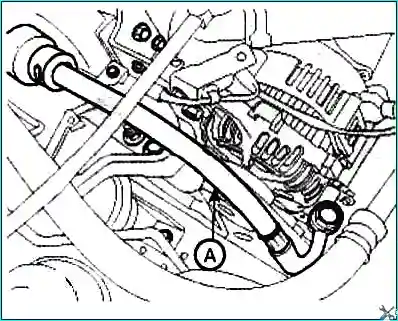
Installing the high-pressure hose of the power steering (A). Tightening torque 55-65 Nm
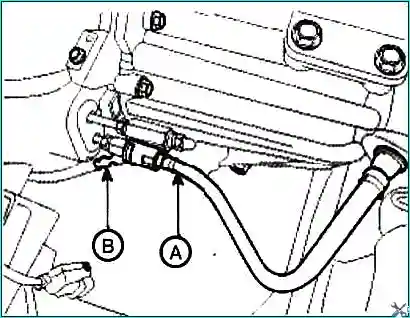
Connect the auxiliary cylinder pipe (A), install the clamp (B)
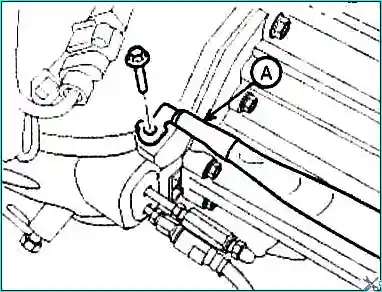
Connect the ground wire (A)
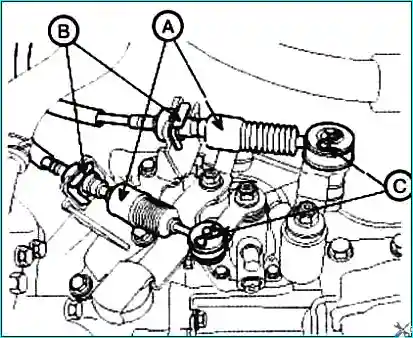
Connect the gear selection and engagement cables (A), install the clamps (B) and locking pins (C)
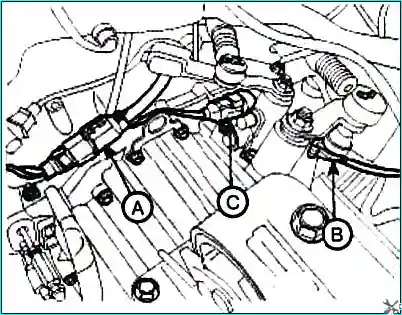
We connect the vehicle speed sensor connector (A), the rear light switch (B) and the neutral position switch (C)
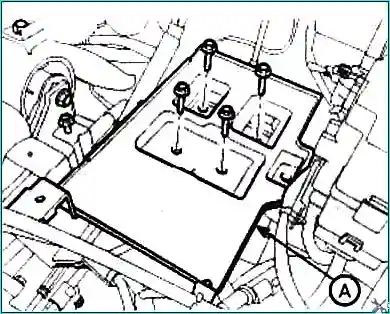
Installing the battery shelf
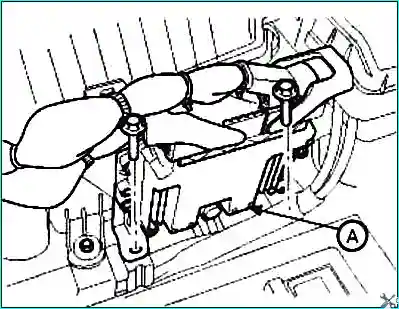
Installing the engine control unit
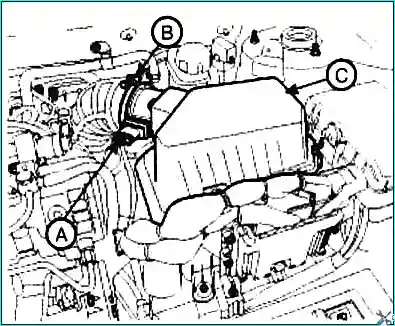
Install the air filter assembly (C) and connect the ground wire connector (A), then tighten the clamp (B)
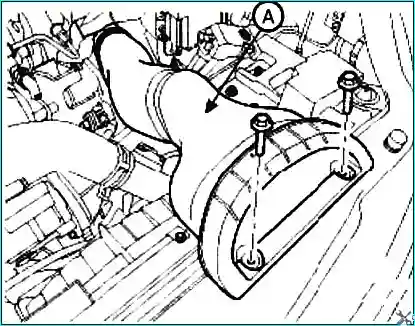
Install the air filter (A)
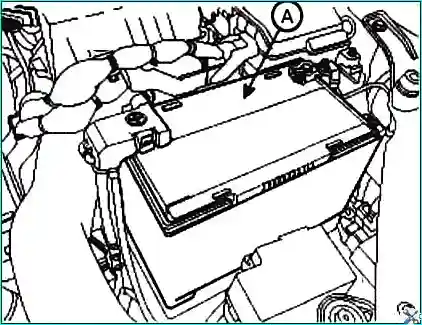
Installing the battery r and connect the terminals. First the positive terminal, then the negative terminal.


