


Removing and installing the brake light switch on a Renault Megane 2
Removal:
Disconnect the brake light switch connector (Fig. 1).
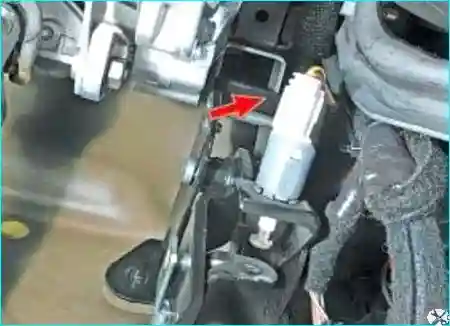
Fig. 1. Disconnect the brake light switch connector
Turn the brake light switch a quarter turn anti-clockwise (Fig. 2).
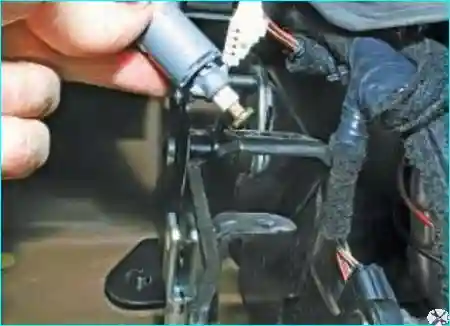
Fig. 2. Turn the brake light switch a quarter turn anti-clockwise
Handle the brake light switch with care.
The plunger should only be moved when adjusting dimension X (Fig. 3).
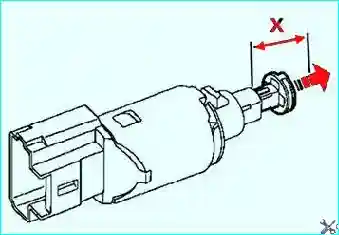
Fig. 3. Adjusting dimension X of the plunger
Installation:
The brake light switch must be replaced in the following cases:
- if the plunger has become separated from the sensor;
- if more than three adjustments of dimension X are required.
Measure dimension X of the piston.
If dimension X is less than 17 mm, adjust it by gently pulling on the end of the plunger (dimension X must not exceed 18 mm).
Press the brake pedal by hand.
Install the brake light switch onto the pedal bracket.
Lock the brake light switch by turning it a quarter turn clockwise.
Carefully return the brake pedal to its initial position, guiding it by hand.
The brake light switch adjusts automatically according to the brake pedal position.
Clicks can be heard as it passes through the detent positions during automatic adjustment.
Connect the connector.
Check the operation of the brake light switch:
- press the brake pedal and check that the brake lights come on;
- release the brake pedal and check that the brake lights go off.


