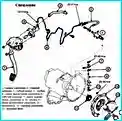
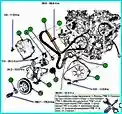
The closed-type cooling system includes a water pump, a cross-flow radiator, a radiator fan with an electric cord, a thermostat, a heater core, hoses and sensors
The radiator fan with an electric cord is activated when the contact temperature sensor is triggered.
On models with an automatic transmission, some of the fluid circulates through the transmission fluid cooler.
Technical data
Cooling system 2.0 L DOHC
Coolant capacity 7.3 liters
Thermostat
- - wax-filled type
- - opening start temperature, °C 82
- - opening temperature range, °C 80.5–83.5
- - full opening, °С 95
Radiator cap
- - main valve opening pressure, kPa 86.1–124.5
- - main valve closing pressure, kPa 83.4
- - vacuum valve opening pressure, kPa – 6.86
Cooling system V 6 2.5 l
Thermostat
- - opening start temperature, °С 82
- - opening temperature range, °С 80–81
- - fully opened temperature, °С 95
Radiator cap
- - main valve opening pressure, kPa 86.1–124.5
- - main valve closing pressure, kPa 83.4
- - vacuum valve opening pressure, kPa – 6.86
Maintenance
Coolant concentration
- - tropical region 40%
- - other regions 50%
Ethylene glycol based coolant
Sealant
Coolant temperature level sensor No. 2310 or equivalent
Coolant temperature sensor LOCTITE 962T or equivalent
Checking the coolant level
Check the coolant level with the engine cold engine.
Remove the cap and use the marks on the dipstick to determine the coolant level, which should be between the F and L marks.
Add coolant if necessary.
Coolant quality
Check for rust or scale buildup around the radiator cap or neck.
Check for cleanliness and contaminants in the coolant.
Replace the coolant if necessary.
Checking the cooling system for leaks
Remove the radiator cap.
Make sure the coolant level reaches the filler neck.
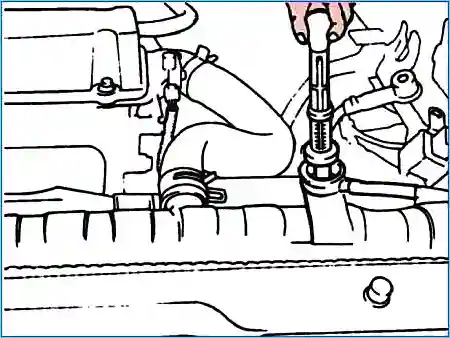
Install the radiator cap tester to the filler neck and create a pressure of 150 kPa in the cooling system.
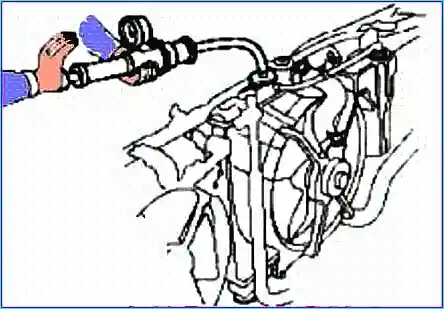
Make sure that the pressure in the cooling system is maintained for 2 minutes.
Do not remove the radiator cap on a hot engine, as the escaping vapors can cause severe burns.
Cover the radiator cap with a thick cloth and slowly unscrew the cap until the steam escaping hisses.
After the steam stops escaping, slowly unscrew and remove the cap from the radiator.
Make sure that there is no moisture in the checked areas.
When the testing device is removed, be careful not to spill coolant from the device.
Be careful when installing and moving the device and do not damage the filler neck of the radiator during testing.
Otherwise, locate the leak and repair it.
Testing the radiator cap under pressure
Use the adapter to secure the radiator cap to the testing device for checking the radiator cap.
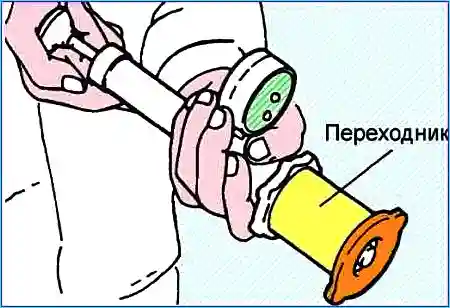
Increase the pressure until the cap valve moves.
Master valve opening pressure: 96.1 - 124.5 kPa
Master valve closing pressure: 83.4 kPa
Make sure the valve opens and closes within the specified range.
Replace the radiator cap if the valve opens and closes outside the specified range.
Before checking, make sure the cap is clean and free of rust and foreign matter that will impair its operation.
Checking thermostat
Immerse the thermostat in a water tank and gradually heat the water
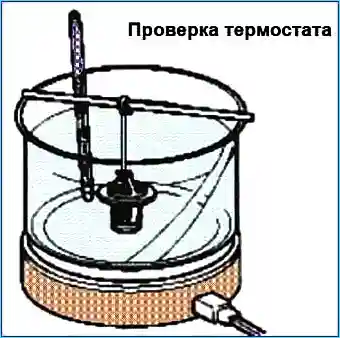
Check the valve opening temperature.
Standard value 82° C, full opening 95° C
Check the full valve opening height: about 8 mm or more at 95° C
If the valve opening height does not meet the standard, you need to replace the thermostat
Possible malfunctions of the cooling system
Low coolant level:
- - Coolant leak
- - Damaged radiator honeycombs
- - Corroded or cracked hoses (hose radiator, heater hose, etc.)
- - Faulty radiator cap valve or spring installation
- - Faulty thermostat
- - Faulty water pump
Dirty radiator tubes:
- - Foreign inclusions in coolant - Replace coolant
High coolant temperature:
- - Faulty thermostat - Replace thermostat
- - Faulty radiator cap - Replace radiator cap
- - Clogged cooling system passages or hoses - Replace or clean clogged cooling system components
- - Loose or torn drive belt - Adjust tension or replace drive belt
- - Faulty water pump - Replace water pump
- - Faulty coolant temperature sensor or wiring - Replace coolant temperature sensor
- - Faulty electric radiator fan or wiring - Replace or repair radiator fan
- - Faulty radiator fan temperature sensor or wiring - Replace radiator fan temperature sensor
- - Low coolant - Add coolant
Low coolant temperature:
- - Faulty thermostat - Replace thermostat
- - Faulty coolant temperature sensor or wiring - Replace coolant temperature sensor
Cooling system leaks:
- - Loose connections - Tighten connections
- - Damaged Hoses, Pipes, or Oil Cooler - Replace or Repair Hoses, Pipes, or Oil Cooler
Radiator Electric Fan Not Working:
- - Damaged Components - Replace or Repair Damaged Components


