In the article, we will consider the replacement of light bulbs, headlights, lanterns and ceiling lamps of a car
The headlights use transparent glass optics.
The headlight cover is smooth and does not perform the function of distributing light fluxes.
It is made of plastic that is more transparent and lighter than a glass cover.
The direction indicators built into the headlights are made without color filters, instead lamps with glass of a certain color are used.
In a variant version, the cars are equipped with fog lights installed in the lower part of the bumper.
The fog lights can only be turned on with the steering column switch when the exterior lights are on.
Replacing bulbs in the headlight
Disconnect the negative battery terminal
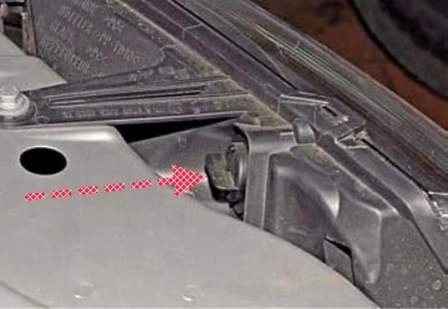
To replace the turn signal bulb, turn the socket counterclockwise
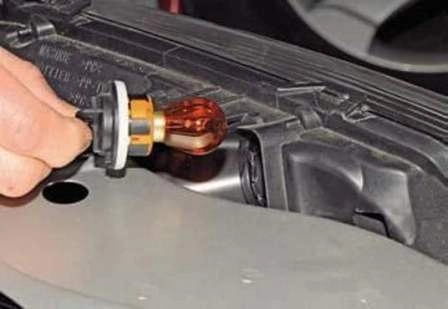
Remove the cartridge with the lamp from the headlight housing
Press the lamp, turn it counterclockwise until it stops and remove the lamp from the socket
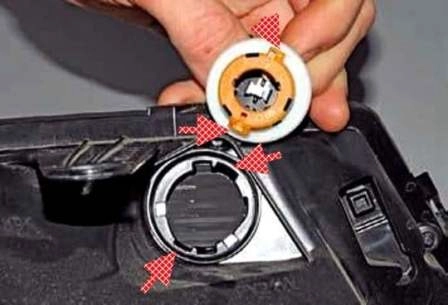
The direction indicator lamp holder has two locking protrusions of different widths, they must fit into the corresponding grooves of the headlight housing
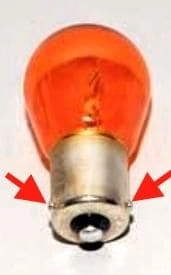
Install the new PY21W lamp in reverse order
There are two protrusions on the base of the lamp, they are located asymmetrically relative to the axis of the lamp and must fit into the corresponding grooves of the cartridge.
Replacing the High Beam Bulb
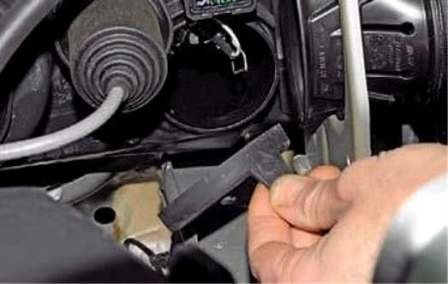
Remove the protective rubber cover of the high beam lamp
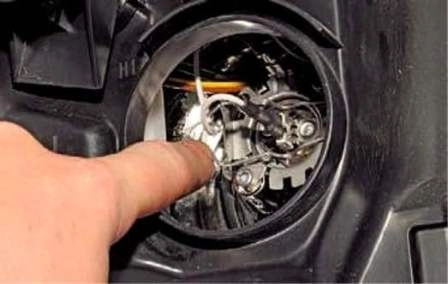
Press on the spring clip of the lamp and disengage it from the hooks of the reflector
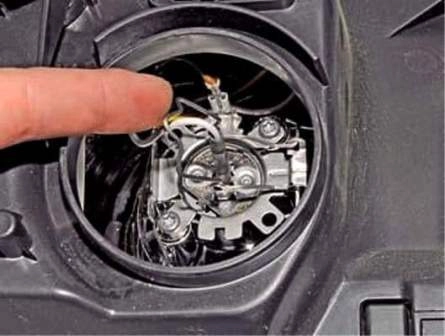
Pull the latch to the side
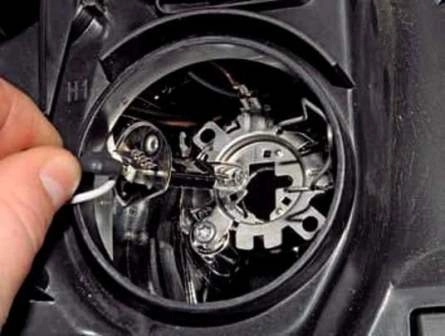
Remove the lamp from the headlight housing
Install the H1 lamp in reverse order
Replacing low beam bulb
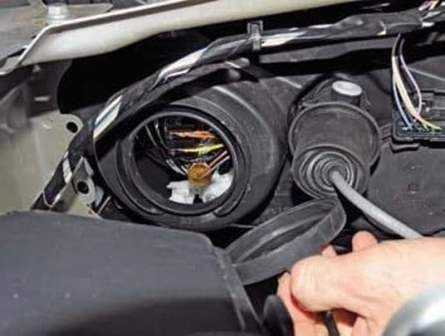
Remove the protective rubber cover of the dipped and side light lamps
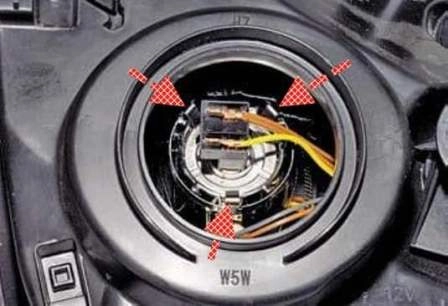
Pull the lamp by the block of wires, we disengage the lamp with three spring clips
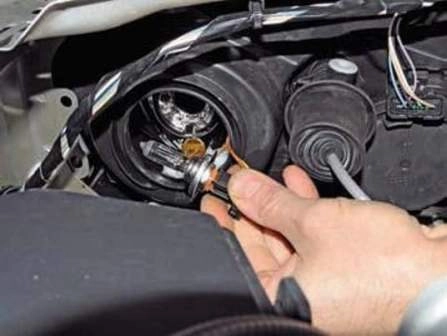
Remove the lamp from the headlight housing
Disconnect the wire block from the lamp.
We attach a block of wires to the new H7 lamp and, having inserted lampu into the housing of the headlight, press the block of wires until the spring clips snap into place.
Replacing the parking light bulb
Remove the protective cover of the dipped and side light lamps
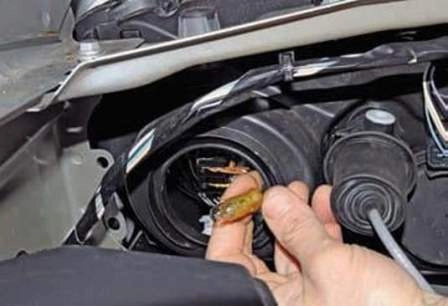
Pull out the socket with the lamp from the headlight housing. We install the new W5W lamp in the reverse order.
Removing headlight
Removing the front bumper
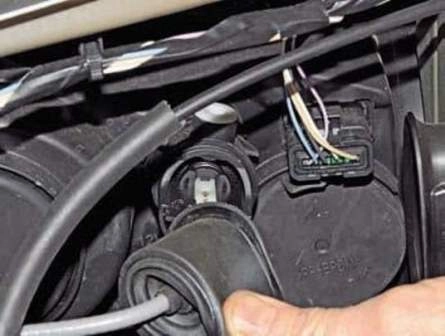
Remove the protective cover from the body of the headlight range control actuator
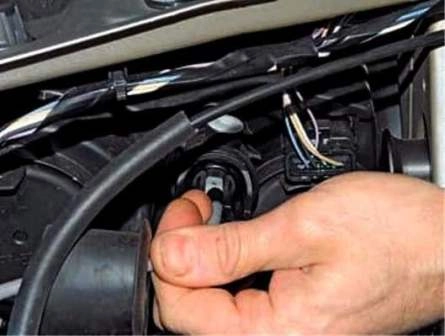
We remove the cable sheath from the holder on the body of the actuator
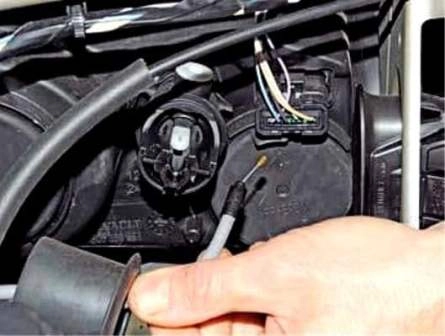
Disconnect the tip of the cable from the rod of the headlight range control actuator
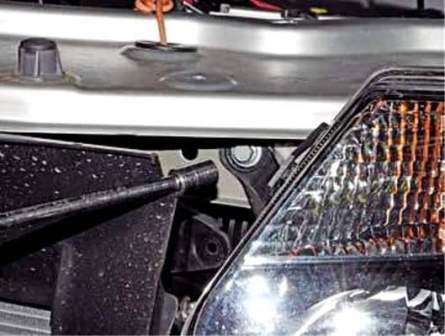
With a head of 10, we unscrew the bolt of the front fastening of the headlight
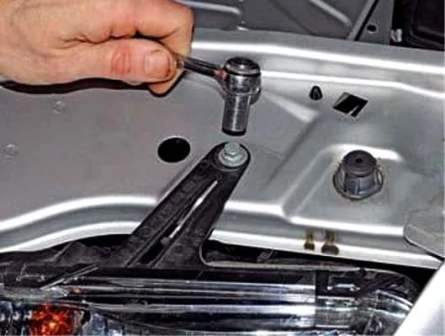
With a head of 10, we unscrew the bolt of the upper fastening of the headlight
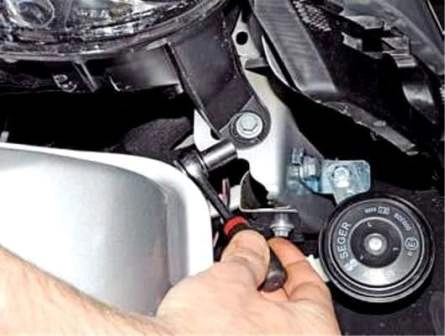
We unscrew the bolt of the lower fastening of the headlight
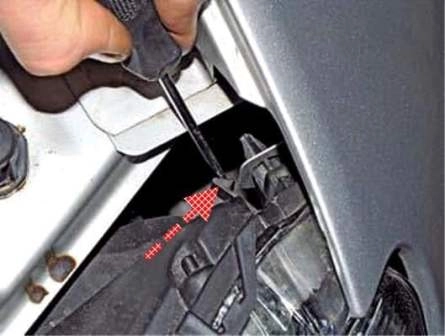
Use a screwdriver to press the latch and remove the headlight from the body
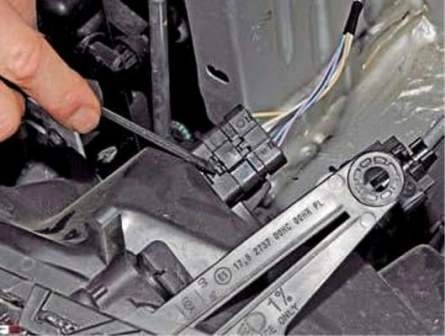
Use a screwdriver to pry the retainer of the wire block
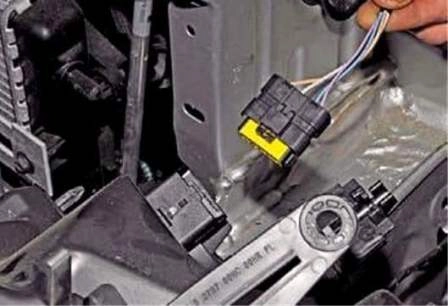
Disconnect the block from the headlight connector
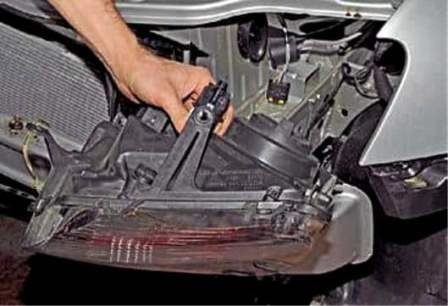
Remove headlight
Install the headlight in reverse order.
After installing the headlight unit, we adjust the direction of the headlight beam.
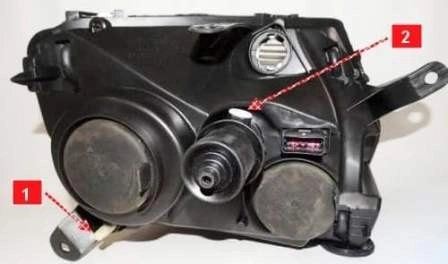
To change the direction of the light beam in the vertical plane with a hexagon 6 (through a hole in the upper cross member of the radiator frame) screw 2.
To change the direction of the light beam in the horizontal plane, turn knob 1.
Replacing the fog light bulb
We install the car on a viewing ditch or lift
Remove the front wheel from the side of the lamp to be replaced.
Remove the mudguard (article - Removing engine protection, fenders and mudguards Renault Duster)
We unscrew three screws securing the fender liner to the front bumper and one self-tapping screw securing the fender liner to the wing.
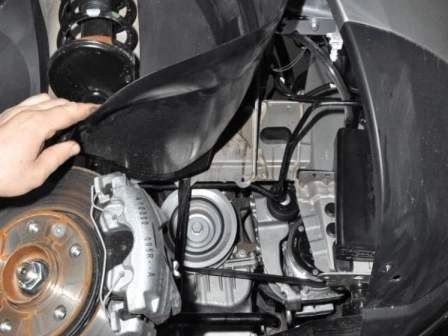
Bend the front part of the fender liner and wind it behind the brake disc
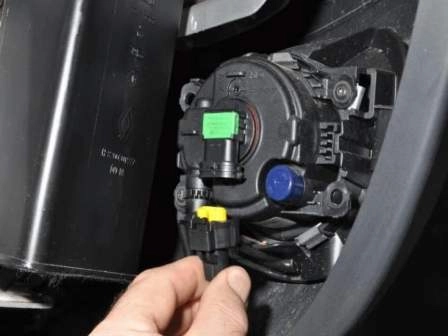
We press the lock of the wire block, disconnect the block from the lamp
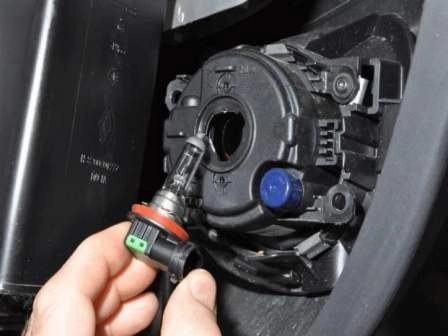
Remove the lamp from the headlight housing
Install the new H11 bulb in reverse order.
Removing the fog lamp
We prepare the car as described above

Bend the front part of the fender liner and wind it behind the brake disc
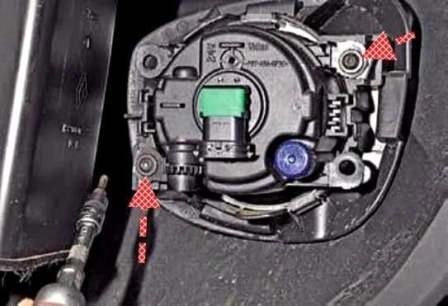
Disconnect the wiring harness from the lamp. With a Torx T-20 wrench, unscrew the two headlight mounting screws
Remove the fog lamp.
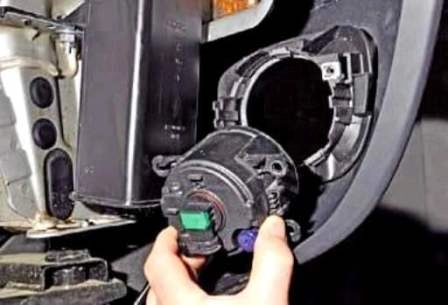
Install the fog lamp in reverse order.
After installing the headlight, we adjust the direction of the light beam in the vertical plane.
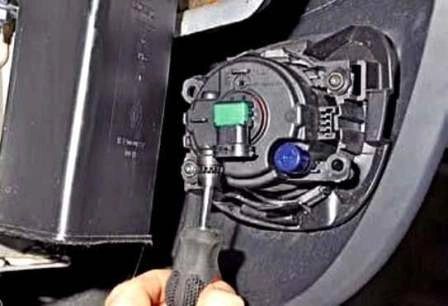
With a hand or a Phillips screwdriver, turn the plastic adjusting screw clockwise to raise the beam of light, or counterclockwise to lower the beam.
To adjust the direction of the fog lamp beam during operation, holes are made in the front bumper
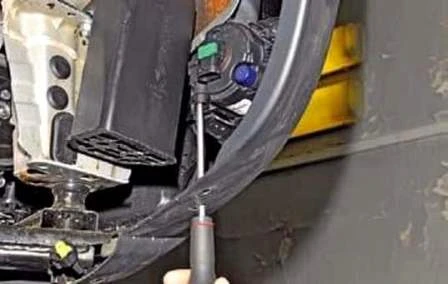
To adjust, insert a long Phillips screwdriver into the hole and adjust the direction of the fog lights.
Removing the side turn signal and replacing the bulb
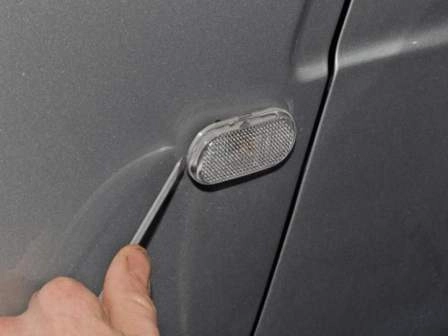
Pry off the turn signal with a screwdriver and remove it from the hole in the front fender
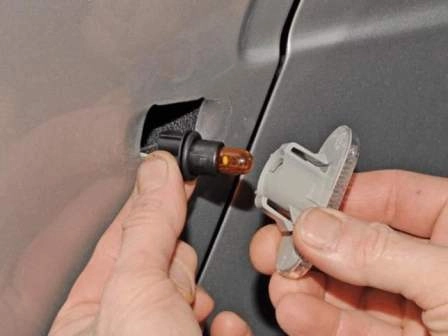
Turn the lamp socket counterclockwise and remove the lamp socket from the housing
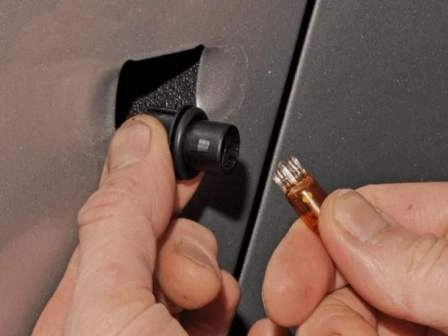
Pull out the lamp and remove it from the socket
Insert the new WY5W bulb. Install the repeater in reverse order.
Removing the rear light and replacing the bulbs
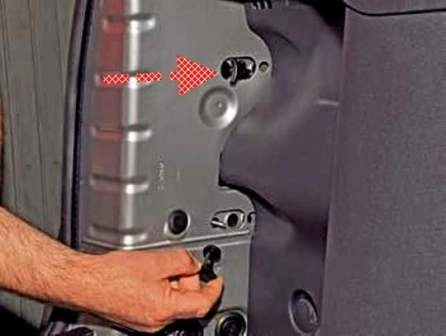
We unscrew the two plastic nuts securing the lamp
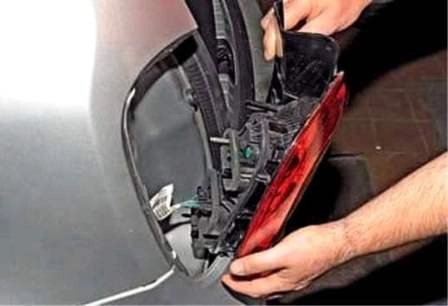
Remove the lamp from the car body
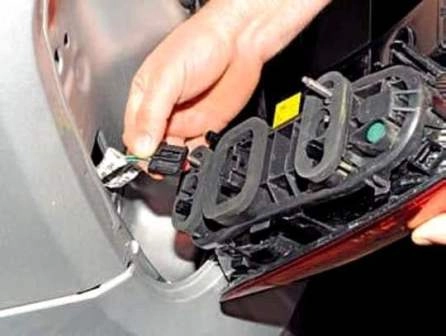
Press the latch and disconnect the wire block from the lamp connector. Removing the lantern
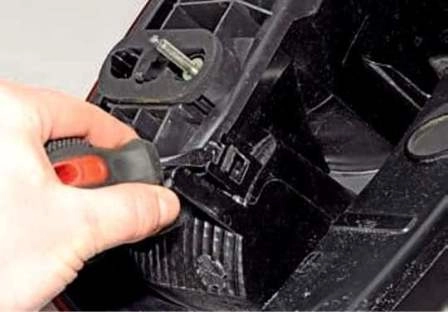
Use a screwdriver to squeeze five latches
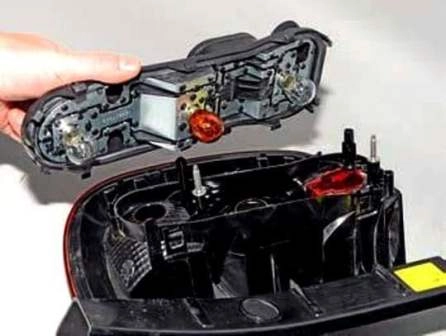
Remove the lamp holder
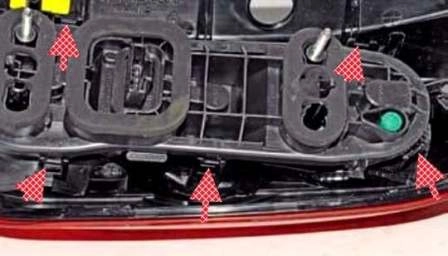
Location of lamp holder fixing latches
Press on the lamp and turn it counterclockwise to remove the two-filament brake and side light lamp from the holder.
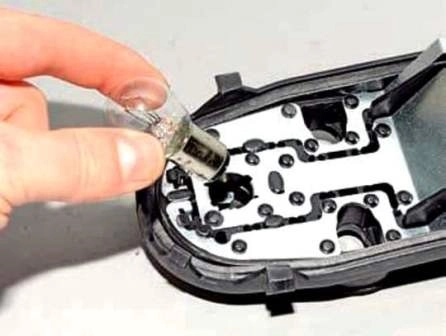
Install the new P21/5W bulb in reverse order.
The protrusions on the plinth are located at different levels in height and must fit into the corresponding grooves of the holder during installation.
In the same way, we replace the P21W fog light bulb (reversing light bulb in the right lamp) and the orange PY21W direction indicator bulb.
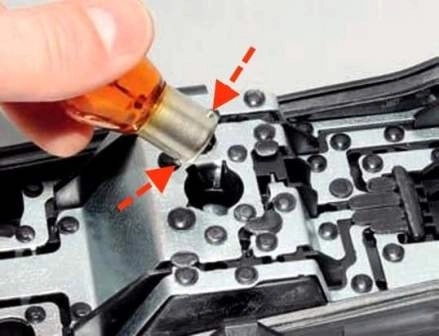
The direction indicator lamp has two protrusions located asymmetrically relative to the lamp axis, they must fit into the corresponding grooves of the holder socket.
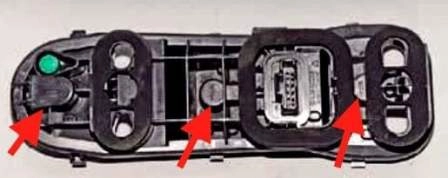
The type of lamp is marked on each lamp holder socket.
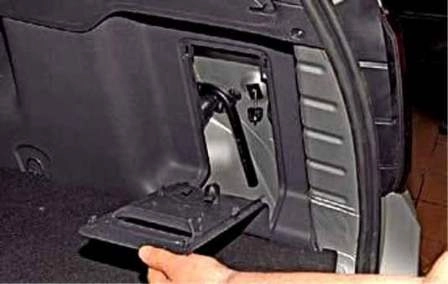
To access the nuts of fastening the right lamp, remove the hatch cover of the trunk upholstery
Install the rear light in reverse order
Replacing the lamp and removing the additional brake signal
Opening the tailgate
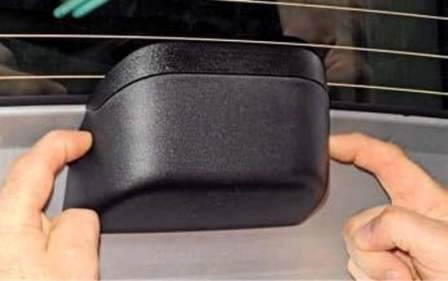
Press the two tabs
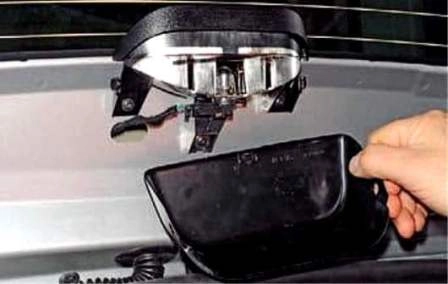
Remove the casing of the additional signal
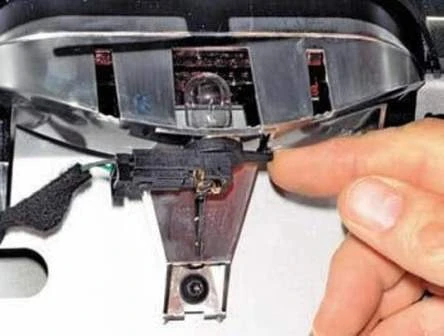
To replace the lamp, press the cartridge lock down
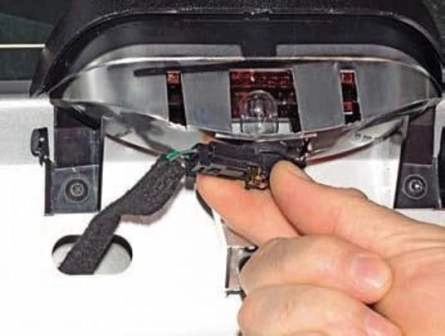
Turn the lamp socket clockwise
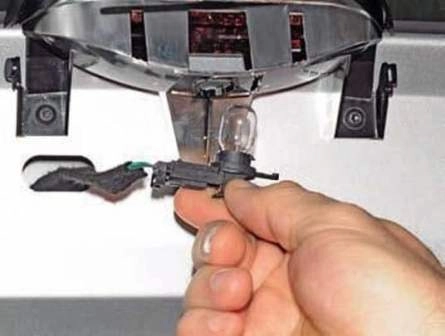
Remove the cartridge with the lamp from the signal housing
Pull out the lamp and remove it from the socket
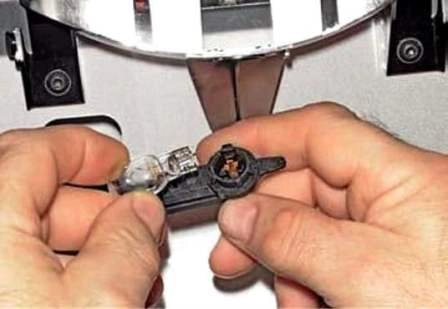
Install the new W16W bulb in reverse order.
To remove the additional brake light:
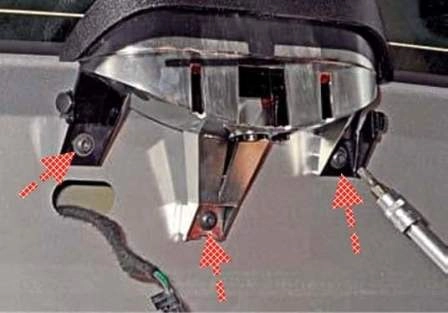
Using a Torx T-20 wrench, unscrew the three screws securing the signal
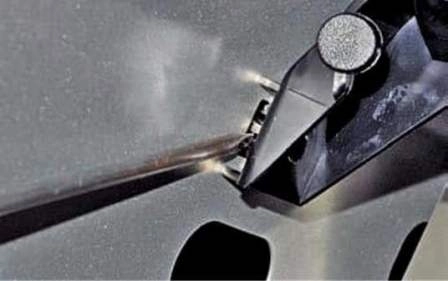
Use a screwdriver to press the three latches
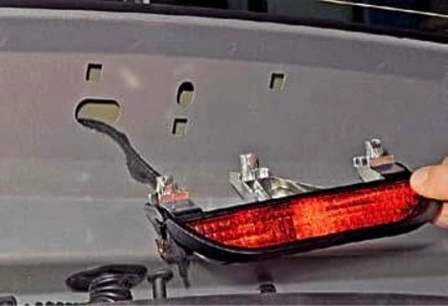
Remove an additional signal
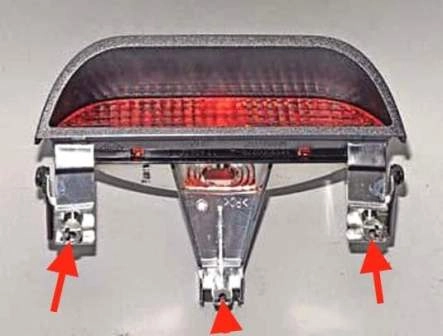
The location of the latches is shown in the figure
The additional signal latch is shown in the figure
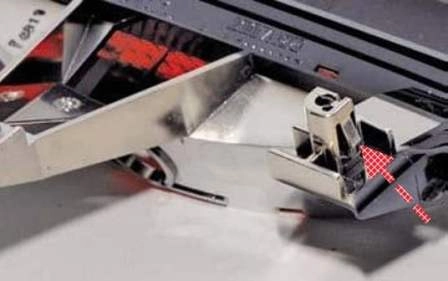
Install all parts in reverse order.
Replacing the bulb and license plate light
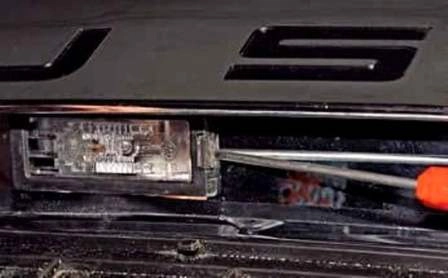
Use a flat thin screwdriver to press the plastic retainer
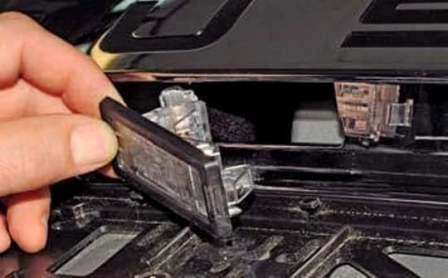
Remove the lamp from the opening of the tailgate
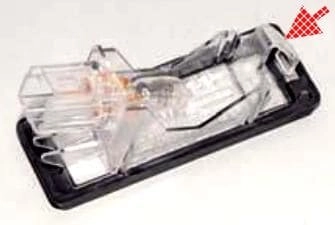
Lamp retainer shown
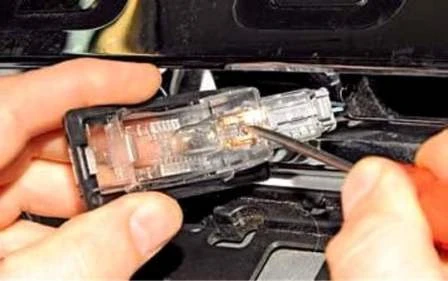
Pry off the lamp with a slotted screwdriver
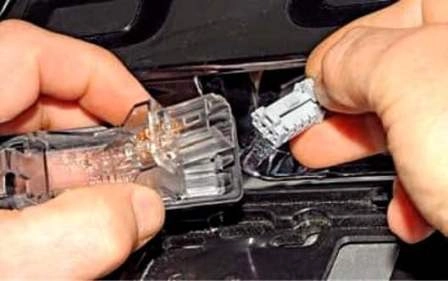
Remove the lamp from the terminals. Install the new W5W lamp in reverse order
If you need to remove the lantern, then disconnect the block from the lantern connector. Install the lamp in reverse order.
Removing the dome light and replacing bulbs
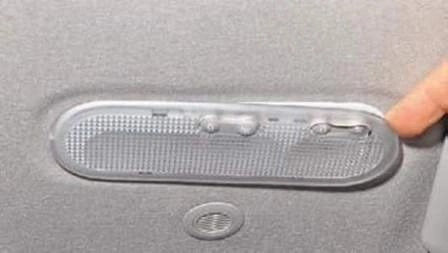
Pry off the diffuser and remove it
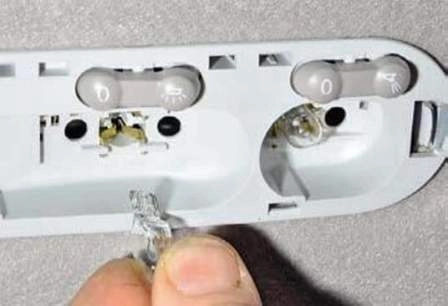
Remove the interior lamp
Install the W5W lamp in reverse order
To remove the cover, remove the diffuser
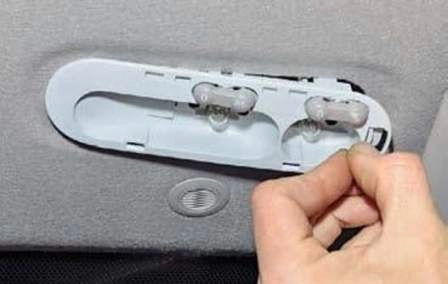
Push on the plastic retainer of the cover and remove the cover from the upholstery of the ceiling
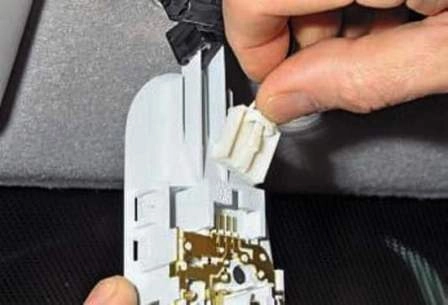
Press the lock of the wire block and disconnect the block from the connector
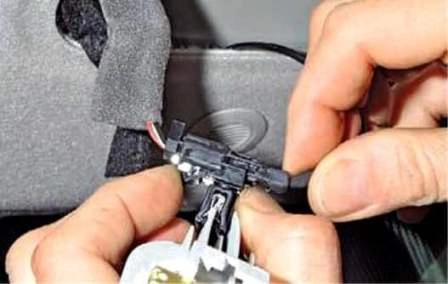
We press the lock of the holder of the block of wires and shift the blocks from the holder on the ceiling
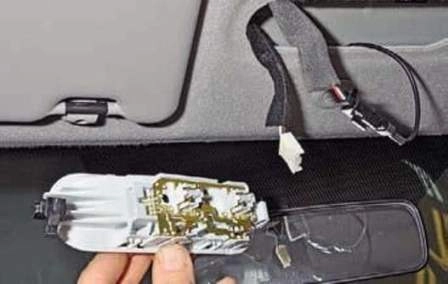
Remove the cover
Install the ceiling lamp in the reverse order.
Replacing the ceiling light and glove box lamp
To replace the lamp, open the glove box
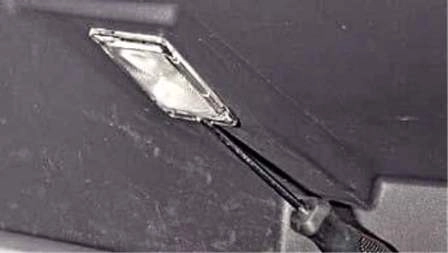
Pry off the cover with a screwdriver
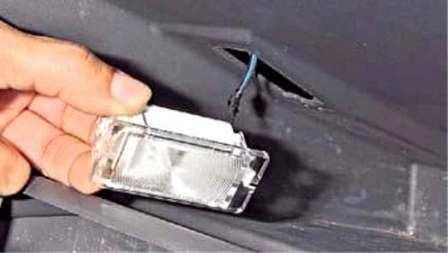
Remove the cover from the opening of the glove box
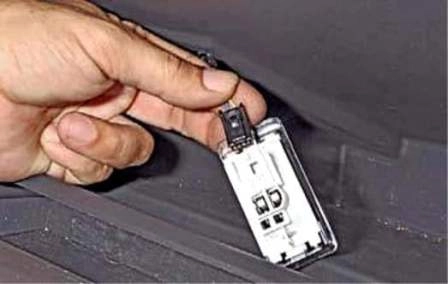
Press the latch and disconnect the wire block from the lamp connector
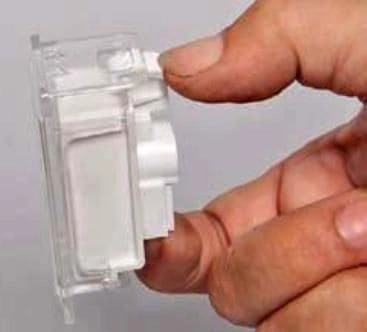
Press the lock
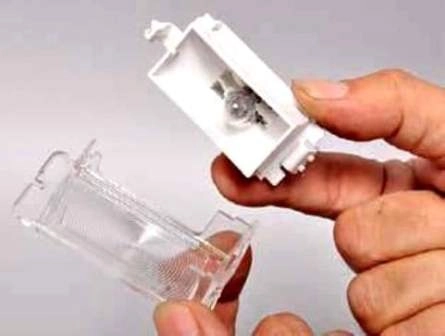
Remove the cover diffuser
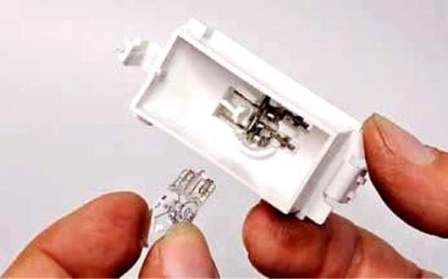
Remove the lamp from the ceiling
We install the W5W lamp in the reverse order.
To replace the ceiling light switch, open the glove box
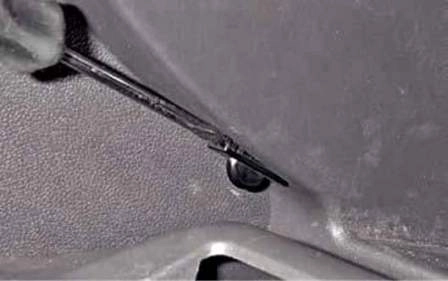
Pry off the switch with a screwdriver
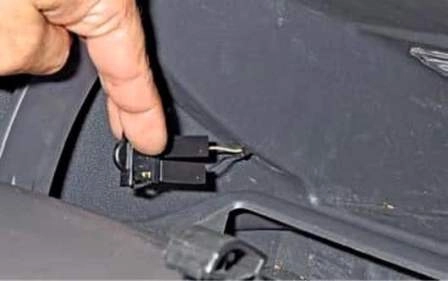
Remove the switch from the hole in the glovebox
Disconnect the two blocks of wires from the terminals of the switch
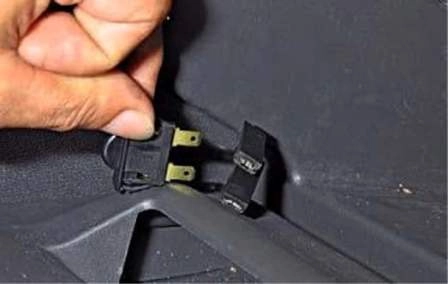
Remove the switch from the glove box.
Install the switch in reverse order.
Replacing the ceiling lamp and trunk light
Disconnect the negative battery terminal
Opening the tailgate
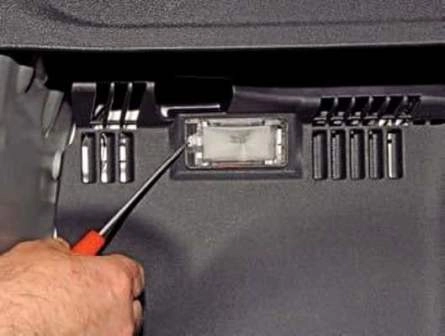
Pry off the cover with a screwdriver
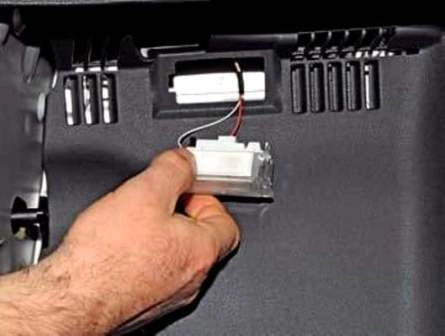
Remove the cover from the upholstery of the trunk
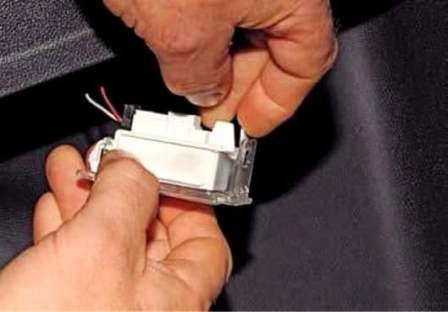
Press the diffuser latch
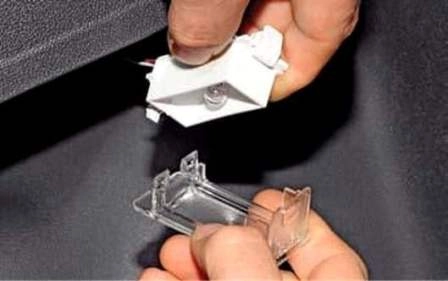
Remove the cover diffuser
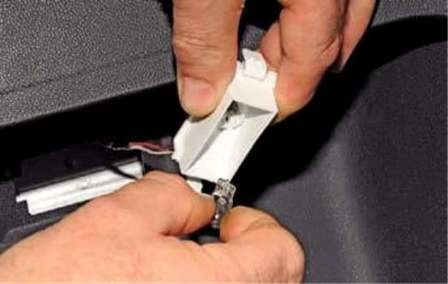
Remove the lamp from the ceiling
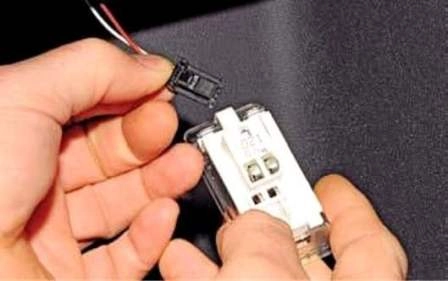
To remove the cover, disconnect the block from the connector
The lamp is used in the W5W lampshade. Install the trunk light in the reverse order.


