


The clutch is located between the engine and the gearbox. It is designed to disengage and engage the flywheel (mounted on the engine crankshaft) and the gearbox input shaft.
On vehicles fitted with a manual gearbox, a dry single-plate diaphragm-type clutch is used (Fig. 1).
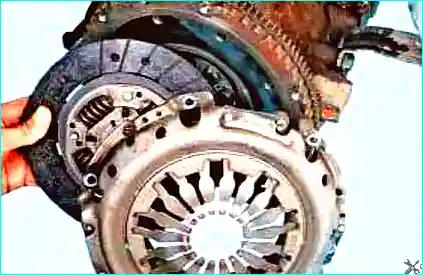
Fig. 1. Diaphragm-type clutch
The clutch consists of a driven (friction) disc (Fig. 2).
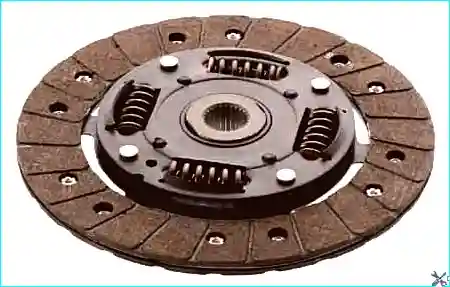
Fig. 2. Driven (friction) disc
A clutch cover (Fig. 3).
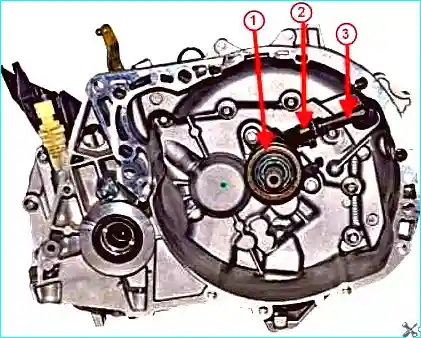
Fig. 3. Clutch housing: 1 - release bearing, 2 - slave cylinder, 3 - hydraulic fluid supply pipe
A pressure plate (Fig. 4).
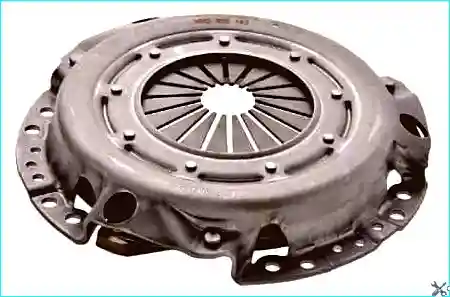
Fig. 4. Pressure plate
The release bearing 1 (Fig. 3) is of the sealed type and is mounted on the guide sleeve of the clutch slave cylinder.
The bearing is moved by the slave cylinder 2, which is mounted on the gearbox input shaft.
Before carrying out any work on the clutch, a number of checks must be performed to confirm the fault.
First, check the fluid level in the reservoir, then check the condition of the hoses and their connections.
Inspect the clutch pedal bushes for wear and secure mounting.
Bleeding the clutch hydraulic system
Take care not to spill hydraulic fluid on painted surfaces. If this happens, rinse immediately with water.
Do not mix different brands of hydraulic fluid.
Do not reuse drained hydraulic fluid.
Any hydraulic system will only operate correctly if it is free of air.
During bleeding, use only clean fluid that meets the manufacturer's specifications.
Never reuse fluid that has been drained from the clutch hydraulic system.
If different fluids have been accidentally mixed in the system, drain the system, flush with the correct fluid, and fit new sealing rings.
In the event of persistent fluid leaks or air ingress, determine the cause and location of the leak, and repair the damaged component.
Poor bleeding can lead to incorrect diagnostic results and unnecessary parts replacement.
Whenever work is carried out on the clutch hydraulic system, bleed the air from the following sections of the circuit:
- between the reservoir and the bleed nipple;
- between the bleed nipple and the clutch slave cylinder;
- when the pedal free play is excessive.
Place the vehicle on a two-post lift.
Remove the engine under-tray.
Disconnect the connector of the brake fluid level sensor in the reservoir.
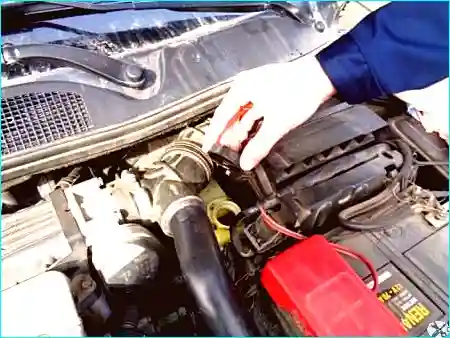
Fig. 5. Remove the brake fluid reservoir cap
Bleeding air between the reservoir and the bleed nipple
Position and hold the clutch pedal in the raised position.
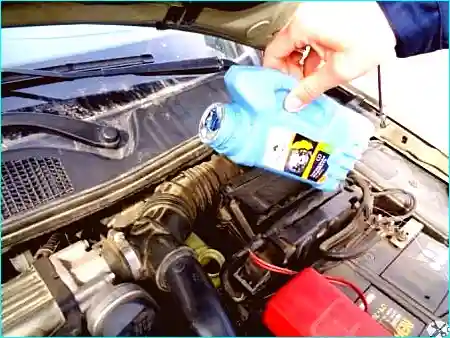
Fig. 6. Fill the hydraulic fluid reservoir with approved brake fluid
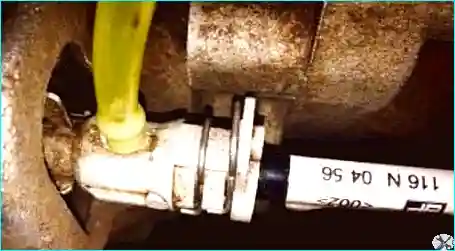
Fig. 7. Remove the cap from the bleed nipple
Attach a transparent hose to the slave cylinder bleed nipple (Fig. 3), and place the other end in an empty container positioned below the bleed nipple.
Ask an assistant to slowly press the clutch pedal 10 to 15 times, with an interval of 2–3 seconds, then release the pedal.
Press the retaining clip (Fig. 4).
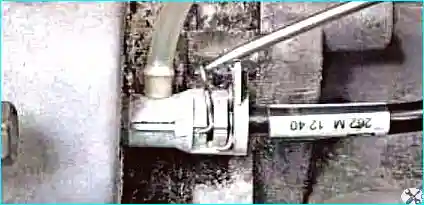
Fig. 8. Press the retaining clip
Do not pull on the clip.
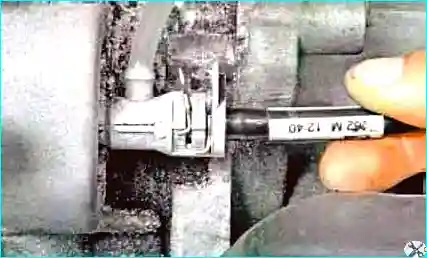
Fig. 9. If an error occurs, the hydraulic pipe must be replaced
Open the bleed nipple by pulling the clutch hydraulic pipe one click.
Ask the assistant to press the clutch pedal and hold it down.
Fluid containing air bubbles will flow through the hose into the container.
When the fluid stops flowing, push the hose connector back into the slave cylinder bore and secure it with the spring clip.
Release the clutch pedal and wait a few seconds.
Wait until there are no more air bubbles in the fluid being expelled.
Ensure that the fluid level in the master cylinder reservoir does not drop below the minimum mark during bleeding.
The locking of the hydraulic pipe should be accompanied by a distinct click.
Engage and disengage the clutch approximately ten times.
Top up the fluid level in the reservoir to the maximum mark.
Check the operation of the clutch. Repeat the procedure if necessary.
Adjusting the clutch pedal free play
Disconnect the supply pipe between the reservoir and the clutch master cylinder.
Plug the reservoir opening.
Draw a small amount of approved brake fluid into a syringe.
Insert the syringe into the supply pipe between the reservoir and the clutch master cylinder.
Use the syringe to remove air from the clutch master cylinder.
Remove the syringe.
Reconnect the clutch master cylinder supply pipe to the reservoir.
Press the clutch pedal five times.
Top up the fluid level in the reservoir to the maximum mark.
Check the operation of the clutch.
Repeat the procedure if necessary.
Refit the brake fluid reservoir cap.
Reconnect the brake fluid level sensor connector in the reservoir.
Refit the engine under-tray.


