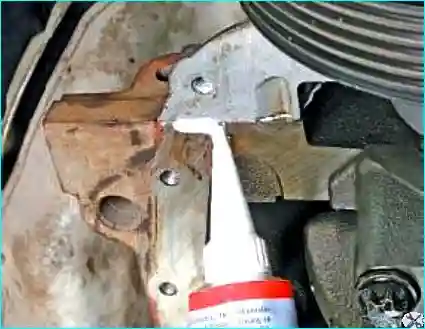
Removal and installation of the engine oil pan (K4J, K4M engines) Renault Megane 2

Place the vehicle on a two-post lift.

Disconnect the battery.

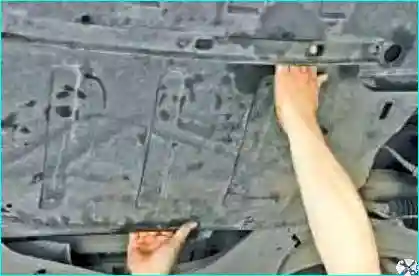
Remove the engine oil pan underguard. To do this:
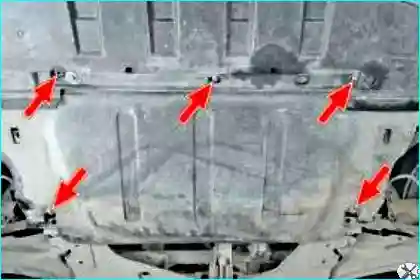
Unscrewing the five underguard mounting bolts
Fig. 1. Unscrew the five mounting bolts of the oil pan underguard
Lowering the rear part of the underguard
Fig. 2. Lower the rear part of the underguard and pull it backwards
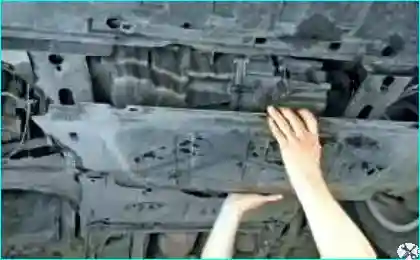
Removing the underguard
Fig. 3. Remove the underguard
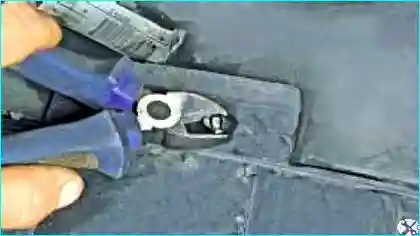
Removing the splash shield
Fig. 4. Cut the tabs of the disposable clips and remove the splash shield

Drain the engine oil.

Remove:

  • the engine upper covers;
  • the oil dipstick;
  • the front wheels;
  • the wheel arch liners.
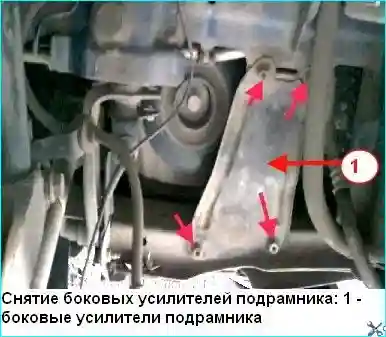
Removing the subframe side reinforcements
Fig. 5. Remove the subframe side reinforcements

Secure the engine cooling system radiator with a safety belt to the upper crossmember.

Unscrew the nuts and bolts securing the subframe.
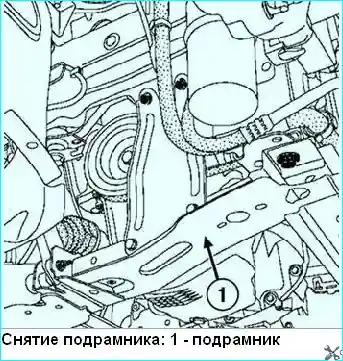
Removing the subframe
Fig. 6. Remove the subframe
Removing the right front wheel drive shaft
Fig. 7. Remove the right front wheel drive shaft
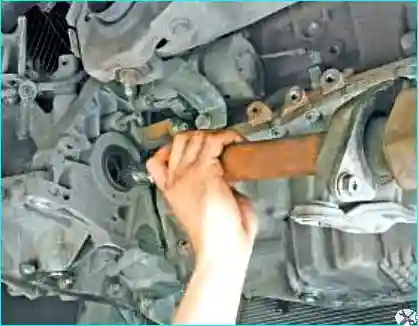
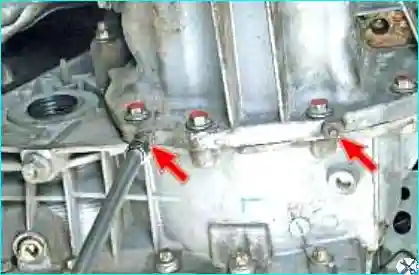
Unscrewing the two lower oil pan mounting bolts
Fig. 8. Unscrew the two lower oil pan mounting bolts
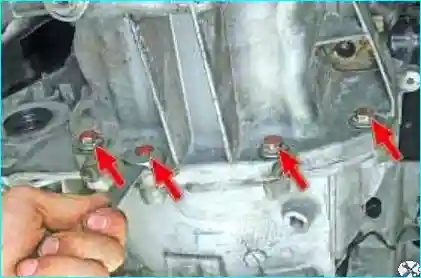
Unscrewing the four oil pan-to-clutch housing bolts
Fig. 9. Unscrew the four oil pan mounting bolts to the clutch housing
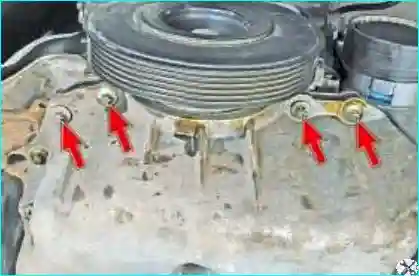
Unscrewing the four oil pan-to-front crankshaft cover bolts
Fig. 10. Unscrew the four oil pan mounting bolts to the front crankshaft cover
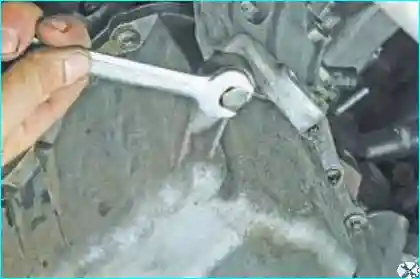
Unscrewing the left mounting bolt
Fig. 11. Unscrew the left mounting bolt
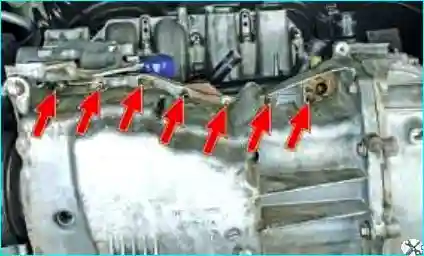
Unscrewing the seven rear oil pan mounting bolts
Fig. 12. Unscrew the seven rear oil pan mounting bolts
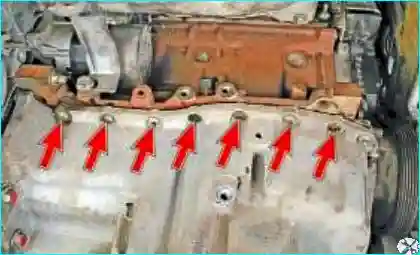
Unscrewing the seven front oil pan mounting bolts
Fig. 13. Unscrew the seven front oil pan mounting bolts
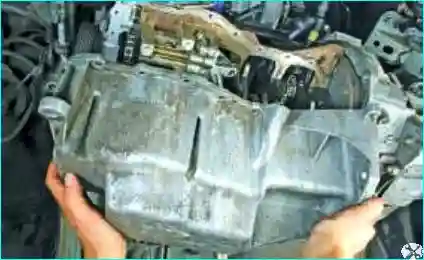
Prying off and removing the oil pan
Fig. 14. Pry off with a screwdriver and remove the oil pan
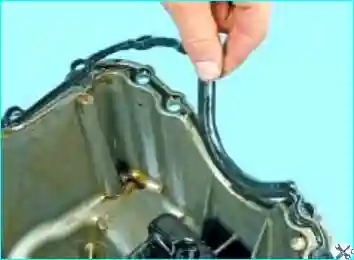
Removing the gasket
Fig. 15. Remove the gasket from the oil pan grooves

Clean and degrease the oil pan grooves.

Install a new gasket.
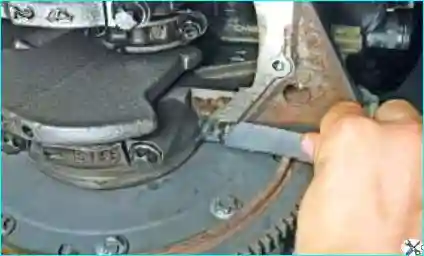
Cleaning the corners of the mating surfaces
Fig. 16. Clean the sealant residue from the corners of the oil pan mating surfaces with the cylinder block
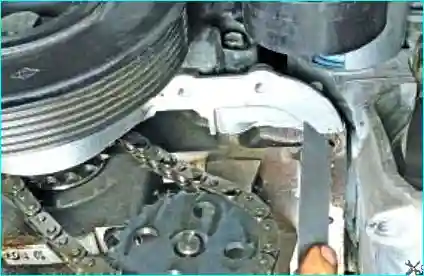
Cleaning the front crankshaft cover joints
Fig. 17. Clean the front crankshaft cover joints

Clean the sealing surfaces with DECAPJOINT to dissolve any adhered gasket residue.
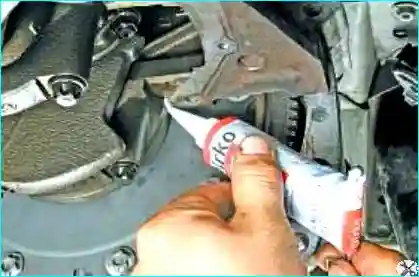
Applying sealant at the front of the engine
Fig. 18. Apply special sealant to the corners of the oil pan-to-cylinder block mating surfaces at the front of the engine
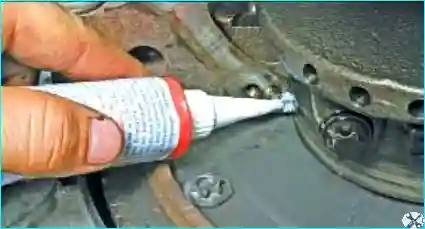
Applying sealant at the rear of the engine
Fig. 19. Also apply sealant at the rear of the engine
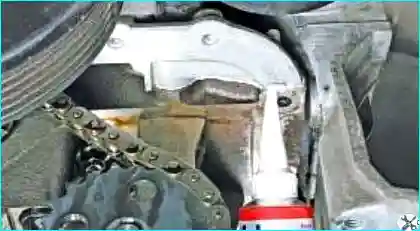
Applying sealant to the front cover joints
Fig. 20. Apply sealant to the joints of the front crankshaft cover with the cylinder block on the oil pump side at the front of the engine, and also at the rear of the engine
Applying sealant
Fig. 21. If too much sealant is applied, excess will be squeezed out when tightening the mounting bolts

If sealant enters the operating fluids, it may damage certain components (engine, radiator, etc.).
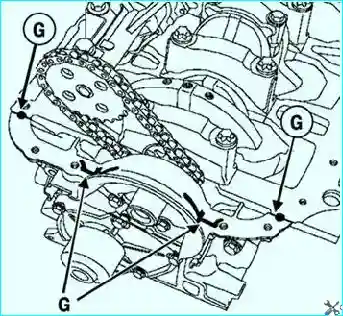
Applying sealant to the front cover-to-cylinder block joint
Fig. 22. Apply two drops of silicone sealant 7 mm in diameter to the front cover-to-cylinder block joint

Install the oil baffle on the cylinder block.
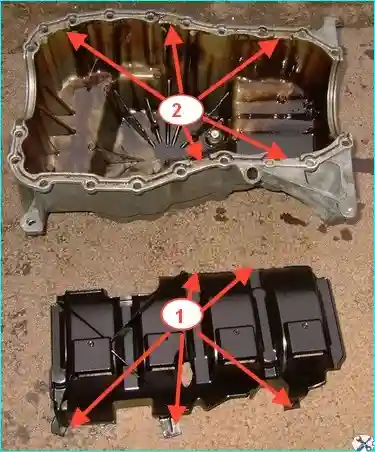
Checking oil pan installation
Fig. 23. Checking the oil pan installation: 1 - oil baffle tabs; 2 - oil pan grooves

When installing the oil pan, make sure the oil baffle tabs engage in the oil pan grooves (Fig. 23).

The cylinder block and oil pan surfaces on the flywheel side are aligned to prevent deformation of the clutch housing.

Install the oil pan with a new gasket.
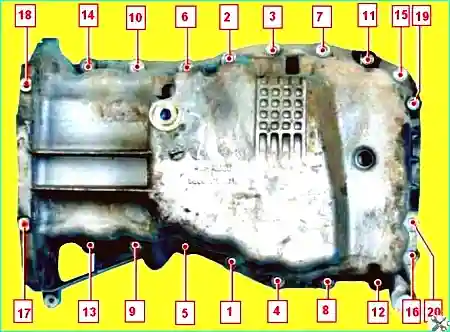
Bolt tightening sequence
Fig. 24. Oil pan mounting bolt tightening sequence

Install the oil pan, screw in the twenty mounting bolts to the cylinder block without fully tightening them.

Fully screw in the four oil pan mounting bolts to the clutch housing without fully tightening them.

Tighten the oil pan mounting bolts to the cylinder block in the sequence shown in Figure 24, first to 8 N·m, then finally to 14 N·m.

Then tighten the four oil pan mounting bolts to the clutch housing to 27 N·m.

Install all removed parts and components in the reverse order of removal.

Fill the engine with oil.