We remove the elements of the rear suspension and replace them in case of malfunctions
Removing the shock absorber
We remove the shock absorber if it loses its working properties, destroys or severely wears the silent block of the lower mount, failure of the rubber pads of the upper mount, casing or shock absorber compression stroke buffer.
We perform work on a viewing ditch or overpass.
To ensure that the performance of the left and right shock absorbers does not differ, both shock absorbers must be replaced.
To prevent damage to the rear brake hoses, do not remove two shock absorbers at the same time with the rear of the car suspended.
Open the tailgate and remove the curtain.
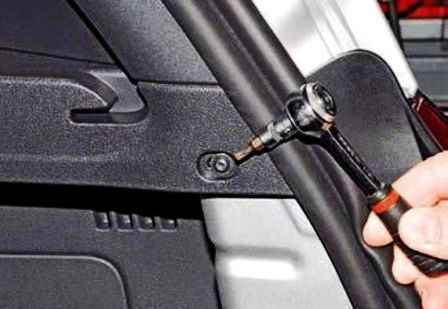
Using the TorxT-20 key, unscrew the self-tapping screw of the rear fastening of the right luggage compartment shelf
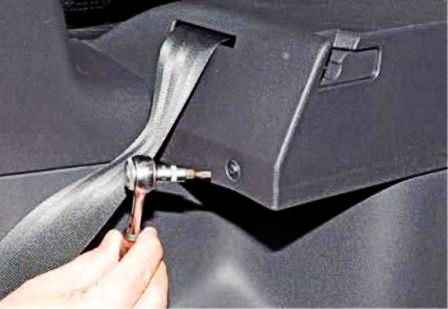
Use the TorxT-20 key to unscrew the self-tapping screw of the shelf
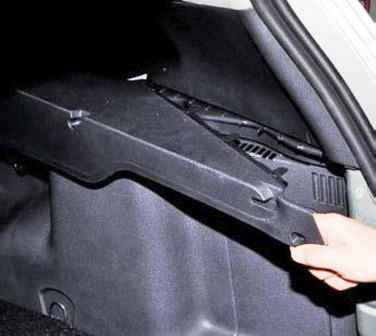
Having overcome the resistance of the clamps, we move the shelf to the middle of the car
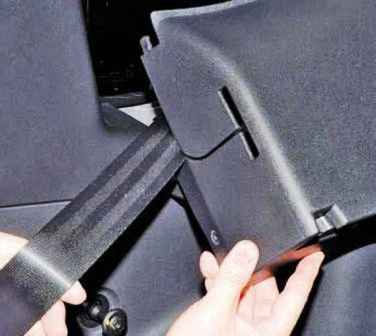
Remove the rear seat passenger's seat belt through the slot in the shelf and remove it
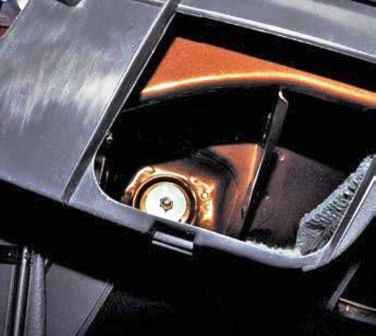
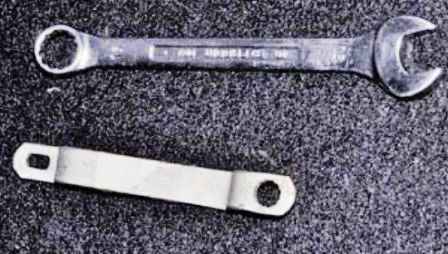
Through the window in the side lining of the luggage compartment, with a 16 wrench, we unscrew the nut of the upper shock absorber mounting, holding the shock absorber rod from turning with a special wrench for 6 (you can use the wrench for the upper mounting of the front shock absorbers of VAZ-2101 cars)
Remove the support washer and the upper rubber pad for attaching the stem
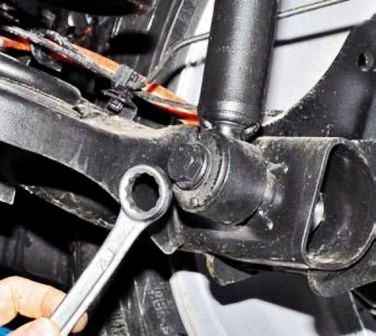
From the bottom of the car with a spanner wrench or a 21 head, unscrew the bolt of the lower shock absorber mounting to the beam arm and remove the shock absorber with the lower rubber cushion and spacer sleeve, lower support washer, compression stroke buffer and protective cover. We replace defective parts.
Before installing the shock absorber, we put all the details on its stem.
Insert the upper end of the shock absorber into the hole in the body and bait the lower shock absorber mounting bolt.
We put the upper rubber cushion and the support washer on the shock absorber rod, bait and tighten the rod fastening nut.
The shock absorber lower mounting bolt is finally tightened in the “car on wheels” position.
The tightening torque of the lower shock absorber mounting bolt is 105 Nm.
The tightening torque of the upper shock absorber mounting nut is 30 Nm.
Removing the spring
We install the car on a viewing ditch or lift
We unscrew the bolt of the lower shock absorber mount, as described above
Hang out the back of the car and fix it on the stand.
Insert a piece of pipe or a strong rod into the hole of the beam lever
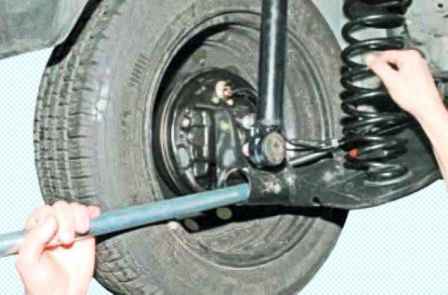
Pull down the pipe section, depressing the beam lever, and take out the spring.
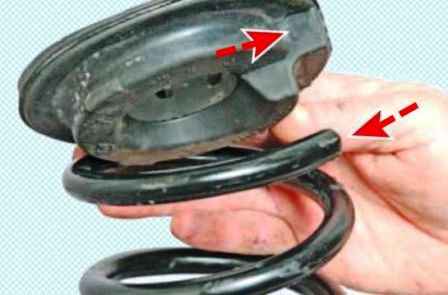
Remove the lower and upper spring spacers.
The top spring spacer usually sticks to the body.
We make sure that there are no deformations and gaps on the gaskets.
Before installing the spring, install the top gasket on it so that the end of the upper coil of the spring rests on the ledge of the gasket.
Then, so that the top gasket does not move when mounting the spring, we attach it to the spring with tape or electrical tape.
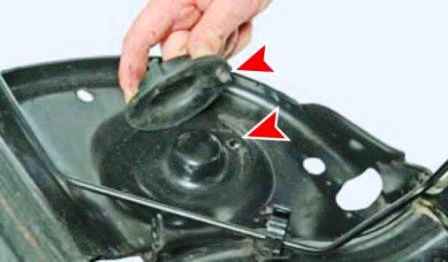
Install the lower spring spacer onto the lug of the lever bracket so that the gasket pin enters the bracket hole (shown on the removed beam).
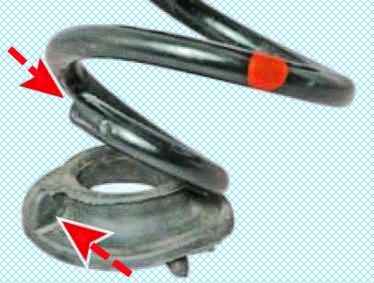
We mount the spring so that the end of its lower coil rests against the ledge of the gasket (shown on the removed gasket)
Leaving the beam lever down, we put the upper end of the spring with the gasket on the protrusion of the body bracket
Further assembly is carried out in the reverse order.
Replacing the beam arm silent block
We change the silent block of the lever in case of breaks or delamination of the rubber of the hinge.
We perform work on a viewing ditch or overpass. We loosen the tightening of the wheel bolts on the side of the silent block to be dismantled.
We hang the rear of the car and securely fix it on the factory-made stands.
Remove the wheel.
We dismantle the brake pads of the rear wheel (article - Replacing the brake pads of the rear wheels of Renault Duster).
We remove the parking brake cable from the lug of the beam bracket.
We show the replacement of the silent block on the right arm of the rear suspension beam.
Set the adjustable stop under the right arm of the beam.
Disconnect the lower shock absorber mount from the beam arm.
We unscrew the nut of the bolt securing the lever to the bracket and the three bolts securing the bracket to the body.
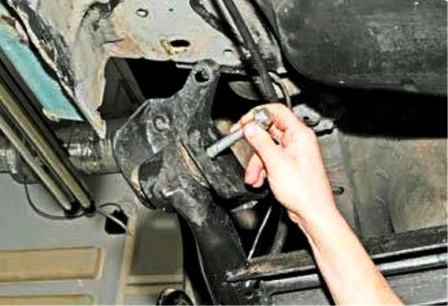
We lower the right side of the beam on an adjustable stop until the fuel tank stops interfering with the release of the lever mounting bolt.
When lowering the beam, make sure that the brake hoses of the rear wheels are not too tight.
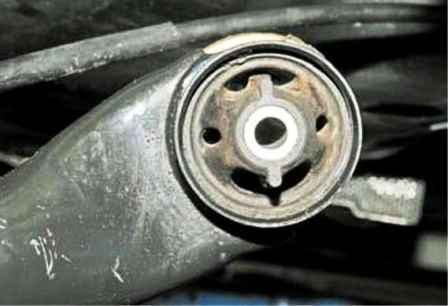
Removing the bolt, remove the bracket from the lever.
Most of the loads are taken by the silent block of the lever along the axis of the car, therefore the rubber massif of the silent block is not symmetrical in cross section.
Before pressing out the silent block, mark the orientation of its elements relative to the lever so that the new silent block is pressed in the same position.
It is best to press the silent block out of the lever with a special puller.
If there is no puller, you can facilitate removal by sawing the outer clip of the silent block.
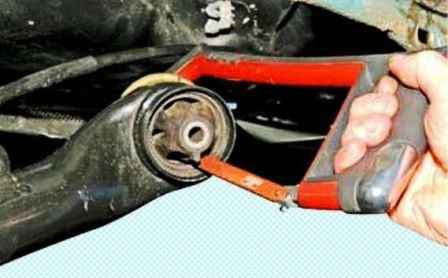
We insert the hacksaw blade into the hole of the rubber massif of the silent block and saw the plastic outer clip of the silent block.
This will significantly reduce the tightness of the silent block in the lever hole.
After that, with a mandrel or a piece of pipe of a suitable diameter, we knock out the silent block from the lever from the side of the threshold, applying force to the outer clip.
Before pressing in a new silent block, we clean the hole in the lever.
Insert the silent block into the hole of the lever, orienting it according to the marks.
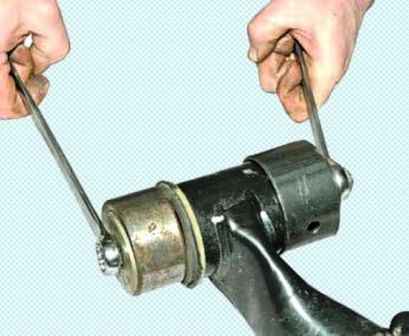
We press the silent block into the lever with a cup puller, applying force through the mandrel to the outer sleeve of the silent block (for clarity, we show it on the removed beam).
We replace the silent block of the left lever in the same way, with the exception of the operation of unscrewing the bolts securing the lever bracket to the body (by unscrewing the nut of the bolt securing the left lever to the bracket, remove the bolt and remove the lever from the bracket lug).
Install the rear suspension beam arms in the reverse order.
We finally tighten the nuts of the bolts for fastening the levers to the brackets with a torque of 125 Nm in the “car on wheels” position.
Removing the rear suspension beam
We remove the beam for replacement in case of damage.
We carry out work on a viewing ditch or overpass.
Removing the brake pads of the rear wheels Renault Duster
We remove the tips of the parking brake cables from the holders on the levers of the rear suspension beam.
Disconnect the brake hoses of the rear wheels from the brake pipes located on the beam.
Disconnect the wheel speed sensors from the brake pads.
We substitute an adjustable stop under the beam
Disconnect the lower shock absorber mounts from the beam arms and remove both rear suspension springs.
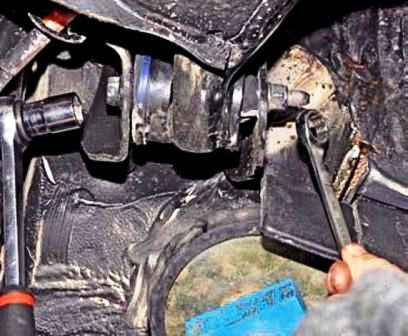
Using an 18 spanner wrench, unscrew the nut of the bolt securing the right arm of the beam to the bracket, holding the bolt with a wrench of the same size.
After unscrewing the nut of the bolt securing the right arm to the bracket, the bolt cannot be removed because it rests against the fuel tank
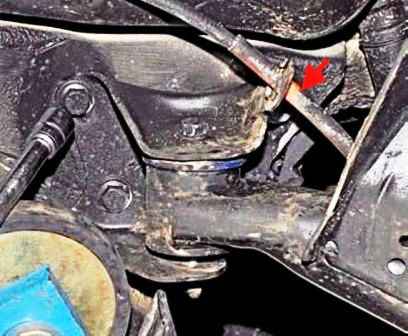
Using a 16-head with an extension, unscrew the three bolts securing the right lever bracket to the body and remove the parking brake cable from the bracket lug (shown by the arrow).
With the same tools, unscrew the nut of the bolt securing the left arm to the bracket
Remove the bolt from the hole in the bracket and silent block or knock it out with a soft metal drift.
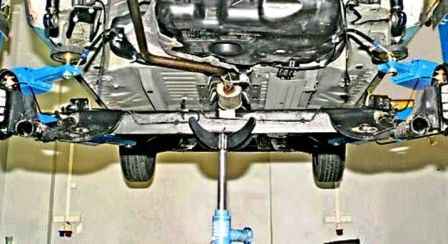
We remove the left arm of the beam from the eye of the bracket and lower the beam on the adjustable stop, holding it on both sides.
We dismantle the bracket of the right lever, the rear wheel brake shields, brake pipes and wheel trunnions from the beam.
Install the rear suspension beam in reverse order.
We finally tighten the nuts of the bolts in the “car on wheels” position
Tightening torques:
- - nut for fastening the rear suspension arm to the body bracket - 125 Nm;
- -bolt of the suspension arm bracket to the body - 62 Nm;
- - rear wheel bearing nut - 175 Nm;
- - bolt for fastening the rear wheel trunnion to the flange of the rear suspension beam - 80 Nm;
- - shock absorber lower mounting bolt - 105 Nm.
Replacing the rear wheel hub bearing
We replace the bearing when it fails - noise, howl in the rear wheel area.
Fully lower the parking brake lever.
Remove the rear wheel and dismantle the brake drum
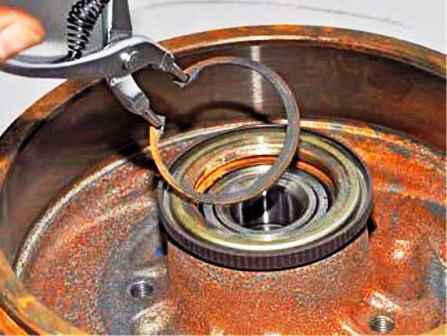
On the inside of the drum, use circlip pliers to remove the bearing circlip.
The bearing to be replaced is knocked out of the drum seat using a suitable mandrel, placing two wooden blocks under the brake drum.
Before installing a new bearing, we clean the seating surface under it in the brake drum.
We install the brake drum on the wooden blocks with the other side and insert the bearing into the drum seat.
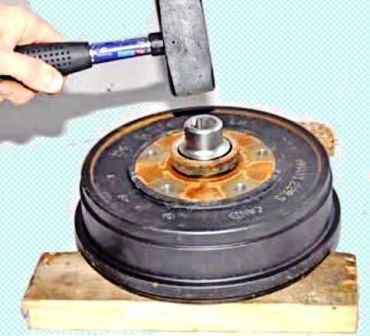
We press in the new bearing with the puller until it stops, applying force through the mandrel to the outer ring of the bearing.
In this case, the outer ring of the old bearing can be used as a mandrel.

When pressing the bearing, be careful not to damage the rear wheel speed sensor ring that is pressed onto the drum from the inside.
Install the retaining ring in the groove of the drum.
Checking the condition of the trunnion.
If its seating surface for a bearing or thread for a nut is damaged, we replace the pin
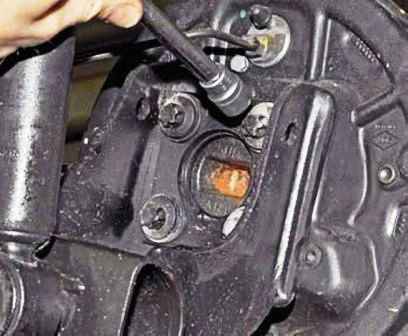
We mount the brake drum on the trunnion.
Using the E-16 head, we unscrew the four screws securing the rear wheel trunnion to the rear suspension beam flange, remove the trunnion and install a new one.


