


Steering wheel
Adjusting the steering column height and tilt angle.
Lift the lever (see arrow Fig. 1) and adjust the steering wheel to the position that suits you.
To lock the steering wheel in this position, push the lever down.
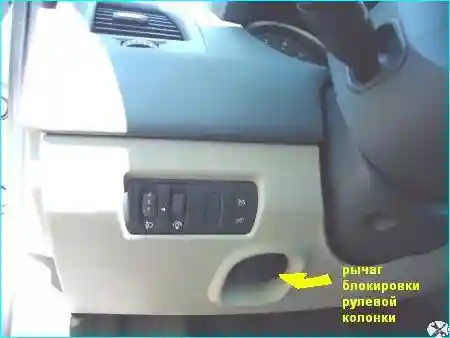
For safety reasons, carry out this adjustment only when the vehicle is stationary.
Do not hold the steering wheel turned to the full lock position for a long time, and do not leave the vehicle with the engine off and the wheels turned to full lock.
Never switch off the ignition on downhill slopes or while driving, as this will cause the brake servo and power steering to stop working.
Audible and visual warnings
Horn
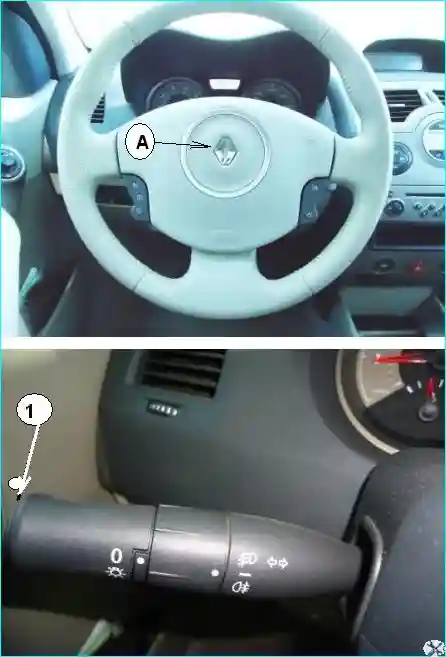
To sound the horn, press the centre cover (A) of the steering wheel (see Fig. 2).
Headlight flash
To flash the headlights, even if the exterior lights are off, pull the stalk switch lever (1) towards you.
Hazard warning lights
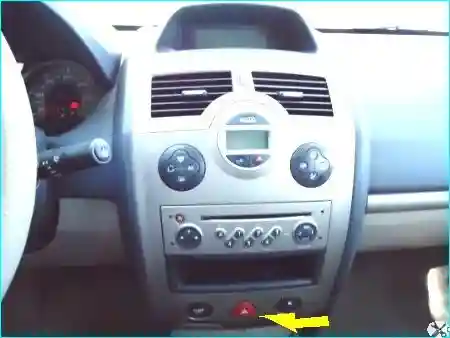
To switch on the hazard warning lights, press the button (see arrow Fig. 3).
All four main direction indicators and the side repeaters flash simultaneously.
The hazard warning lights are used to warn other road users:
- of an emergency stop in an unsuitable or even prohibited location;
- of a particular situation while driving, and in all cases where their use is required by traffic regulations.
On some vehicle versions, the hazard warning lights may activate automatically during very heavy braking.
In this case, you can switch them off by pressing the switch (2).
Direction indicators
To operate the direction indicators, move the stalk switch lever (see 1, Fig. 2) in the plane of the steering wheel in the direction you intend to turn.
When driving on motorways, it is not usually necessary to turn the steering wheel enough for the stalk switch to return automatically to the neutral position (0).
The direction indicator lever has an intermediate position in which it must be held during manoeuvres such as lane changes.
When you release the lever, it automatically returns to position (6).
Exterior lighting and signalling
Side light tell-tale
Turn the outer ring of the stalk switch lever (see 1, Fig. 4) until mark (4) aligns with the corresponding symbol. The tell-tale light comes on and the instrument panel illumination is activated.
The brightness of the instrument panel illumination can be adjusted by turning the adjuster (2).
Manual dipped beam
Turn the outer ring of the stalk switch lever until mark (4) aligns with the corresponding symbol.
When the dipped beam is switched on, the corresponding tell-tale light comes on in the instrument panel.
Automatic mode (depending on vehicle specification)
With the engine running, the dipped beam headlights switch on and off automatically depending on the ambient light level, without operating the stalk switch lever (1) (position (0)). The automatic mode can be activated or deactivated as you wish.
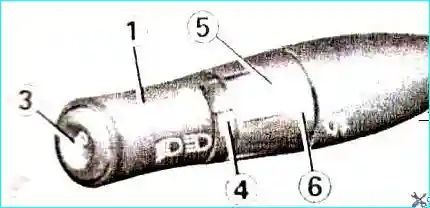
To activate the mode, press and hold button (3) for at least 4 seconds.
A double audible signal confirms activation, and a corresponding message appears on the instrument panel.
To deactivate the mode with the engine stopped, press and hold button (3) for at least 4 seconds.
An audible signal confirms deactivation, and the message «Automatic lighting off» appears on the instrument panel.
Any operation of the stalk switch lever (1) cancels the automatic lighting mode.
Before driving at night, check that the electrical equipment is working properly and adjust the headlight beam height (if the vehicle load differs from normal).
Front fog lights
Turn the middle ring of the stalk switch lever (5) until mark (6) aligns with the corresponding symbol, then release the ring.
The front fog lights only switch on if the ring at the end of the switch is in the correct position. The corresponding tell-tale light comes on in the instrument panel.
Rear fog light
Turn the middle ring of the stalk switch lever (5) until mark (6) aligns with the corresponding symbol, then release the ring.
The light switches on when the exterior lights are on. The corresponding tell-tale light comes on in the instrument panel.
Remember to switch off the rear fog light when it is no longer needed, so as not to dazzle other road users.
Note. The rear fog light is located on the driver's side.
Switching off the exterior lighting
Turn ring (5) again, aligning mark (6) with the symbol of the fog light you wish to switch off.
When the exterior lights are switched off, the front and rear fog lights are switched off simultaneously.
In fog, the automatic lighting may not be reliable, so you should check the operation of the fog lights by the tell-tale lights on the instrument panel.
Electric headlight beam height adjustment
On vehicles equipped with this adjustment, the adjuster (A) allows the headlight beam to be directed downwards or upwards depending on the vehicle load.
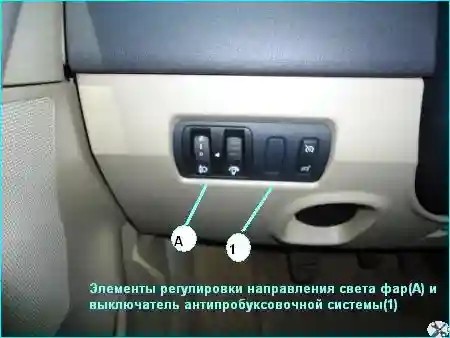
Turn the knob (A) downwards to lower the headlight beams, or upwards to raise them.
On other versions, adjustment is automatic.
Windscreen wipers and washers
With the engine running or in accessories mode, move the stalk switch lever (1) to the desired position (see Fig. 6).
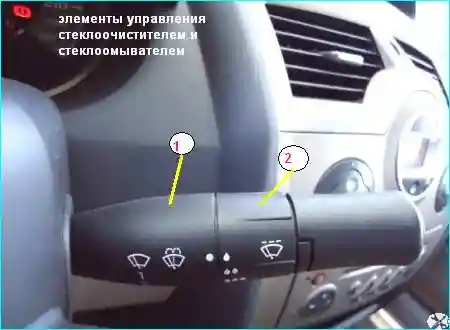
In mode (B), the wiper blades stop for a few seconds after each cycle.
The pause between cycles can be adjusted by turning ring (2) (see Fig. 6).
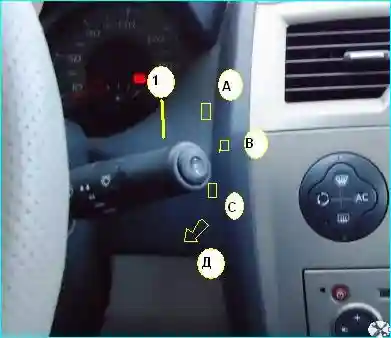
During driving, any stop reduces the wiper speed.
If the wipers were operating at high speed, they switch to low speed.
As soon as the vehicle moves off, the wipers return to their original operating mode.
Any operation of the stalk switch lever (1) cancels the automatic mode.
Vehicles with automatic wipers
With the engine running or in accessories mode, move the stalk switch lever (1) to position (A), then to position (B).
The wipers will now switch on automatically in intermittent mode at the optimum speed when water droplets appear on the windscreen.
The pause between cycles can be adjusted by turning ring (2).
Before each engine start, the lever must be returned to position (A) to reactivate the automatic intermittent mode.
Modes C and D are the same as on models without automatic wipers.
If the wiper arms are stuck (for example, frozen to the windscreen), the power supply to the wipers is automatically cut off.
Windscreen and headlight washers
With the ignition on, pull the stalk switch lever (1) towards you.
With headlights off
A brief pull triggers one wipe cycle.
A prolonged pull triggers three consecutive wipe cycles, with the last cycle after a short pause (1-2 sec.).
With headlights on
The same as with the headlights off, with the addition of the headlight washers.
In freezing conditions, check that the wiper blades are not frozen to the windscreen, as this could cause the wiper motor to overheat.
Check the condition of the wiper blades regularly. They should be replaced as soon as the wiping quality deteriorates (approximately once a year).
Clean the windscreen regularly.
If you switch off the ignition while the wipers are running (lever in position (A)), the blades stop in a random position.
- To switch on the ignition without starting the engine: insert the key card into the slot, without pressing the pedal, press the start button and wait a few seconds.


