We remove the levers if you need to replace the silent blocks or if the levers themselves are deformed.
Preparing the car for the task.
We install the car on the inspection ditch.
Replacing the upper arm of the front suspension
We brake with a parking brake.
We substitute the wheel chocks under the rear wheels.
Loosen the front wheel nuts.
We raise the front of the car and install it on reliable supports.
Remove the corresponding wheel.
We install a jack under the lower arm of the front suspension and raise the arm a few centimeters.
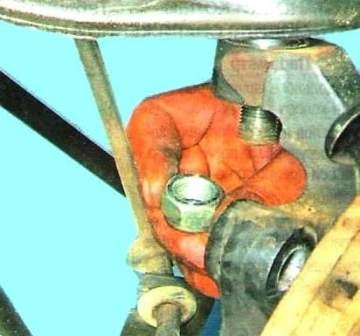
Unscrew the upper ball joint pin nut
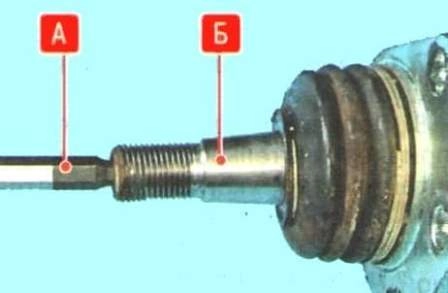
If the ball pin turns, hold it with a hexagon
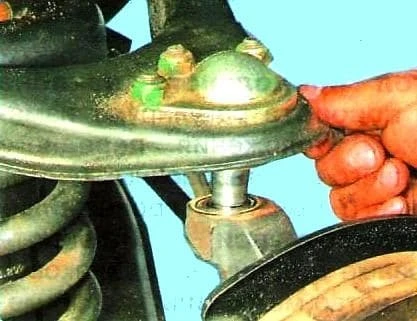
Using a puller, press the hinge pin out of the knuckle hole
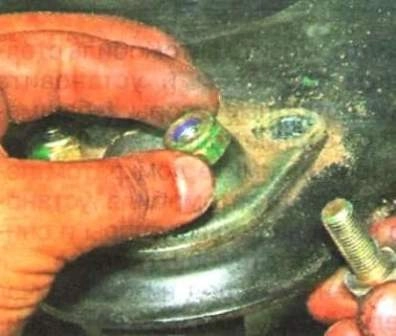
If we remove the lever for replacement, unscrew the nuts of the three ball joint bolts
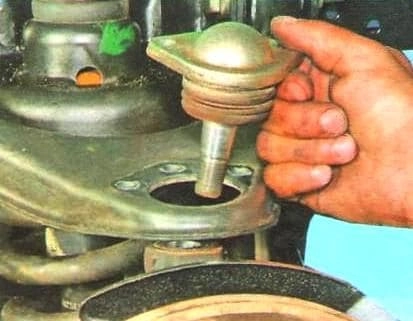
Remove the hinge
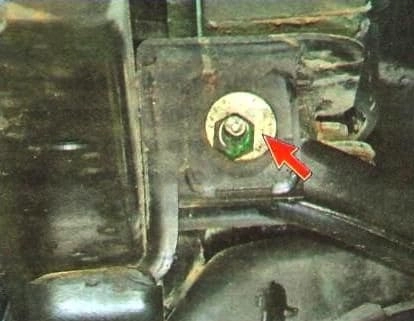
Marking the position of the eccentric washers of the adjusting bolts
This will help to maintain wheel alignment during subsequent installation.
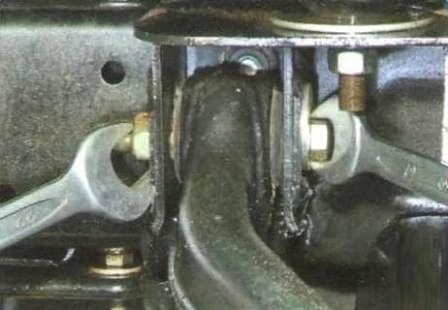
Unscrew the nut of the lever adjusting bolt
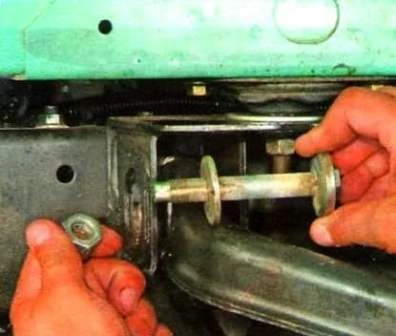
Remove the washer and remove the bolt from the hole
We also disconnect the second hinge.
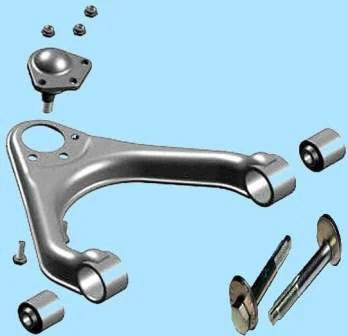
Remove the lever.
Install the upper arm in reverse order.
For the correct installation of silent blocks, the nuts of the adjusting bolts must be tightened only after the suspension spring has been compressed.
To do this, remove the shock absorber (it will be convenient to control the spring compression through the holes for its installation).
Install the wheel and lower the vehicle to the ground, or lower the vehicle onto a support placed under the lower control arm.
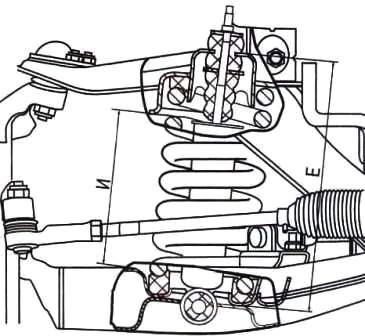
The spring is considered sufficiently compressed if the dimension "E" between the lower end of the lower arm (in the area of the shock absorber mounting) and the upper end of the subframe shock absorber cup is 319-321 mm.
Finally tighten the nuts on the lever adjusting bolts.
Install the shock absorber.
Check and adjust the wheel alignment if necessary. (article Adjusting the angle of the front wheel alignment of the GAZelle)
Replacing the lower control arm of the front suspension
Preparatory operations are the same as for replacing the upper arm.
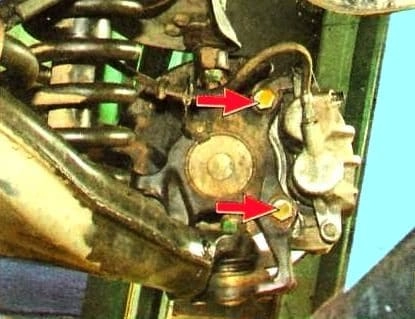
We unscrew the two bolts of the front brake caliper
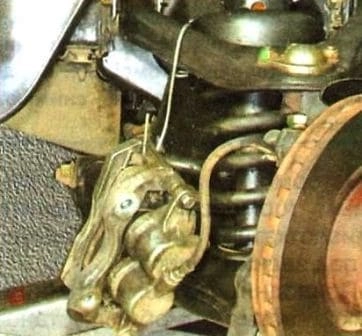
Remove the caliper and tie it to the suspension parts
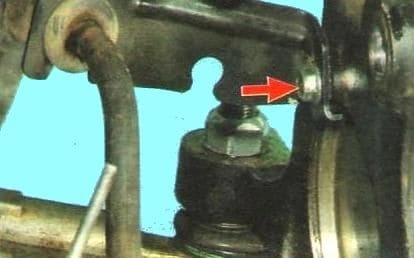
Unscrew the bolt securing the brake hose bracket and disconnect the bracket
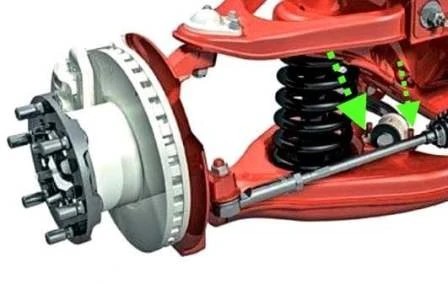
We unscrew the bolts securing the stabilizer pad bracket to the upper arm and remove the bracket
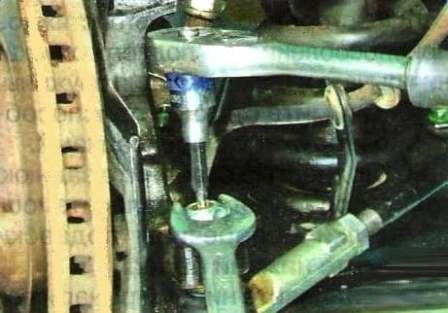
We unscrew the nut securing the tie rod joint pin to the steering knuckle lever, keeping the finger from turning
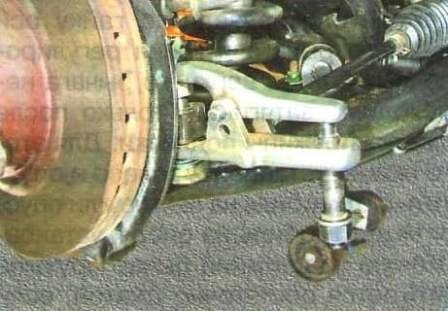
Install the ball joint puller and press the pin out of the lever boss
Unscrew the nut of the upper hinge pin

If the ball pin "B" rotates in the tapered hole of the steering knuckle, hold it with the hexagon "A" inserted into the axial hole on its end (shown on the removed hinge for clarity).


We press the hinge pin out of the fist hole
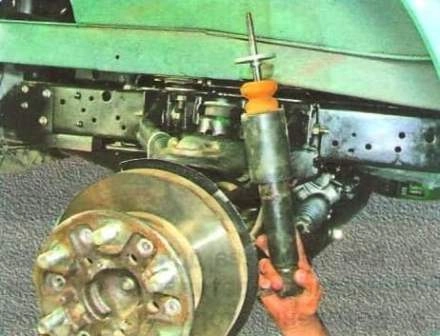
Removing the front suspension shock absorber (article - Replacing the shock absorber and front suspension stabilizer)
We compress the spring with a special tool.
It takes a lot of force to compress the suspension spring.
Therefore, do not use devices designed to compress car springs, or products of dubious quality.
Severe injury can occur if these devices break or slip!
Most suitable for this job is a tool with a long pinch screw mounted inside the spring instead of the removed shock absorber.
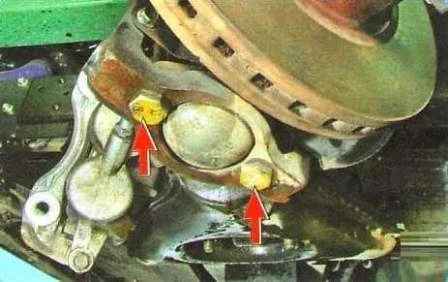
We unscrew the two bolts securing the lower ball joint to the steering knuckle.
Remove the steering knuckle with hub assembly
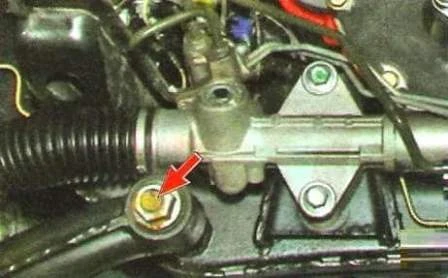
Loosen the rear axle nut control arm to the front suspension cross member
Raise the car and remove the emphasis from under the lower arm.
Carefully loosen the turnbuckle until the arm is fully lowered and the spring is fully extended.
Remove the turnbuckle and spring with spacers.
Remove the rear arm axle nut completely.
Remove the axle from the cross member bushing and remove the lower control arm
Install the lower arm and all removed parts (except the shock absorber, since it will be convenient to control the spring compression through the holes for its installation) in the reverse order of removal.

To properly install the silent blocks, the rear nut of the lower arm axle and the nuts of the upper arm adjusting bolts must be tightened only after the suspension spring has been compressed.
To do this, you can install the wheel and lower the car to the ground, or lower the car on a support installed under the lower arm.
The spring is considered sufficiently compressed if the dimension "E" between the lower end of the lower arm (in the area of the shock absorber mounting) and the upper end of the subframe shock absorber cup is 319-321 mm.
Finally tighten the lower arm axle rear nut and upper arm adjusting bolt nuts.
Install the shock absorber (article - Replacing the shock absorber and stabilizer front suspension).
Check and adjust the wheel alignment if necessary. (article Adjusting the angle of the front wheel alignment of the)


