If during the next maintenance or when replacing a wheel it was found that the wear of the pads exceeded the norm, then you need to change the pads
The pads must be changed as a set on one axle, regardless of the fact that there is less wear on one wheel than on the other.
We carry out work on a flat area, a viewing ditch or overpass.
If the fluid level in the reservoir of the hydraulic brake drive is at the MAX mark, then before installing new pads, we pump out part of the fluid from the reservoir with a syringe or a rubber bulb.
This operation must be performed so that when the piston is pressed into the wheel cylinder of the brake mechanism during the installation of new pads, fluid does not flow out from under the reservoir cap.
Remove the front wheel.
Before installing new pads, it is necessary to move the piston of the wheel cylinder inside the cylinder as much as possible.
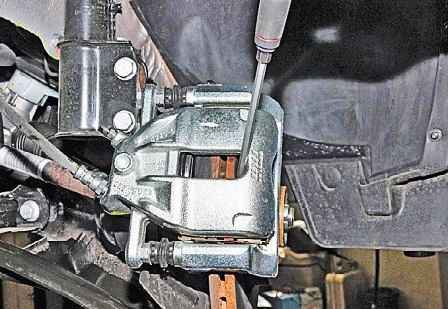
To do this, by inserting a screwdriver with a wide blade through the hole in the caliper between the base of the inner pad and the piston and leaning on the pad, we press the piston into the cylinder
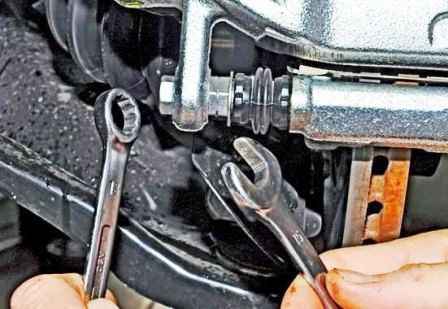
Using a 13 spanner wrench, unscrew the bolt securing the bracket to the lower guide pin, holding the finger with a 15 wrench
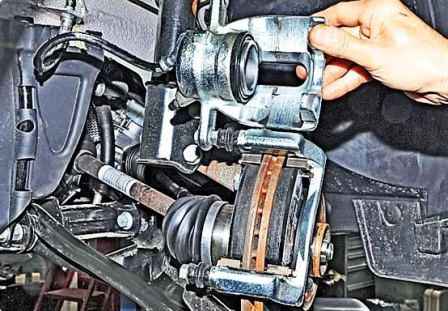
Raise the brake caliper on the upper guide pin
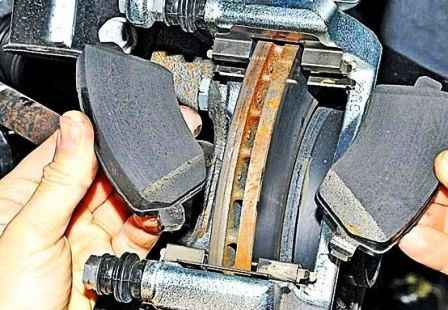
Remove the brake pads from their guide
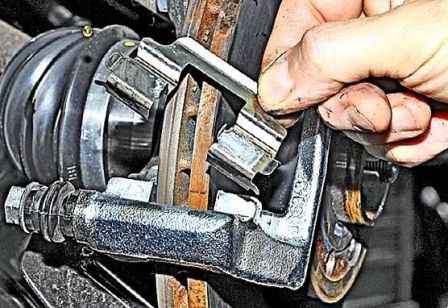
Remove the two spring clips of the pads
We clean the spring clips and pad seats from dirt and corrosion.
Check the condition of the protective covers of the guide pins.
We replace the torn rubber boot, for this:
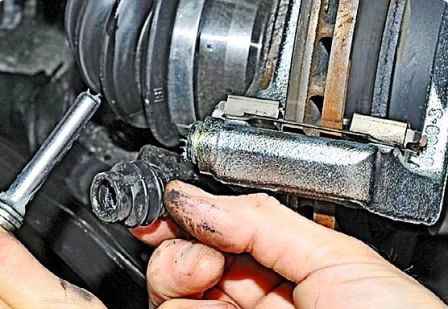
Remove the guide pin from the hole in the guide block and replace the cover.
To replace the cover of the upper guide pin, unscrew the bolt and remove the bracket from the guide.
Before installing the pin, put some grease into the hole of the shoe guide
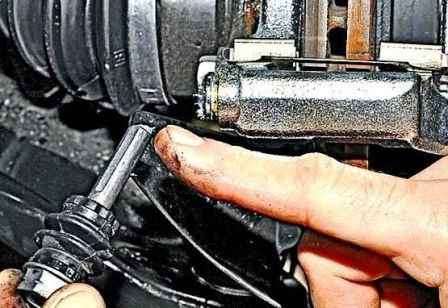
Apply a thin layer of lubricant to the surface of the finger
We install new brake pads in the pad guide and lower the bracket.
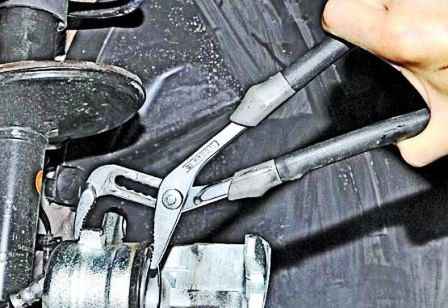
If the piston prevents the caliper from being installed on the brake pads, then raise the bracket and use sliding pliers to push the piston into the cylinder.
We install the front brake caliper on the guide and fix it with guide pins.
Guide pin tightening torque 28 Nm (2.8 kgf.m).
Install the protective caps in the wells of the guide pins.
We also change the pads on the other front brake
Installing the front wheels.
We press the brake pedal 2-3 times, check and, if necessary, bring the level of brake fluid in the hydraulic brake reservoir to normal.
Reinstall the brake fluid reservoir cap.
Checking the effectiveness of the working brake system.
In progress The surface of the brake disc becomes uneven, as a result of which the area of contact of new, not yet run-in pads with the disc is reduced.
Therefore, during the first 100 km of run after replacing the pads, while the new pads have not run in, be careful, as the braking distance of the car may increase, the pads may heat up more than usual, up to the appearance of light smoke and smell, especially in hot weather.
Replacing the brake pads of the rear wheels
We install the car on a lift or a viewing ditch.
Remove the rear wheel
We reduce the pads, for this:
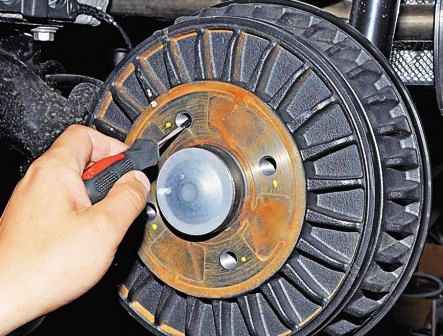
Using a thin flat screwdriver through the threaded hole in the brake drum, rotate the ratchet nut of the mechanism for automatically adjusting the gap between the shoes and the drum, reducing the length of the spacer bar
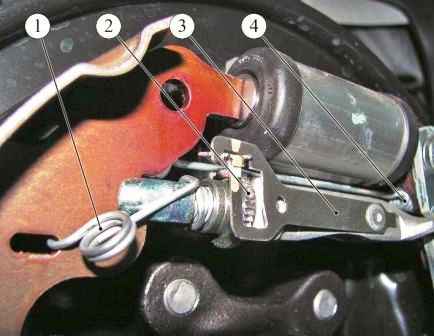
The figure shows the automatic gap adjustment mechanism
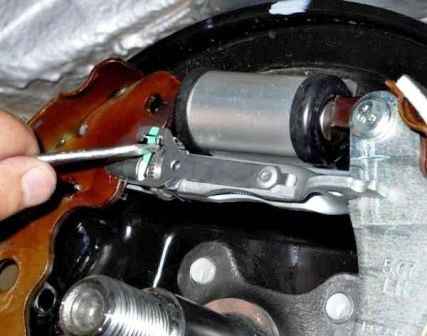
Figure 2 shows the operation of bringing the shoes together with the drum removed
Rotate the ratchet nut by the teeth from top to bottom
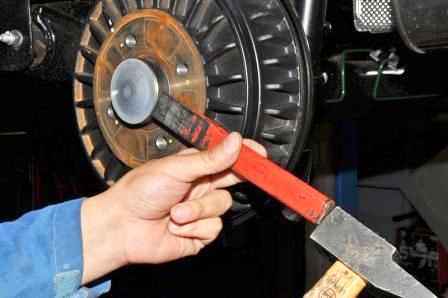
We knock down the protective cap with a hammer and a chisel
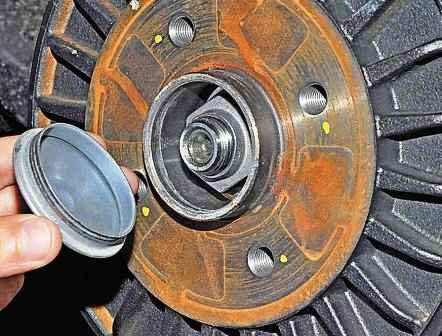
Remove the protective cap of the hub bearing
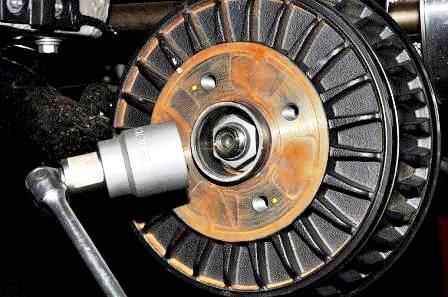
With a 36 socket, unscrew the hub bearing nut
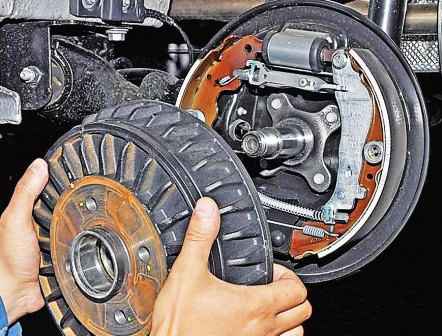
Remove the brake drum assembly with bearing
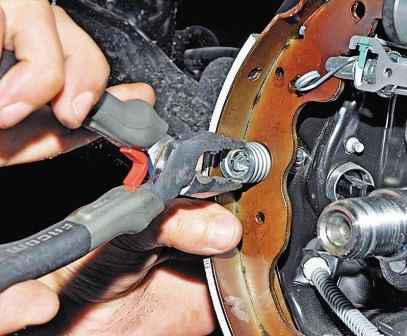
With pliers, press and turn the rack spring cup until the groove is aligned
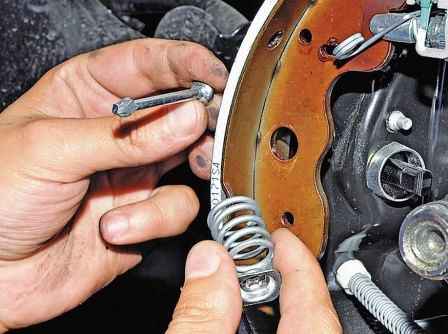
Remove the cup with the spring and remove the support post from the hole in the brake shield
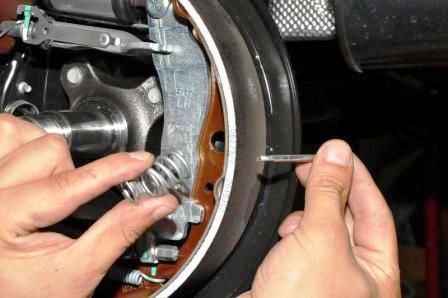
Also remove the support leg from the rear block
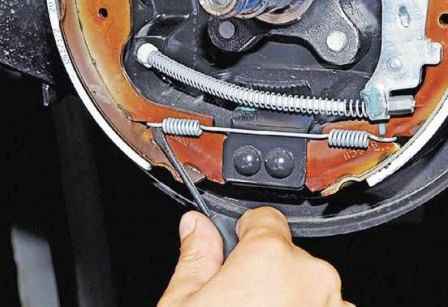
Hooking with a screwdriver, disengage the hook of the lower coupling spring from engagement with the block
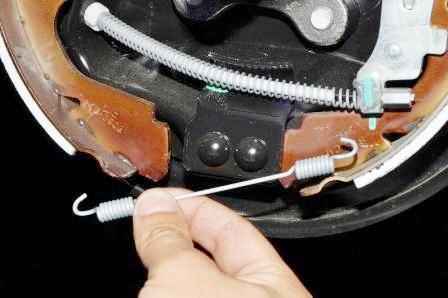
Remove the spring
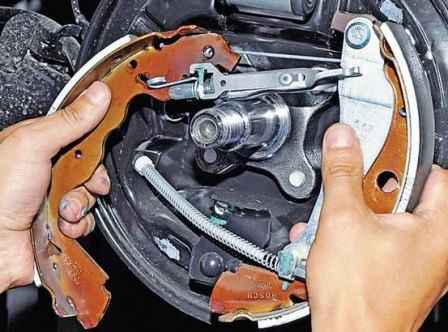
Carefully, so as not to damage the anthers of the wheel cylinder, we remove the subassembly of the rear pads from the brake shield
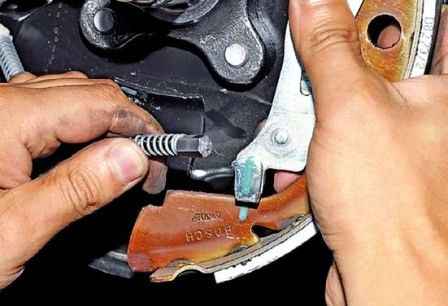
Disconnect the end of the parking brake cable from the rear shoe lever
Remove the front and rear pads assembly with spacer bar
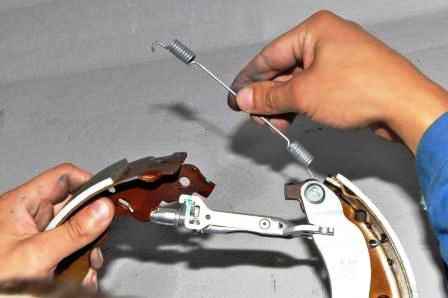
We disengage the hook of the upper coupling spring and the gap adjuster spring
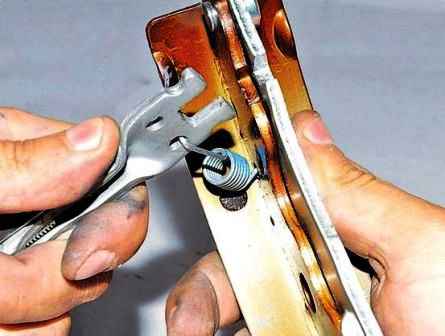
Disconnect the spacer bar and the rear brake shoe, remove the return spring of the spacer bar.
Check the technical condition of the parts and clean them.
Before installing new pads, clean the threads of the spacer tip and the ratchet nut and apply a thin layer of grease to the threads.
We set the automatic gap adjustment mechanism to its original state by screwing the tip of the spacer bar into the hole in the bar (the thread on the tip of the spacer bar and the ratchet nut is left).
Install new rear wheel brake pads in reverse order.
Before installing the brake drum, we clean its working surface with a metal brush from dirt and wear products of the pads.
Similarly, we replace the brake pads of the right wheel (the thread on the tip of the spacer bar and the ratchet nut is right-handed).
To adjust the position of the brake pads, press the brake pedal several times.
Then, while holding it down, repeatedly raise and lower the parking brake lever (when moving the lever, keep the parking brake release button on the lever pressed all the time so that the ratchet mechanism does not work).
At the same time, clicks will be heard in the brake mechanisms of the rear wheels from the operation of the mechanism for automatically adjusting the gaps between the pads and the brake drums.
Raise and lower the parking brake lever until the clicks in the brake mechanisms stop.
If necessary, adjust the parking brake.
Check the level of brake fluid in the reservoir of the hydraulic drive of the system and, if necessary, bring it to normal.
After installing the brake drum, tighten the hub bearing nut with a torque of 175 Nm.
It is advisable to install a new nut, but if it is not available, then you can use the old nut.
Spread the vise jaws by 10-15 mm, put the hub nut on them at an angle so that it simultaneously rests on both the face and the base.
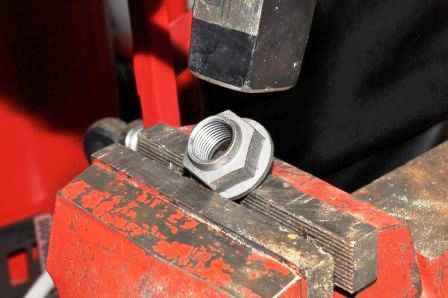
Cautiously strike with a hammer on the collar of the nut, crushing it.
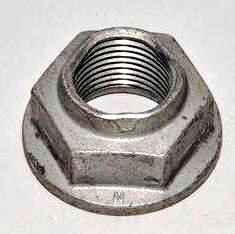
The shoulder needs to be crumpled in three places.


