The rear suspension is spring-loaded, semi-independent, with a transverse beam and hydraulic shock absorbers
The lower spring supports and brackets for mounting shock absorbers are welded to the rear suspension beam
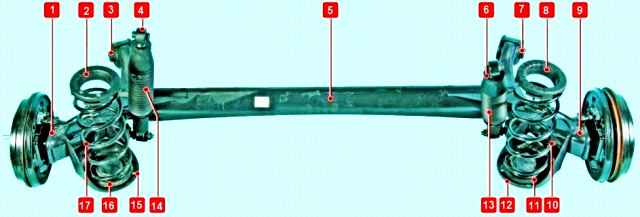
The rear wheel hubs are attached to the rear trailing arms with four bolts
In front, bushings are welded to the beam, into which silent blocks for fastening the beam to the body are pressed
The lower hinges of double-acting hydraulic shock absorbers are bolted to the brackets of the rear suspension beam.
The upper shock absorber pivots are attached to the body
Possible malfunctions of the rear suspension and solutions
Cause of malfunction Remedy
Noise and knock of the suspension when the car is moving:
Shock absorber defective - Replace shock absorber as a pair
Loose or worn shock absorber lug bushing - Tighten shock absorber lower mounting bolt and nut or replace bushings
Worn trailing arm bushings - Replace bushings
Spring settling or breaking - Replace springs
Wheel hub bearing failure - Replace hub
Moving the car away from straight ahead:
Settlement or breakage of one of the springs - Replace the springs in pairs
Trailing arms warped - Replace rear suspension beam
Worn trailing arm bushings - Replace bushings
Checking the condition of the rear suspension parts
Rear suspension parts should be checked from below the vehicle, preferably on a lift.
Find out if there are any cracks on the suspension parts or traces of rubbing against road obstacles or the body, deformation of the tailgate parts at the attachment points of the suspension units and parts.
Check the condition of rubber-metal joints (silent blocks), suspension springs and shock absorbers.
Rubber-metal hinges and rubber parts must be replaced in case of ruptures and one-sided bulging of the rubber, as well as when cutting their end surfaces.
Suspensions on rubber parts are not allowed:
- – signs of rubber aging;
- - mechanical damage.
On rubber-metal hinges are not allowed:
- - signs of aging, cracks;
- – one-sided buckling of the rubber array.
Replace defective parts.
Check for mechanical damage (deformations, cracks, etc.) of the suspension elements.
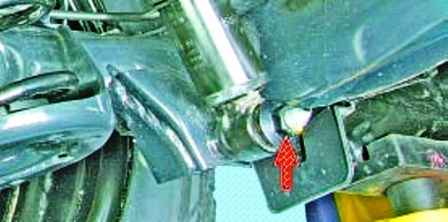
Inspecting the rubber bushings of the threaded connections of the lower shock absorber mounts
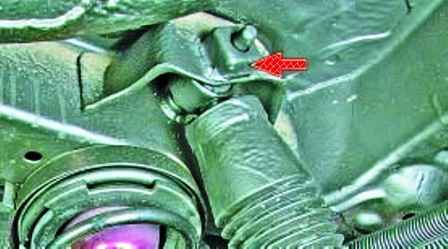
Inspecting the rubber bushings of the threaded connections of the upper shock absorber mounts
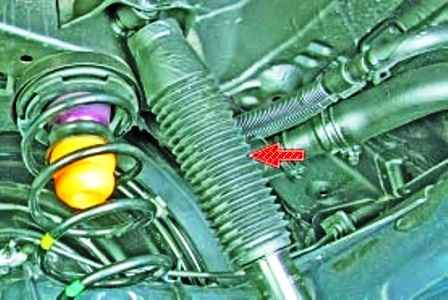
Checking the condition of the protective covers of shock absorbers
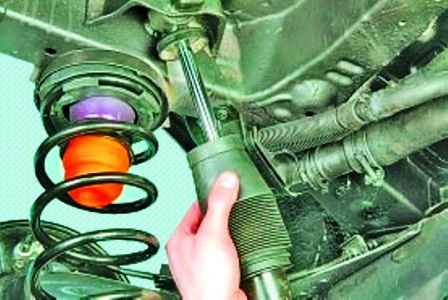
We lower the cover and check the shock absorber rod. Fluid leaks along the stem are not allowed
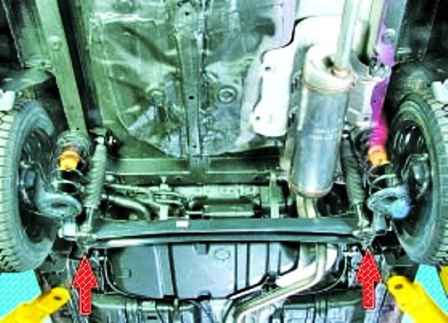
Inspecting the rubber-metal hinges of the rear suspension beam
Checking the rear wheel bearings
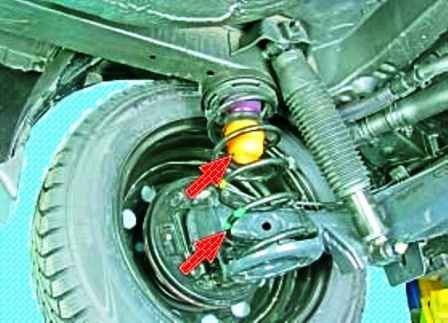
Checking the springs and rear suspension compression stroke buffer
Pay attention to the exhaust system. Extraneous knocks emitted by it are often mistaken for a knock in the rear suspension.
The use of non-standard parts or a break in the silencer suspension elements can cause a strong knock, especially when re-gassing.
When checking, stop the engine, carefully inspect the exhaust system, check the reliability of the mounting and suspension of the muffler.
Holding the end of the exhaust pipe, shake the muffler up and down and from side to side - there should be no knocks.


