We remove the heater elements for replacement or repair.
Removing and installing the control unit was discussed in the article - Removing the Renault Duster heater control unit.
Removing the heater fan
To remove the fan, you will need tools: socket head 13, TorxT20, T30, T50 keys, a special plastic spatula or slotted screwdriver, pliers.
Disconnect the negative battery terminal.
Removing the instrument panel (article - How to remove the Renault Duster instrument panel)
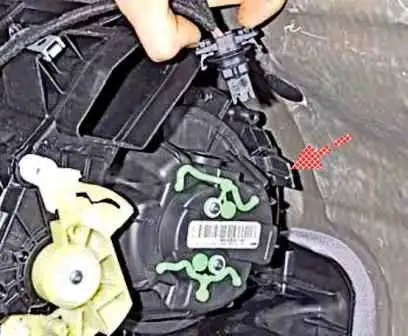
Squeezing the two clamps of the wire block, disconnect the block from the fan motor connector
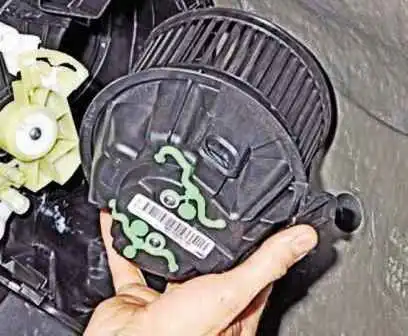
Pressing the plastic latch (shown by the arrow), turn the fan clockwise until it stops and remove the fan from the heater housing.
Install the heater fan in reverse order
Removing the additional heater fan resistor
We remove the resistor to replace it when it fails.
Disconnect the wire terminal from the negative battery terminal
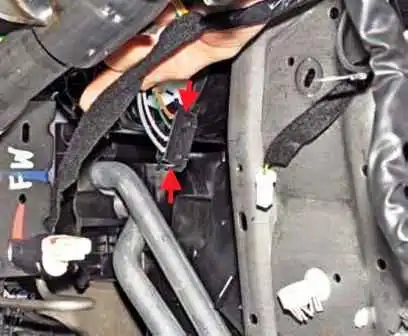
Squeeze two clamps of the wire block (shown by arrows), disconnect the block from the additional resistor
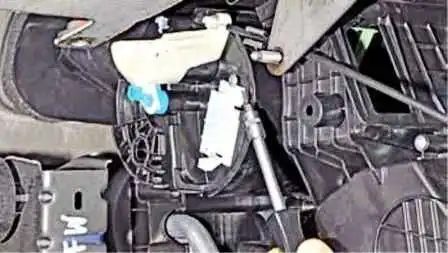
Using the Torx T-20 wrench, unscrew the screw securing the resistor
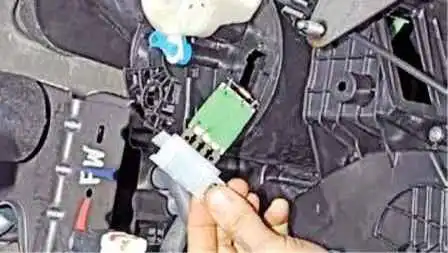
Sliding the resistor up, remove it from the heater housing
Install the additional heater fan resistor in reverse order.
Removing the heater core
We remove the heater radiator for replacement if the radiator pipes are clogged or if a coolant leak through the radiator is detected.
We drain the liquid from the engine cooling system (article - Checking and replacing the Renault Duster engine coolant)
We remove the lining of the floor tunnel (article - Removing the lining of the Renault Duster car floor tunnel)
Removing the instrument panel
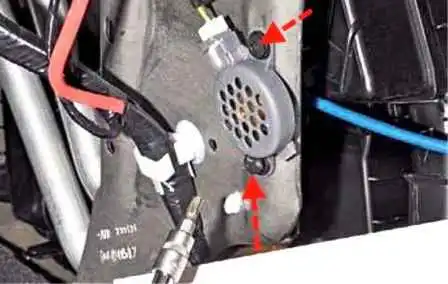
Using the TorxT-20 key, unscrew the two screws of the caps for fastening the buzzer (speaker) of the parking sensors and remove the caps
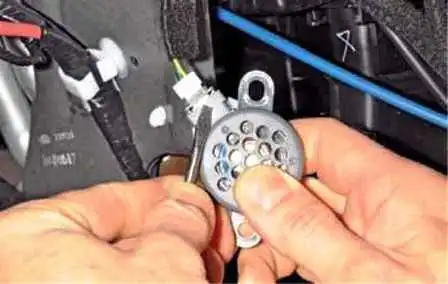
Pushing the wire block retainer with a screwdriver
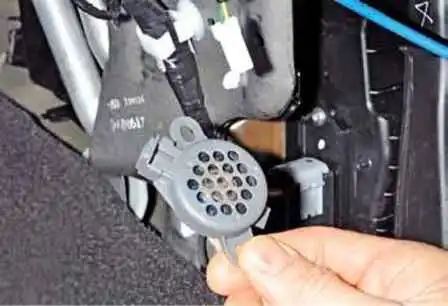
Disconnect the block and remove the parking sensors buzzer
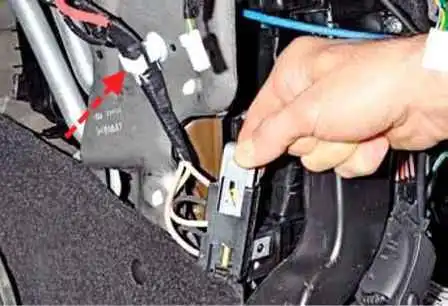
Sliding up the lock of the wire block, disconnect the block from the passenger compartment electric heater and remove the wire harness from the holder (shown in the photo by an arrow) on the bracket of the cross beam.
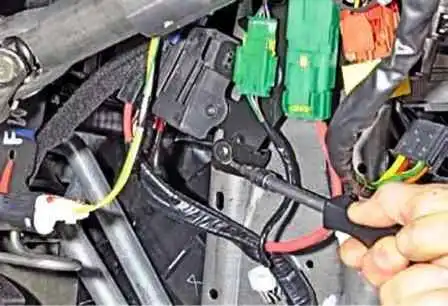
Using a TorxT-20 wrench, unscrew the screw securing the relay bracket and wiring harness pads
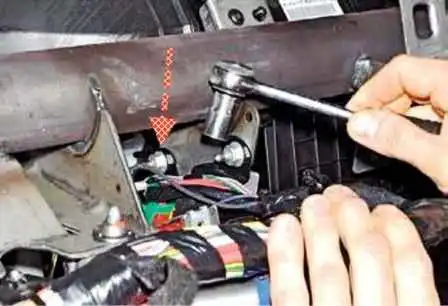
With a 13 head, unscrew the two nuts of the upper fastening of the cross beam bracket
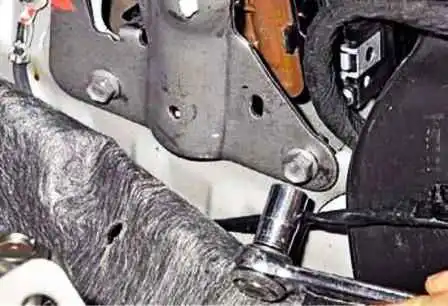
We take out the piston for fastening the carpet to the cross beam bracket and, having bent the edge of the cover, with a 13 head, unscrew the two bolts of the lower bracket fastening
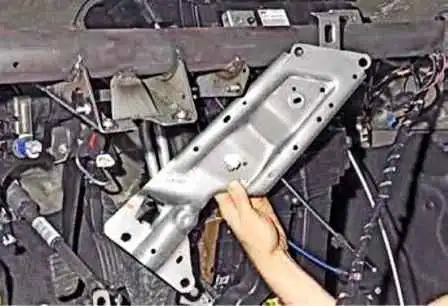
Remove the cross beam bracket
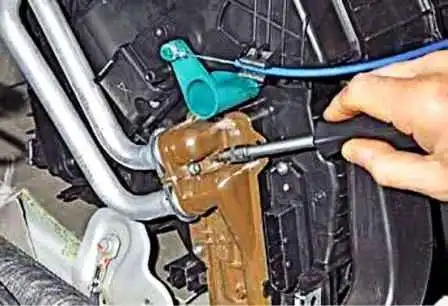
Using a TorxT-20 wrench, unscrew the screw of the pressure plate of the radiator tubes
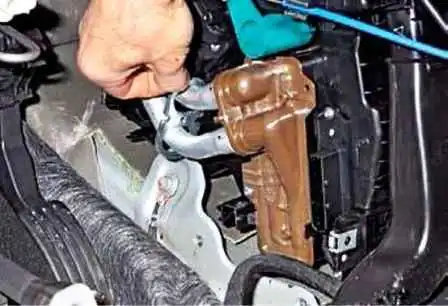
Sliding the pressure plate along the tubes
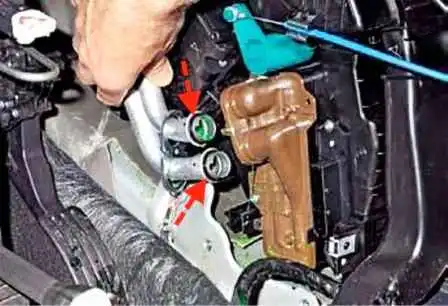
Remove the tubes from the holes of the heater radiator tank
The pipes are sealed in the radiator tank with rubber rings (shown by arrows in the photo)
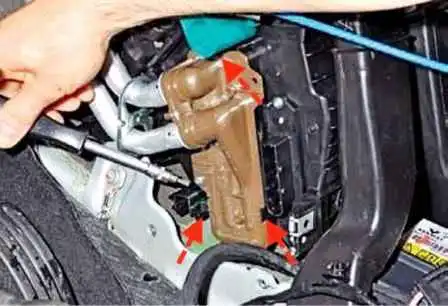
Use the TorxT-20 key to unscrew the radiator mounting screw
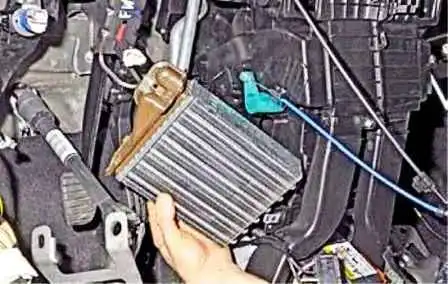
We press the three latches (shown by arrows) and remove the radiator from the heater housing.
Before installing the radiator, we replace the sealing rings of the tubes with new ones.
Install the heater core in reverse order.
Removing the additional electric interior heater
We remove the additional electric interior heater for replacement if it malfunctions.
We remove the lining of the floor tunnel (article - Removing the lining of the Renault Duster car floor tunnel)
We remove the instrument panel (article - How to remove the Renault Duster instrument panel)
Remove the instrument panel cross member
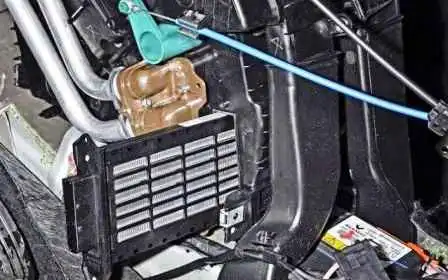
Using the TorxT-20 wrench, unscrew the two screws securing the electric heater
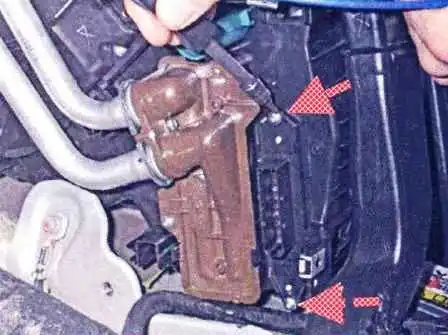
Remove the electric heater from the heater body
Install additionala powerful interior electric heater in reverse order.


