


Mainly, during the operation of the air conditioning compressor, the fault is the failure of the air conditioning clutch. Bearing 4 (fig. 1) of the pulley begins to break up.
The bearing can break up due to excessive tension of the drive belt, water ingress, slipping of the pressure disc 1 (fig. 1).
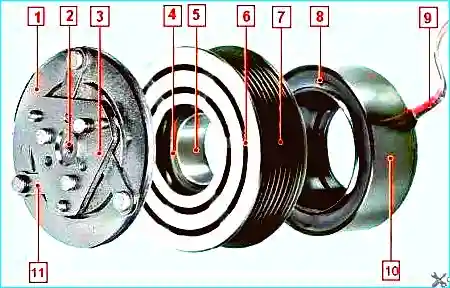
Due to the bearing play, during rotation the inner surface of the pulley begins to rub against the surface of the housing 10 of the electromagnet coil. Under the action of friction the parts heat up, and the insulation of the winding 8 (fig. 1) of the coil begins to burn out, the turns of the electromagnet coil short-circuit and the electromagnet fails.
Signs of a fault:
- complete seizure of the bearing and turning of the bearing inner race 5 on the mounting neck of the compressor cover;
- extraneous noises during operation of the air conditioning compressor.
Check: remove the drive belt from the pulley and turn the pulley by hand. It should rotate without noise and without jamming. There should be no radial or axial play.
Removing and refitting the air conditioning compressor
Tools: 18 mm spanner and flat-blade screwdriver.
We prepare the vehicle for the work.
Preliminary operations:
- We remove the refrigerant from the air conditioning system (see the article Refrigerant charging specifics for the Renault Megane 2).
- We remove the right front wheel arch liner (see the article Removing the arch liners on a Renault Megane 2).
- We remove the engine splash guard.
- We remove the auxiliary drive belt (see the article Replacing the auxiliary drive belt on a Renault Megane 2).
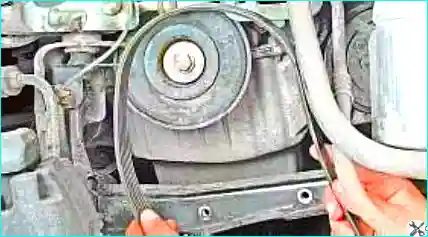
We check the condition of the drive belt. We replace the belt if the following defects are found:
- wear of the toothed surface, cracks, cuts, folds or separation of the rubber from the fabric;
- depressions, cracks or bulges on the outer surface of the belt;
- fraying or delamination on the end surfaces of the belt;
- traces of oil on the belt surface due to leakage of the engine shaft seals.
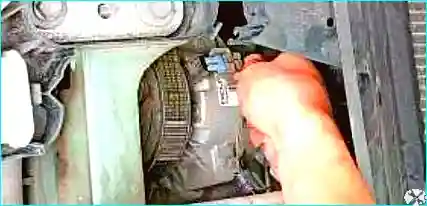
We press the retainers and disconnect the wire connector from the connector of the electromagnetic compressor engagement clutch.
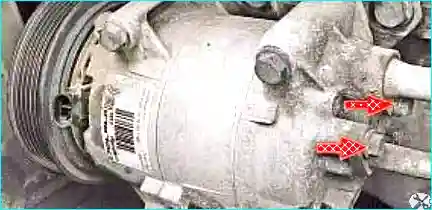
We remove the bolts from the holes and disconnect the pipelines from the compressor. Important: after disconnecting the pipelines, the openings of the compressor and the pipelines must be plugged.
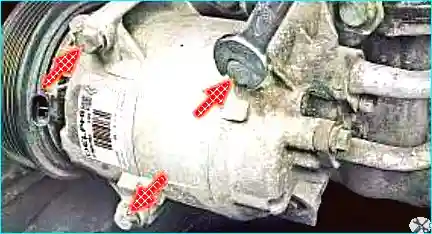
We unscrew three bolts securing the compressor to the bracket on the cylinder block. We remove the bolts from the holes and remove the compressor.
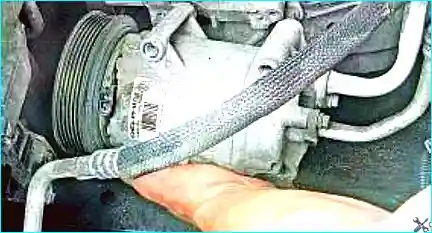
Refitting the compressor:
- Refit the compressor and all parts in the reverse order.
- Remove the plugs of the compressor and pipeline openings just before connection.
- Lubricate the new sealing rings with air conditioning compressor oil.
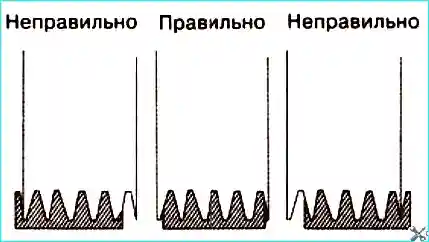
- When fitting the belt, make sure that the V-grooves match the pulley grooves.
- Charge the air conditioning system.
- If a new compressor is fitted, you need to know how much oil has been poured into the compressor and the type of oil.
Replacing the compressor pulley bearing
The compressor pulley bearing is double-row, it is not lubricated or adjusted during operation.
Tools: flat-blade screwdriver, 18 mm spanner, pullers for removing the compressor pulley.
Preliminary operations: we remove the refrigerant (see the article Refrigerant charging specifics for the Renault Megane 2), we remove the air conditioning compressor.
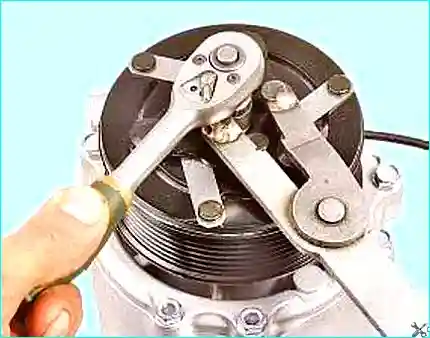
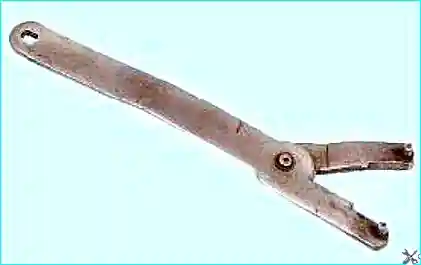
We unscrew the bolt securing the pressure plate, holding the shaft from turning. To hold the rotor shaft we use a special key.
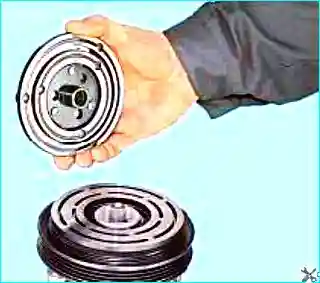
We remove the pressure plate from the compressor shaft. If the pressure plate sits tightly on the shaft, a puller must be used.
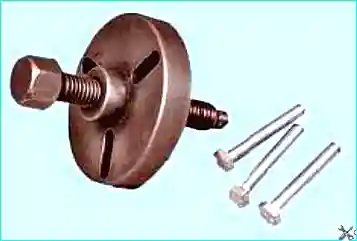
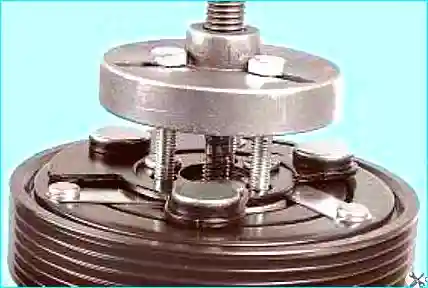
Note: if there is no thread in the holes, you need to cut an M5 thread yourself with a tap.
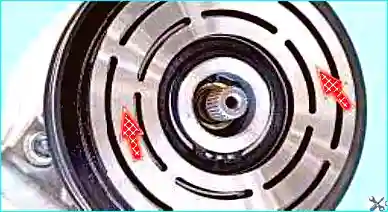
Inspection of parts
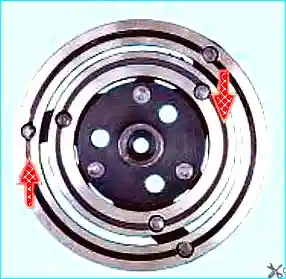
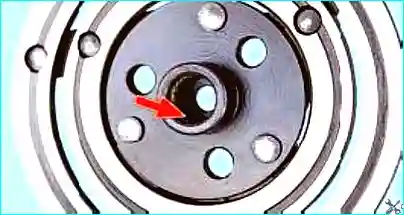
We inspect the splines of the pressure plate. If the splines are worn, we replace the plate.
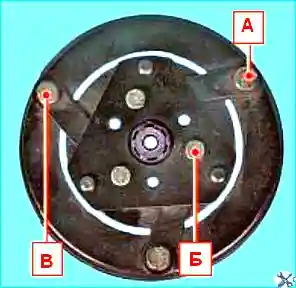
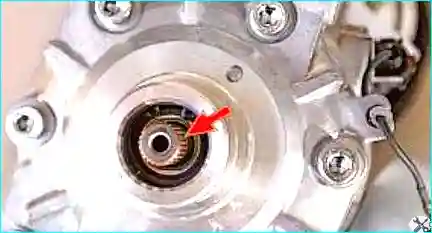
We inspect the surface of the shaft. Important: if the shaft seal leaks, the compressor must be replaced.
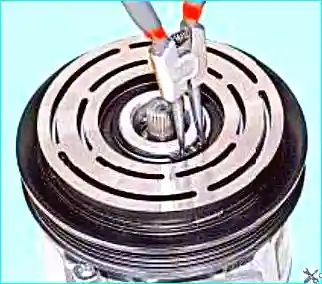
Removing the pulley and replacing the bearing
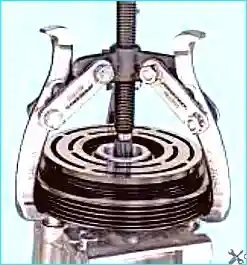
To remove the pulley it is convenient to use a universal puller.
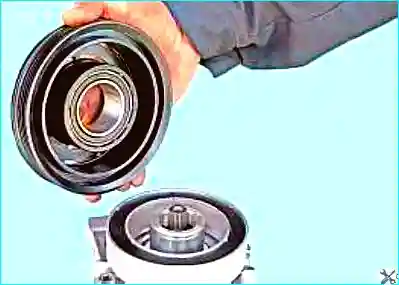
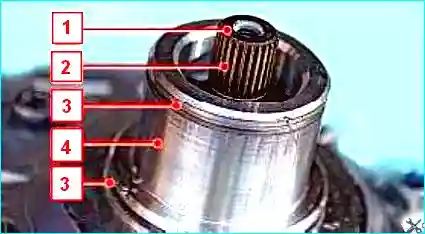
We inspect the splines 2 and the threaded end of the shaft 1, the grooves for the circlips 3 and the mounting surface 4 of the bearing neck. If there is wear, the compressor must be replaced.
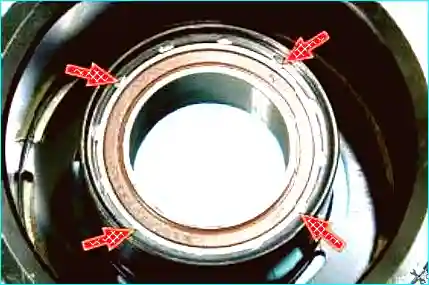
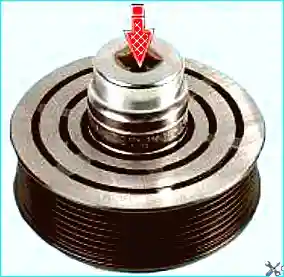
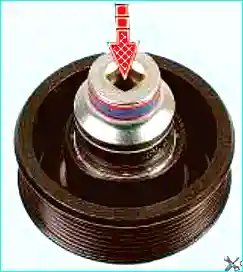
Fitting the new bearing:
- We press in the new bearing, applying force to the outer race of the bearing.
- Pressing in must be done carefully, without misalignment — the outer race of the bearing is very thin.
- We secure the bearing by staking the edge of the pulley mounting hole.
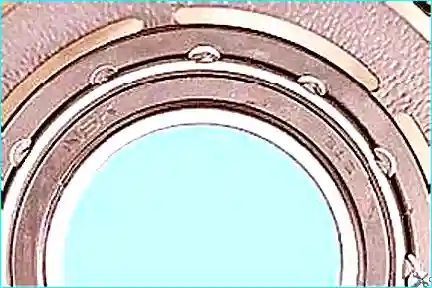
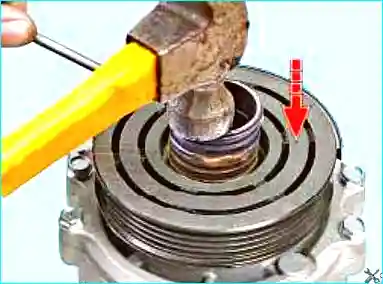
We press the pulley onto the front cover of the compressor. The force must be applied to the inner race of the bearing.
Adjusting the gap
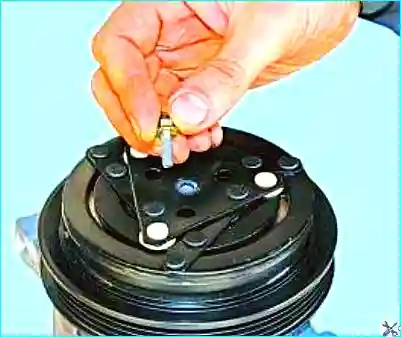
We fit the pressure plate onto the shaft and screw in the old securing bolt. With a feeler gauge we measure the gap between the friction surfaces of the pressure plate and the pulley. The gap must be the same at different points of the circumference.
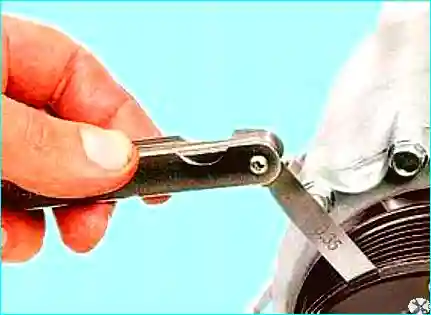
Nominal gap:
- petrol engines — 0.25–0.45 mm;
- diesel engines — 0.30–0.50 mm.
The exact gap can be checked with a dial indicator. To do this we install the compressor in a vice.
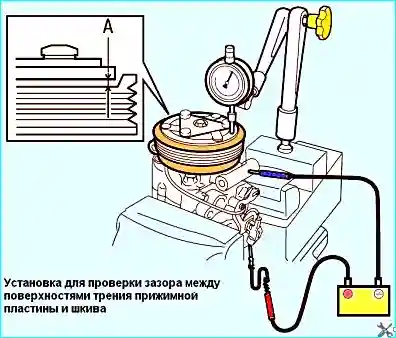
We connect the positive battery terminal to the connector of the coil winding, the negative terminal to the compressor housing. We measure the gap «А» between the friction surfaces at different points. If the gap is not the same, we replace the pressure plate.
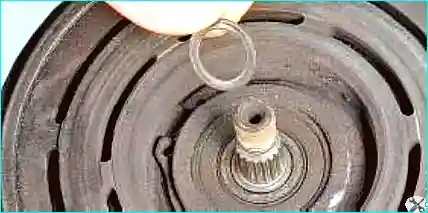
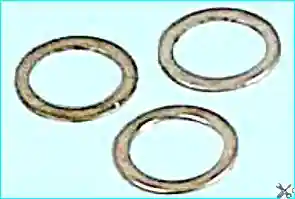
After adjustment we unscrew the old bolt from the shaft end and screw in a new bolt. We fit the compressor and all removed parts. We charge the air conditioning system.
Replacing the compressor clutch electromagnet
Tools: a set of screwdrivers, 18 mm spanner, pullers for removing the pulley, a puller for removing the electromagnet and a tester.
We remove the refrigerant from the system. We remove the compressor. We remove the pressure plate and the drive pulley, as described above.
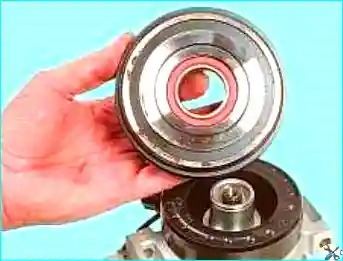
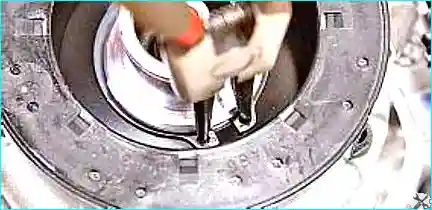
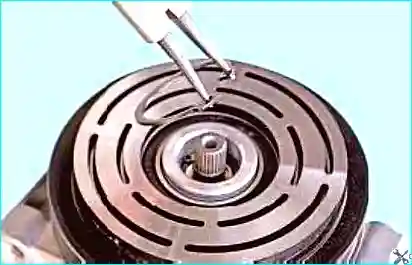
We remove the circlip of the electromagnet of the compressor clutch. To remove the circlip we use a special expanding puller.
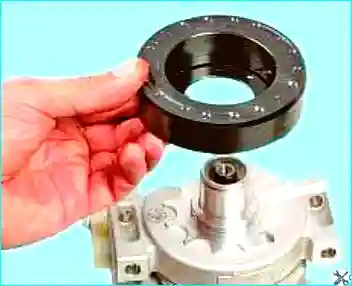
We slide the electromagnet off the mounting band of the compressor front cover and remove it.
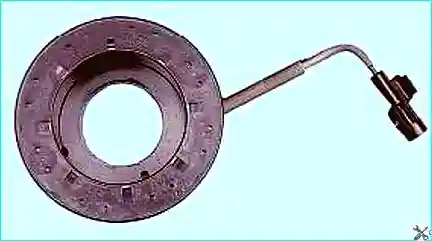
We check with an ohmmeter the resistance of the electromagnet coil winding and the absence of a short circuit to the housing. The resistance must be 3.6–3.8 Ом.
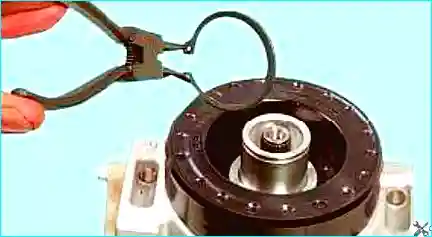
Fitting the electromagnet:
- We fit the electromagnet onto the compressor front cover.
- The locating lug «А» on the rear surface of the coil housing must enter the recess «Б» on the compressor cover.
- You must make sure that the circlip has fully entered the groove.
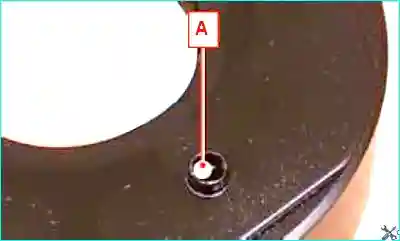
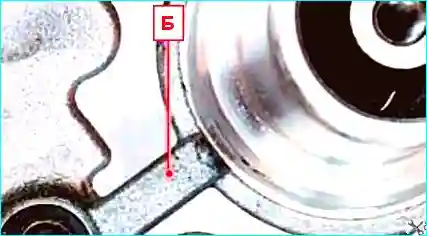
We press the pulley onto the mounting neck of the compressor front cover. We apply the force to the inner race of the bearing. After pressing on, we check the rotation of the pulley.
We fit the compressor and the remaining parts in the reverse order. We charge the system with refrigerant.
Removing the air conditioning compressor pressure regulator
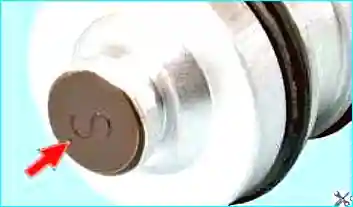
Important: on the lug of the end surface of the regulator housing there is a colour identification. The colour of the mark indicates the setting of the regulator to certain working pressure values. To replace the regulator you need to purchase a regulator with a mark of the same type.
Removal procedure:
- We remove the refrigerant from the system.
- We place the vehicle over an inspection pit.
- We disconnect the negative battery terminal.
- We remove the right front wheel arch liner.
- We remove the engine splash guard.
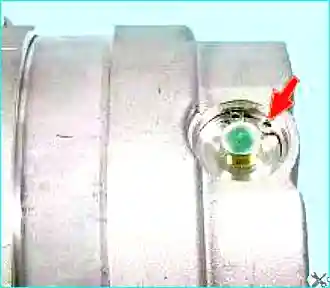
We clean the end surface of the regulator and the surface of the compressor cover around the regulator from dirt.
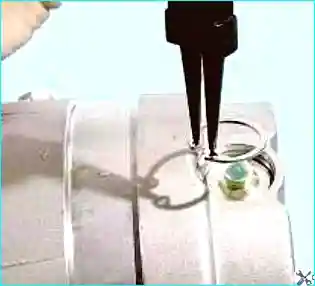
We remove the circlip securing the regulator. We extract the regulator from the compressor housing.
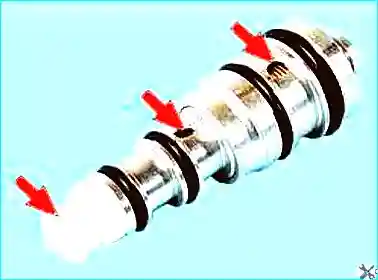
Attention: if particles of aluminium or plastic are found on the filter mesh or in the openings of the regulator, it means that the pumping part of the compressor has broken up. Replacement of the compressor and flushing of the entire air conditioning system will be required.
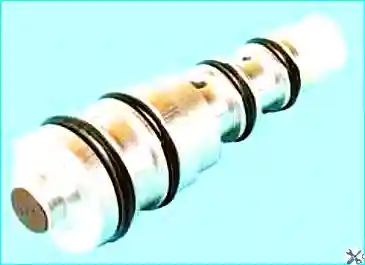
Refitting: when fitting a new regulator we lubricate the sealing rings with air conditioning compressor oil. We charge the air conditioning system.


