


We remove the fuel module to replace the fuel filter, as well as in the event of a fault in the module's components.
The module structurally consists of an electric pump, a fuel level sensor, a pressure regulator and a coarse filter.
Faults for which the fuel pump module is repaired:
- fault in the pressure regulator;
- failure of the fuel pump;
- clogging or damage to the coarse filter;
- failure or incorrect operation of the fuel level sensor.
The symptoms of a fuel pump fault are a reduction in the vehicle's power and dynamics, hesitation in acceleration mode, and unstable engine operation at idle.
A sign of deterioration in the fuel pump's operation is a "whine" or a constant unpleasant hum with excessive wear of the pump part due to operation with poor, unfiltered petrol.
The finest mechanical impurities contained in such fuel contribute to the wear of the friction surfaces of the pump part.
The cause of rapid pump wear is also driving with a low fuel level in the tank, with the reserve fuel warning light on.
Because the electric pump is cooled by the fuel in the tank.
To remove the fuel pump module:
We prepare the vehicle to carry out the task.
We reduce the fuel pressure, as described in the article — "Replacement of the additional fuel filter".
We disconnect the negative terminal of the battery.
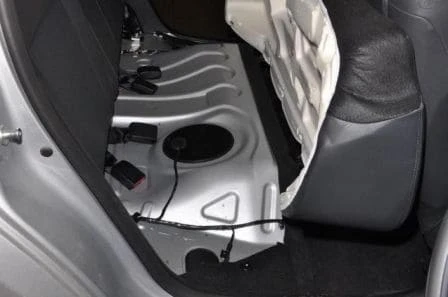
In the vehicle interior, we fold up the rear seat cushion.
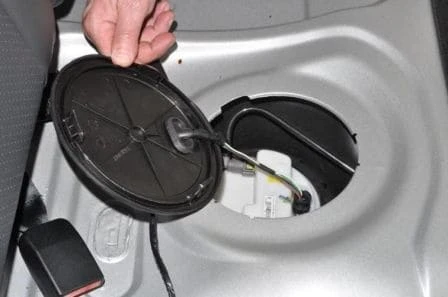
Using a flat screwdriver, we prise up and lift the fuel tank access cover.
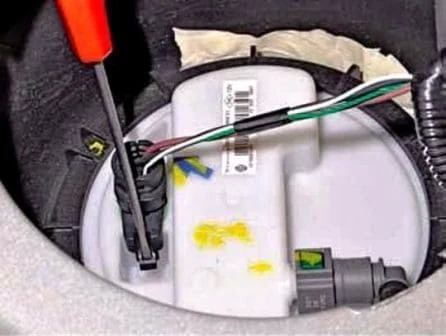
Using a flat screwdriver, we press down the wiring connector clip.
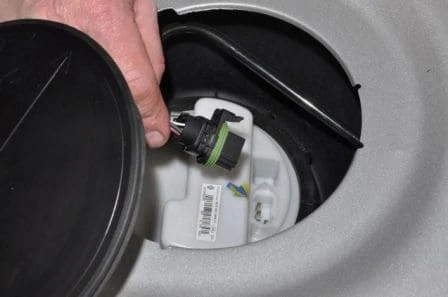
We disconnect the connector from the module socket.
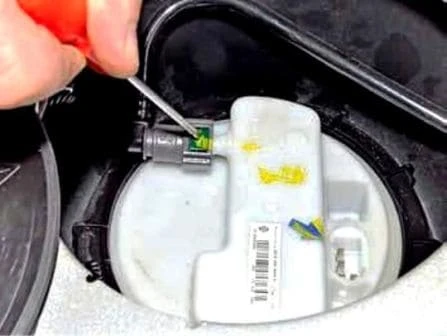
We press the fuel pipe end fitting clip.
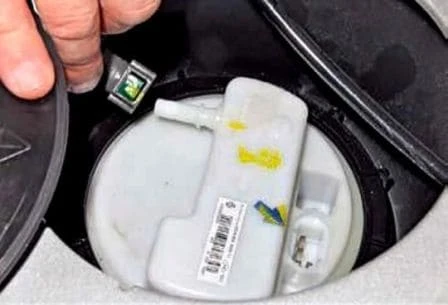
We disconnect the end fitting from the module cover union.
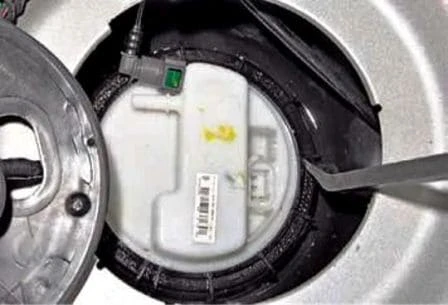
We try to undo the module clamping ring with a pry bar.
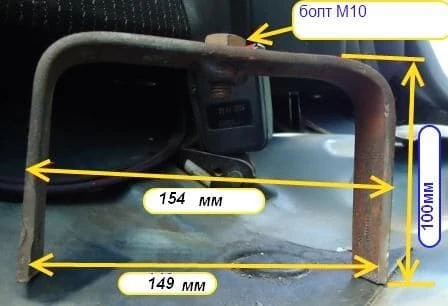
If this does not work, we make a bracket to size from a metal rod.
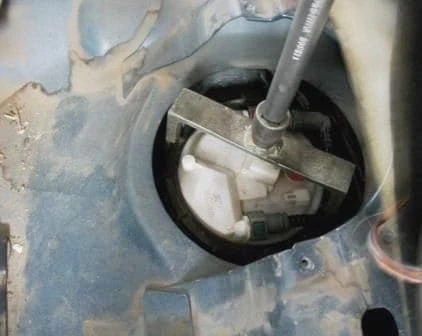
We undo the clamping ring and remove it.
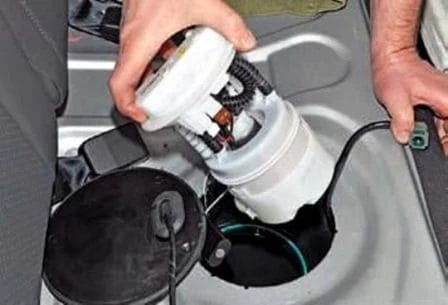
We carefully remove the fuel module from the tank, guiding the level sensor float out through the opening in the tank.
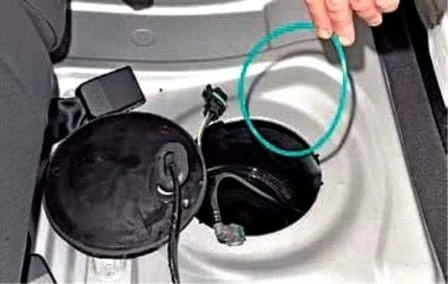
We remove the rubber sealing ring.
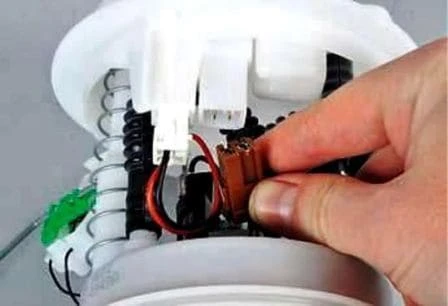
After draining the remaining fuel from the fuel module, we disconnect the fuel level sensor wiring connector.
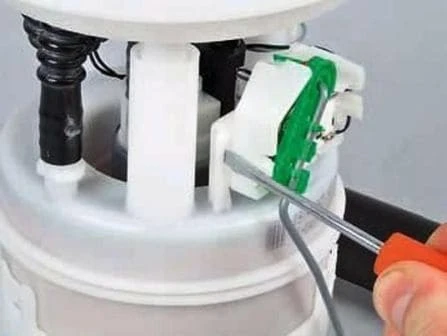
We release the fuel level sensor clip.
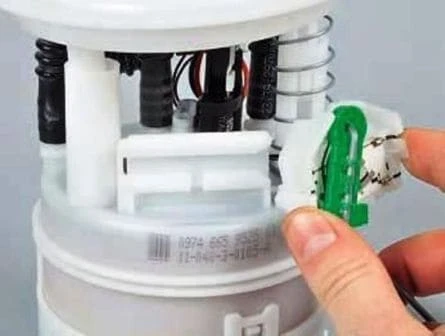
We remove the fuel level sensor.
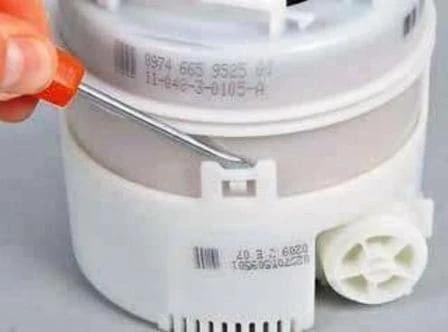
Using a screwdriver, we release the three clips of the cup.
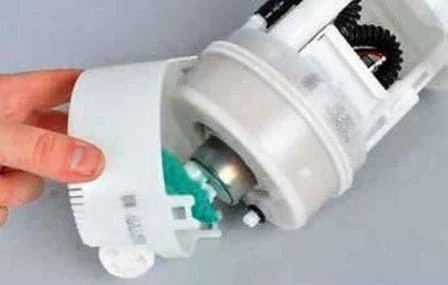
We remove the cup from the filter housing.
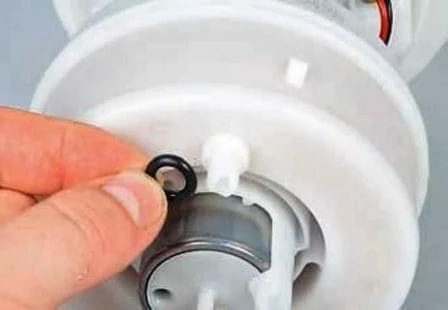
The connection of the fuel pressure regulator channel is sealed with a rubber ring.
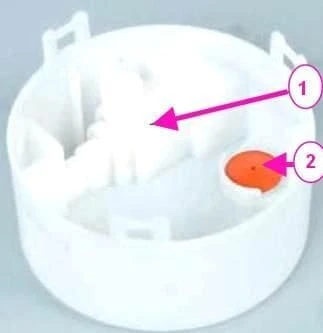
The cup contains the fuel pressure regulator 1 and the non-return valve 2.
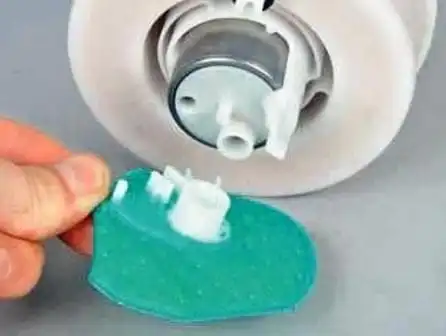
We remove the mesh filter from the pump union.
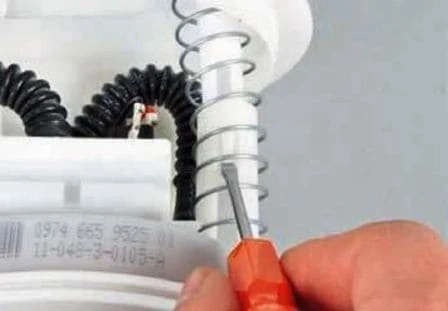
Using a screwdriver, we press down the fuel module cover clip.
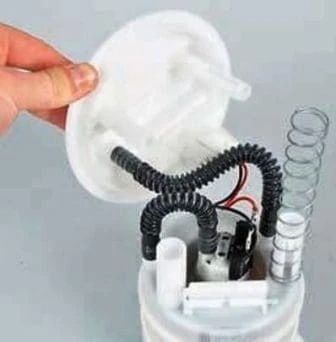
We move the cover aside.
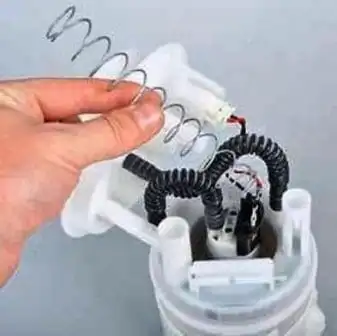
We remove the spring from the guide.
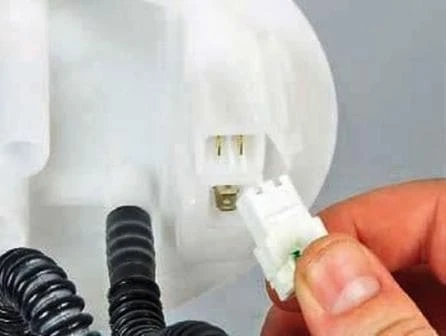
We disconnect the fuel pump wiring connector from the socket on the inside of the fuel module cover.
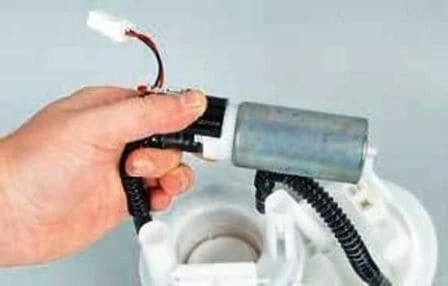
We remove the fuel pump from the fuel filter seat.
We heat the plastic corrugated tube with a heat gun or hot water.
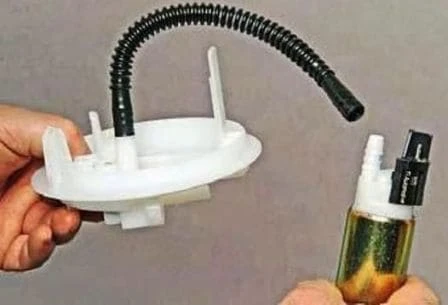
We remove the tube from the pump union.
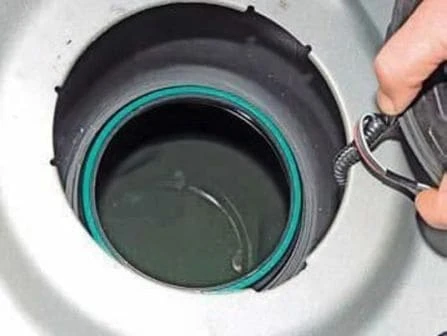
We install all parts in the reverse order.
During installation of the module, we check that the sealing ring is correctly positioned.
We install the module in the tank.
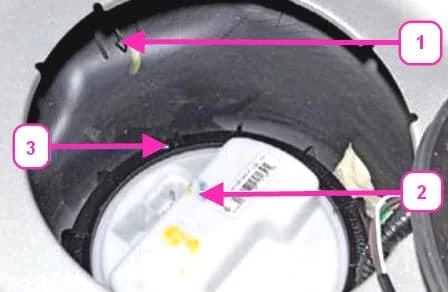
When installing, we orient the fuel module so that the arrow on its cover is opposite the arrow on the tank.
We press down on the module cover from above and screw the clamping ring onto the fuel tank neck until the module cover is pressed firmly against the neck.
We then turn the clamping ring to the position in which arrow 3 on the ring is opposite arrows 1 and 2.
We fit the fuel pipe end fitting onto the module cover union until the clips click.
After installing the module, we switch on the ignition and check the connections for leaks.
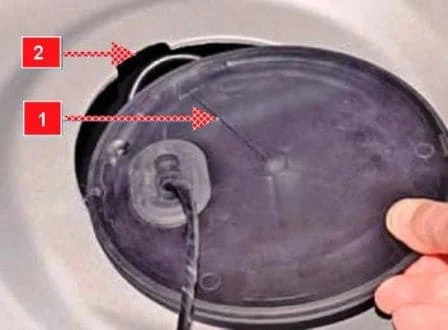
When installing the access cover, we orient it so that arrow 1 on the cover is opposite slot 2.


