


The exhaust gas system consists of the exhaust manifold, the metal compensator, the catalytic converter, the additional and the main silencer.
Replacing the suspension cushions of the exhaust system parts
If the rubber suspension cushions of the exhaust system are damaged, during the movement of the car or when starting the engine, knocking may be heard under the floor of the car due to the contact of the system parts with the body or the parts of the rear suspension.
The cushions may be torn, have lost their elasticity, have cracks and tears.
We carry out the work when replacing the cushions on an inspection pit or a trestle.
Removing the suspension cushion of the catalytic converter
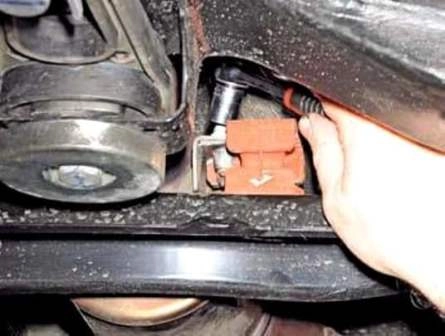
With a 13 mm socket we unscrew the bolt securing the cushion to the bracket welded to the front end of the catalytic converter.
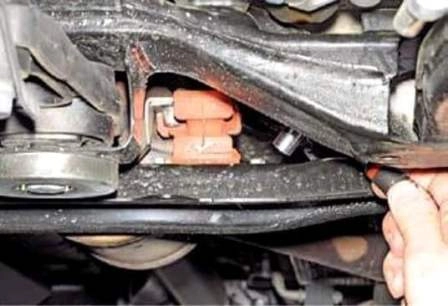
With a 10 mm socket we unscrew two bolts securing the cushion to the body cross member.
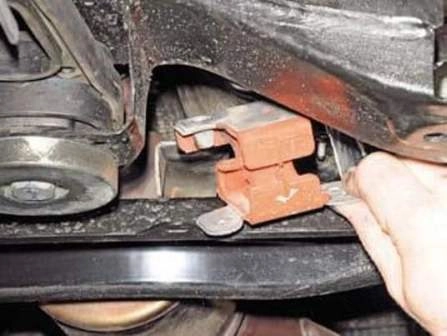
We remove the cushion.
Removing the suspension cushion of the additional silencer pipe
To remove the suspension cushion of the additional silencer pipe, we prise the cushion off the pipe bracket with a screwdriver and inject soap solution into the gap formed.
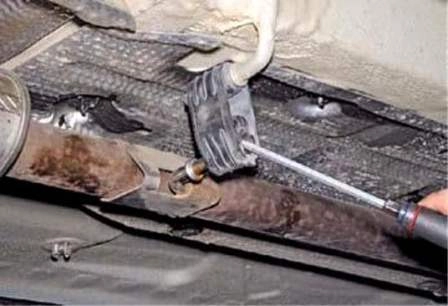
With the help of a large screwdriver we pull the cushion off the pipe bracket.
In the same way we inject soap solution into the gap between the body bracket and the cushion.
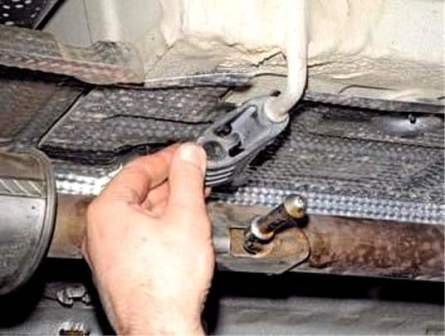
We pull the cushion off the body bracket.
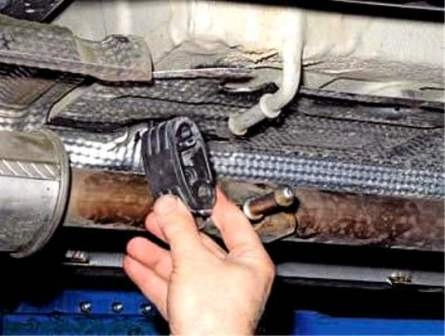
We remove the cushion.
If we are replacing the cushion, we can cut the old cushion with a knife.
Removing the cushions of the main silencer
To remove the right suspension cushion of the main silencer, we moisten the openings of the cushion with soap solution.
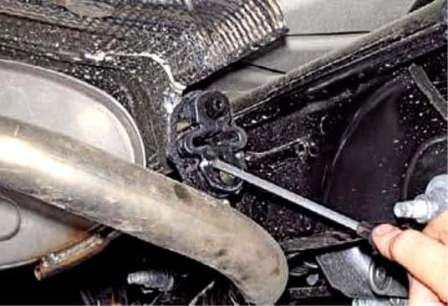
With a large screwdriver we pull the cushion off the silencer bracket.
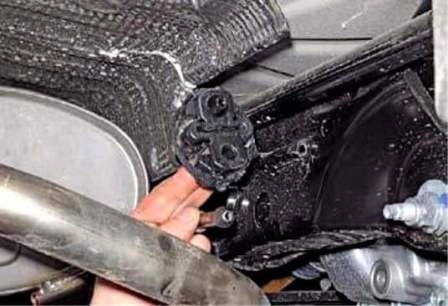
We pull the cushion off the body bracket.
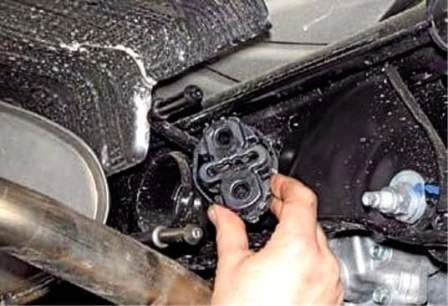
We remove the cushion.
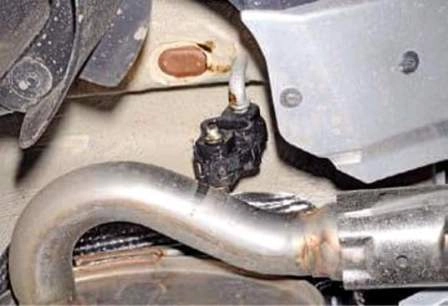
We remove the left suspension cushion of the main silencer in the same way.
Before installing the new suspension cushions of the silencers, we clean the body brackets and the elements of the exhaust system.
Removing the exhaust gas system on a 4x4 car
We remove successively three rubber suspension cushions of the additional and the main silencers from the body brackets or the brackets of the exhaust system, and also unscrew the bolt securing the cushion to the catalytic converter (see above).
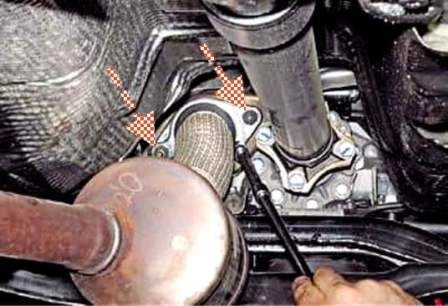
With a 10 mm socket we unscrew two nuts securing the metal compensator flange to the exhaust manifold flange.
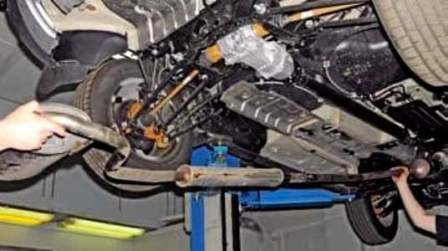
We remove the exhaust gas system.
We remove the metal multilayer gasket from the studs of the exhaust manifold.
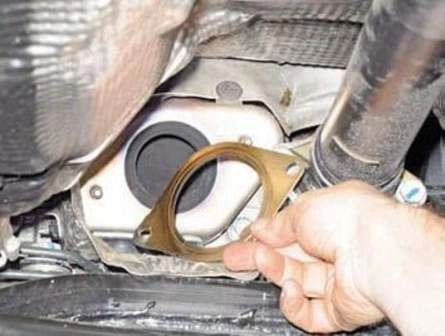
We install the exhaust system in the reverse order.
Removing the exhaust system on a 4x2 car
To extract the parts of the exhaust system from the space between the body and the rear suspension beam, we jack up the rear part of the car.
We remove successively two rubber suspension cushions of the exhaust system from the body brackets or the brackets of the exhaust system parts.
We unscrew the nuts securing the metal compensator flange to the exhaust manifold flange (see above).
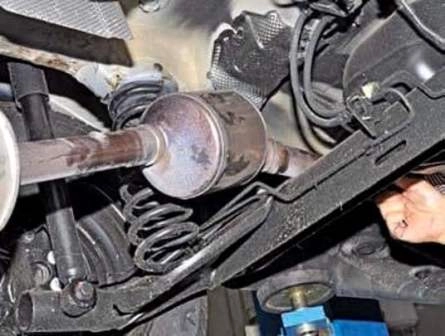
We shift the exhaust system backwards and, having passed the parts of the exhaust system between the rear suspension beam and the body floor, we remove the exhaust gas system.
We install the parts in the reverse order.
Replacing the elements of the exhaust gas system
We replace the elements of the exhaust gas system in cases of their burning through, through corrosion, large mechanical damage or in case of failure of the catalytic converter.
We carry out the work on an inspection pit or a trestle. The operations for replacing the elements of the exhaust system are shown on a 4x4 car.
If necessary, we remove the oxygen concentration sensors (article — Removing the ECU and the sensors of the engine management system).
Since the construction of the exhaust system is non-detachable (with the exception of the connection of the exhaust manifold with the rest of the system), to replace a separate element of it, it is necessary to cut the part to be replaced out of the pipeline.
As spare parts, the additional and the main silencers, as well as the catalytic converter with the metal compensator, are supplied separately.
To connect the parts, it is also necessary to purchase one or two (when replacing the additional silencer) special clamps.
Before replacing the metal compensator with the catalytic converter or the additional silencer, we mark on the pipe connecting the catalytic converter and the additional silencer the place of the cut.
To do this, we divide in half the distance (which is 80 mm) between the two marks located on the pipe.
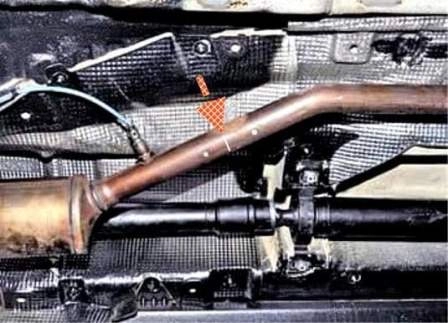
We mark with chalk or a marker the place of the cut.
We cut the pipe according to the applied mark.
After cutting the pipe, the metal compensator with the catalytic converter can be replaced.
To do this, we unscrew the bolt securing the suspension cushion of the system to the catalytic converter, disconnect the metal compensator flange from the exhaust manifold flange and remove the metal compensator with the catalytic converter.
Having installed the new metal compensator with the catalytic converter, we connect the pipes between the catalytic converter and the additional silencer with a special clamp.
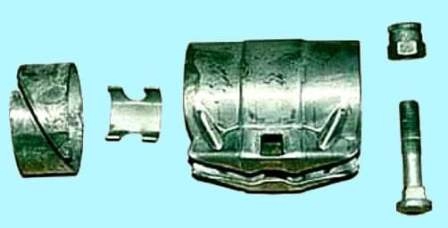
To replace the additional or the main silencer, it is necessary to cut the pipe connecting them.
To do this, we draw with chalk or a marker a line in the middle between the two marks on the pipe connecting the silencers.
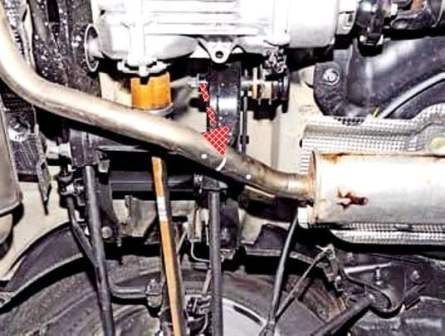
With a hacksaw we cut the pipe according to the applied mark.
Then, when replacing the main silencer, we take the silencer brackets out of the rubber cushions and remove the silencer.
When replacing the additional silencer, we also cut the pipe connecting the silencer and the catalytic converter (see above) and remove the additional silencer, having taken the bracket of its pipe out of the rubber cushion.
When installing the new main or additional silencer, at the place of connection of their pipes we use a special clamp.
On a 4x2 car, the exhaust gas system can also be replaced either entirely or by its separate elements, which are supplied as spare parts.
To replace the catalytic converter, it is necessary to cut the pipe connecting the catalytic converter and the additional silencer.
The place of the cut is shown on the pipe by marks in the form of two points, between which the cut should be made.
To replace the additional or the main silencer, it is necessary to cut the pipe connecting these parts according to the marks, as in the case of replacing the catalytic converter.
Removing the exhaust manifold
We carry out the work when replacing the gasket in the connection of the exhaust manifold with the cylinder head or when repairing the cylinder head.
The place of the joint of the manifold with the mating surface of the cylinder head is sealed with a metal gasket.
In the case when the gasket has burned through or the tightening of the nuts securing the manifold has weakened, the exhaust gases may escape through this connection to the outside, which is accompanied by a characteristic sound.
If it is not possible to eliminate the defect by tightening the nuts securing the exhaust manifold, it is necessary to replace the gasket.
We carry out the work on an inspection pit or a trestle.
We remove the air filter housing (article — Removing and installing the engine receiver).
We disconnect the metal compensator flange from the exhaust manifold flange of the exhaust system (see above).
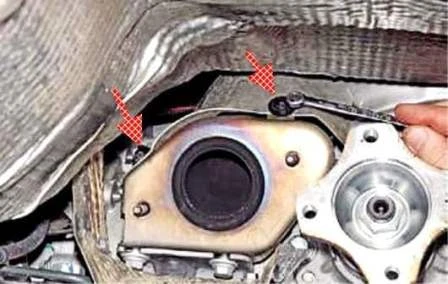
From below the car, with an 8 mm ring spanner we unscrew two bolts securing the upper protective shield to the exhaust manifold flange.
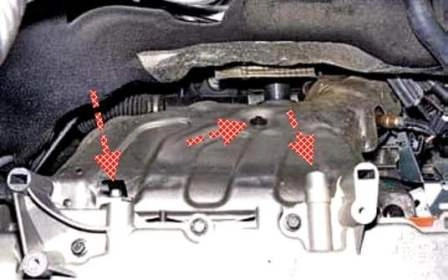
From above, with the same tool, we unscrew three bolts securing the upper heat shield to the exhaust manifold.
We remove the upper heat shield.
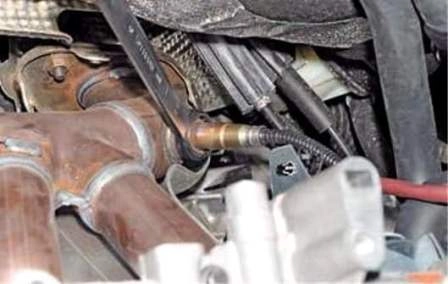
We unscrew the control oxygen concentration sensor from the opening of the exhaust manifold (article — Removing the ECU and the sensors of the engine management system).
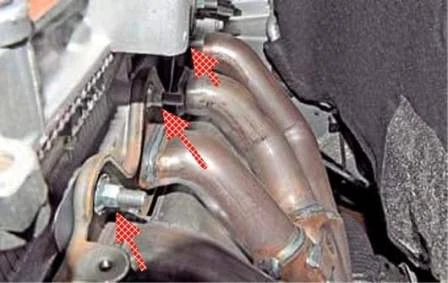
With a deep 10 mm socket we unscrew nine nuts securing the exhaust manifold to the cylinder head.
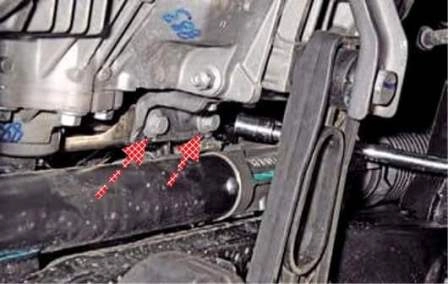
With a 13 mm socket we unscrew by a few turns two bolts securing the exhaust manifold to the gearbox bracket.
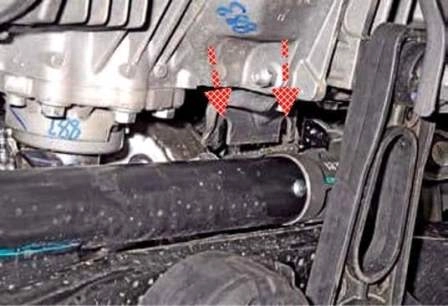
We shift the exhaust manifold along the studs of the cylinder head and bring the bolts out of the slots of the gearbox bracket.
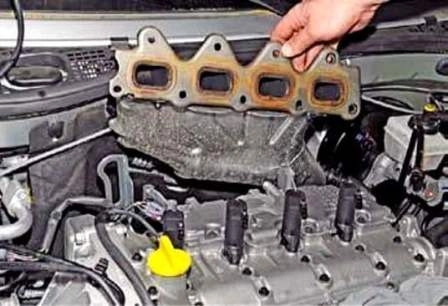
We take out the exhaust manifold.
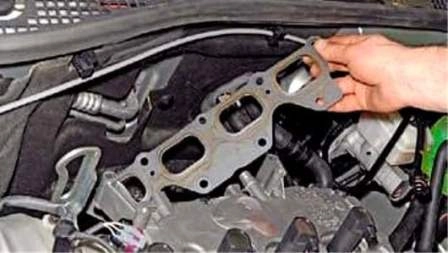
We remove the metal gasket of the exhaust manifold.
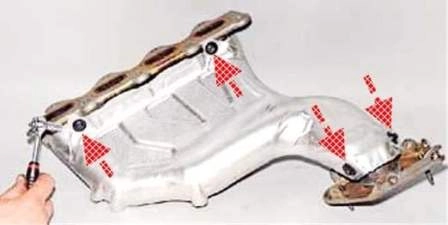
With an 8 mm socket we unscrew four bolts securing the lower heat shield to the exhaust manifold.
We remove the shield.
Before mounting the exhaust manifold, we clean the mating surfaces of the cylinder head and the exhaust manifold from carbon deposits and install a new gasket.
Before screwing in the nuts securing the manifold, we apply graphite powder to the studs of the cylinder head.
We tighten the securing nuts to a torque of — 18 N·m.
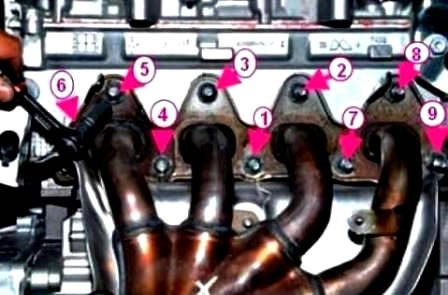
We tighten in the sequence shown in the photo.
We screw in the bolts securing the exhaust manifold to the gearbox bracket after tightening the nuts securing the manifold to the cylinder head.


