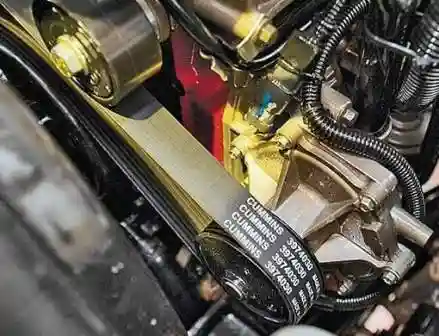
The tension and condition of the auxiliary drive belt must be checked at every service.
The belt must show no traces of engine oil, no scuffing, no fraying, no cracks and no depressions.
A characteristic squeal during engine operation indicates insufficient belt tension and the need to replace the belt.
With insufficient belt tension, the voltage at the alternator terminals may drop and coolant circulation in the engine cooling system may deteriorate.
If we remove the belt not for replacement, we must mark one of its edges so as to preserve its direction of travel during reassembly.
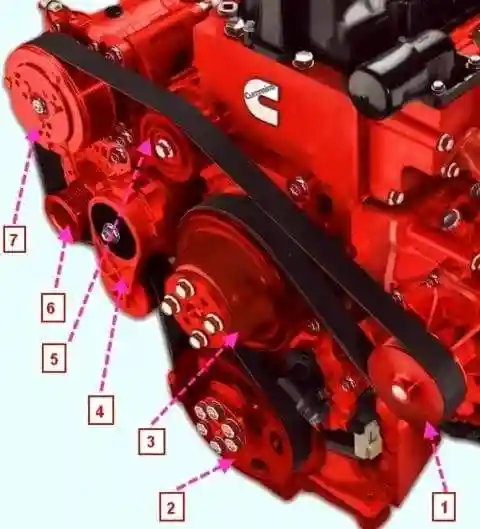
A worn tensioner mechanism or pulley misalignment can cause the belt to jump off.
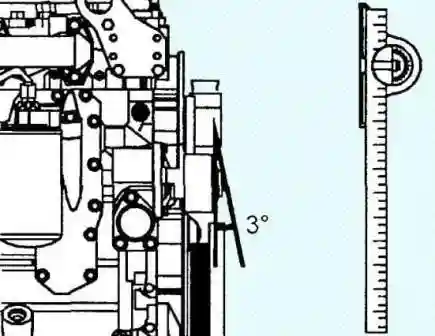
To check the pulley installation, use the pulley alignment tool (No. 3163524). In its absence, a straight edge and an inclinometer can be used. The maximum pulley misalignment must not exceed 3°. If necessary, repair, adjust or replace parts with disturbed alignment.
Removal of the auxiliary drive belt
Caution! The tensioner is under spring load and must be moved away from the belt. Moving the tensioner in the wrong direction may damage it. The tensioner is moved aside so that the spring tongue bends onto the mechanism housing. To release the belt tension, turn the tensioner while releasing the spring.
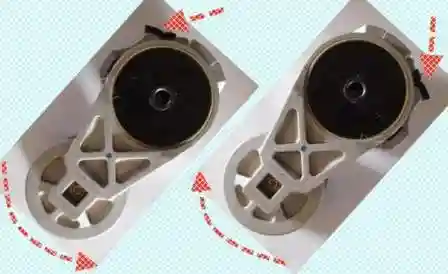
Caution! Excessive force when turning the tensioner in the spring-release direction, or to the stop when the spring is already fully released, may break its lever.
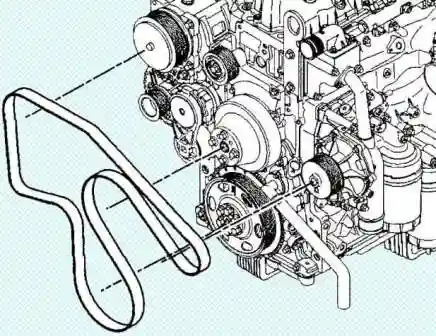
Turn the tensioner mechanism towards the spring tongue and remove the belt.
Checking the belt and the tensioner
Check the drive belt for the absence of the following damage:
- cracks;
- oil contamination;
- tears or cuts;
- hardening;
- excessive wear.
Replace the belt if damage is found.
Check the idler and drive pulleys for wear or cracks. Check the plastic pulleys for deposits of road dirt or particles of the material from which the pulley is made. Remove the dirt with a suitable tool and check for wear. It is recommended to clean the idler pulleys, check their condition and reuse them rather than replace them.
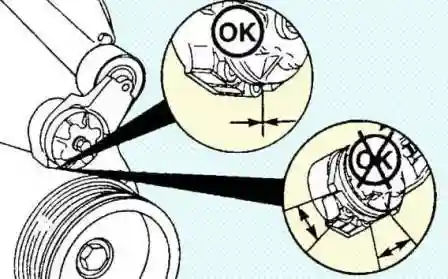
With the belt removed, check the contact between the tensioner lever stop and the stop on the spring housing. If there is no contact, replace the tensioner.
With the tensioner removed, measure the clearance between the tensioner mechanism spring and its lever to check the wear of the tensioner mechanism and the bearing.

If the clearance at any point exceeds 3 mm, the tensioner mechanism is considered to have failed and must be replaced. Typically, tensioner mechanisms show increased clearance near the lower part of the spring housing, causing the upper part of the housing to begin rubbing against the tensioner lever.
When replacing the tensioner, always replace the belt.
Check the tensioner for signs of contact between the lever and the tensioner cover. Signs of contact between the two parts indicate a fault in the tubular axle bush, and the tensioner must be replaced.
Installation of the auxiliary drive belt
- Install the tensioner and screw in the bolt (if removed). Tightening torque: 43 N·m.
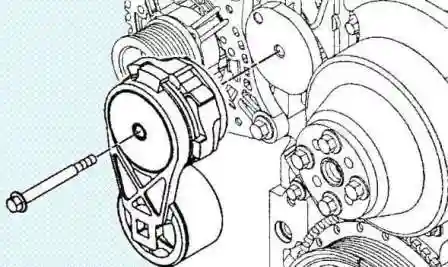
- Install the belt on the engine according to the diagram drawn up during its removal. At this stage, do not install the belt on the coolant pump pulley.
- Move the tensioner towards the spring tongue and install the drive belt, placing it on the coolant pump pulley last.
- Release the tensioner to ensure the drive belt tension.
- Check that the belt position on the tensioner and on the auxiliary drive pulleys at the front of the engine is correct.
After installing the belt, make sure that no stop of the tensioner mechanism lever touches the stop on the spring housing. If at least one stop touches:
- make sure that the belt installed has the correct catalogue number;
- if the correct belt is installed, replace it.
After replacing the belt, if the tensioner lever stops still touch the stop on the spring housing, replace the tensioner.
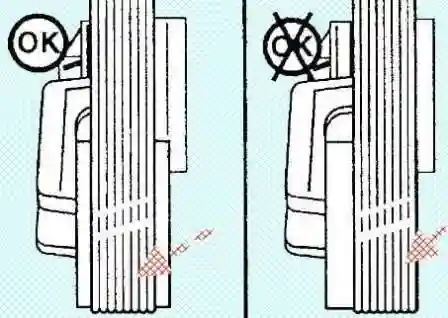
Check the position of the drive belt on the tensioner pulley. The belt must be located in the middle of the pulley or close to its middle. An incorrect belt position with a shift forward or backward can cause belt wear, the belt jumping off the pulley or uneven wear of the tensioner bush.