Preparing the car for work. Disconnect the negative battery terminal.
Removing the transmission
On a car with a manual transmission, remove the flywheel.
On vehicles with automatic transmission, unscrew the bolts and remove the torque converter drive plate.
Remove the crankshaft rear oil seal
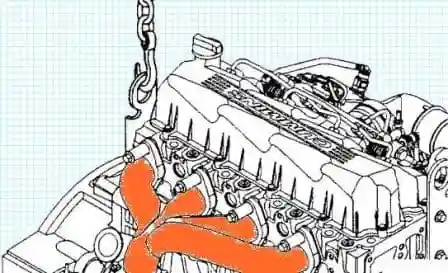
Hanging out the back of the engine
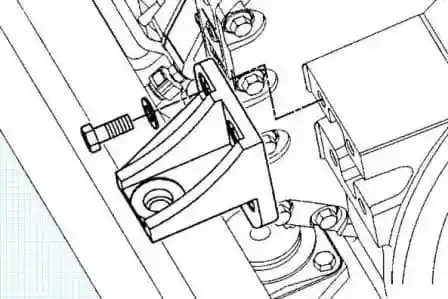
Remove the brackets of the rear engine mounts
Loosen, but do not unscrew the flywheel housing bolts
Using a hammer with a rubber head, we tap the flywheel housing so as to break the seal between the housing and the rear cover of the timing gears.
Holding the flywheel housing, unscrew the bolts and remove the flywheel housing.
You need to remember or mark the flywheel housing bolts.
Some bolts vary in length. It is necessary to install the bolts during assembly in their places.
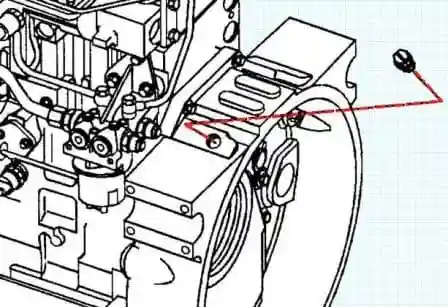
We unscrew and remember the location of the flywheel crankcase plugs
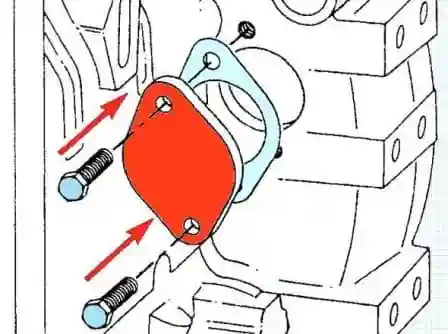
We unscrew the bolts of the technological plug and remove it together with the gasket.
Remove the high pressure pump (high pressure pump)
Remove the compressor (if installed)
Remove the camshaft gear, for this:
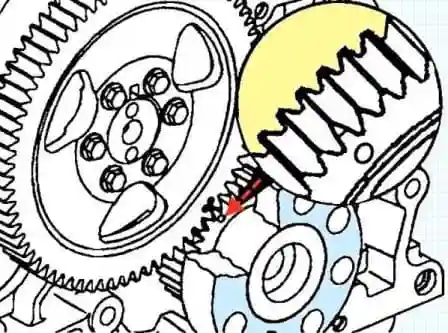
Turn the crankshaft until the alignment marks are aligned.
The timing mark can be on the camshaft gear or beveled tooth.
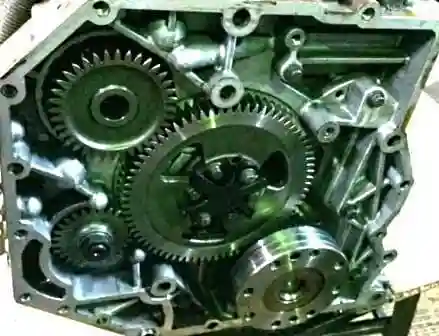
- On engines with an air compressor, it may be necessary to synchronize the positions of the gears of the air compressor and the camshaft.
To ensure that the air compressor is correctly timed to the camshaft gear when installed, mark the camshaft gears before removing the camshaft gear.
Models with air compressor: to remove the camshaft gear, you must loosen the fasteners of the air compressor.
It is not necessary to completely remove the air compressor.
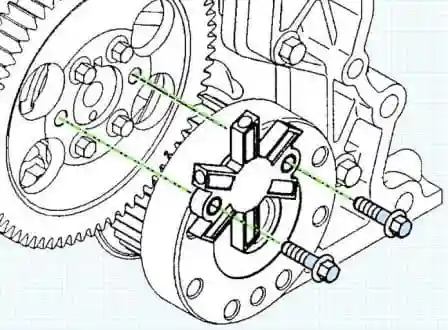
We unscrew the two bolts and remove the crankcase ventilation disc from the camshaft gear.
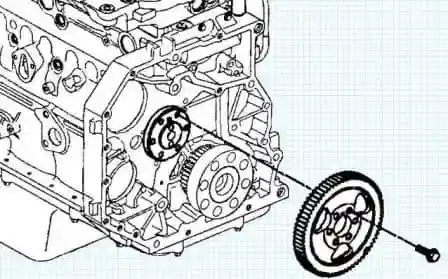
We unscrew the bolts of the camshaft gear and remove the camshaft gear.
Remove the camshaft, for this:
- - remove the cylinder head cover;
- - remove the valve levers (rocker arms);
- - remove the rods;
- - raise pushers;
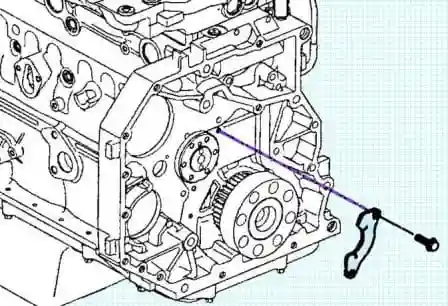
- unscrew the bolts stronger stop plate and remove the stop plate;
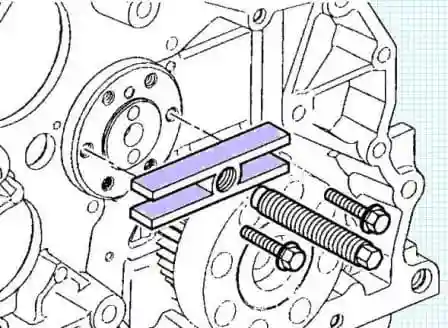
- install a gear puller on the end of the camshaft. This will give the necessary leverage and make it easier to remove the camshaft;
When removing the camshaft, you need to hold it so as not to damage its neck when it exits the last bushing.
- take out the camshaft.
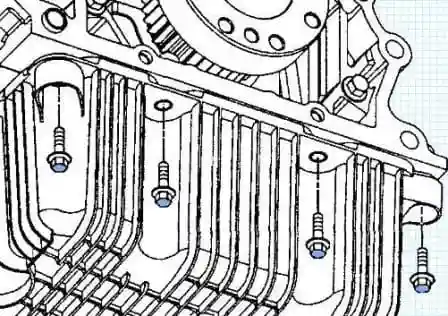
We unscrew the four bolts securing the oil pan to the rear timing gear housing.
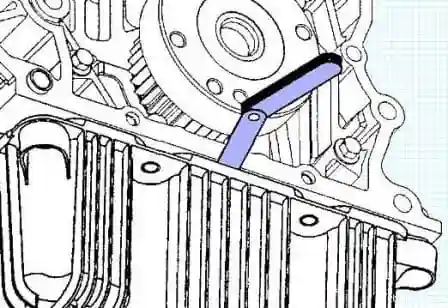
Using a dipstick, disconnect the oil pan from the rear timing gear housing.
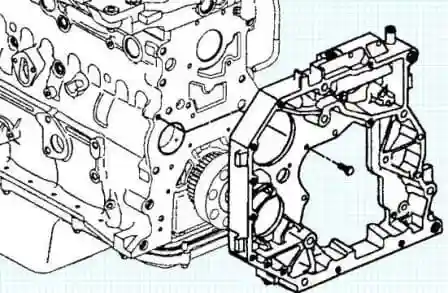
Remove the rear timing gear housing by unscrewing the bolts.
The rear timing gear housing is attached with three bolts of various lengths and diameters. You need to remember or tag these bolts.
Install
Apply a bead of sealant Ø 1.5-2 mm on the gear housing from the side of the cylinder block, as shown in the figure.
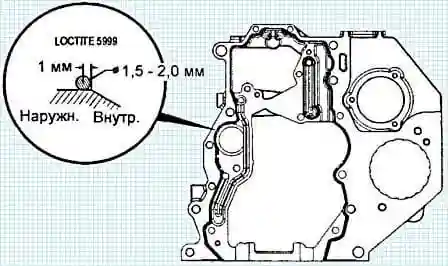
Install the case and tighten the mounting bolts
We make sure that there is a bead of sealant at the intersection of the joints of the cylinder block, oil pan and gearbox housing.
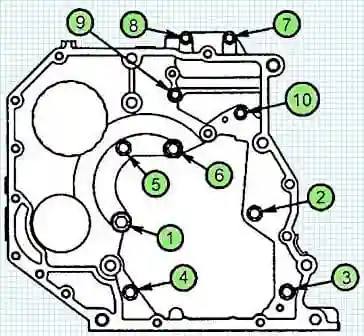
Tighten the bolts in the order shown in the figure. Tightening torque: M12 bolts - 77 Nm; bolts M10 - 47 Nm; M8 - 24 Nm.
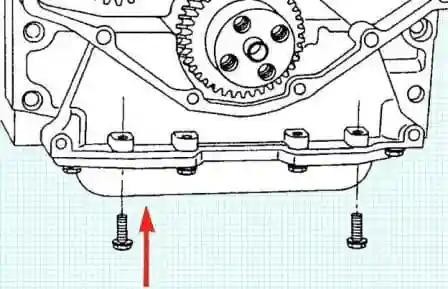
Tighten the four bolts securing the rear timing gear housing to the oil pan. Tightening torque - 24 Nm.
We replace the rear camshaft oil seal, for this:
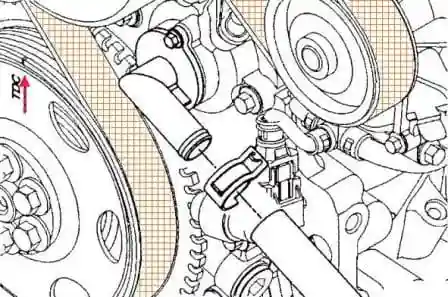
- - remove and remember the location of the ventilation hose clamp. Disconnect the hose;
- - unscrew the bolts and remove the crankcase ventilation tube;
- - replace the rear oil seal;
- - install the crankcase ventilation tube;
- - connect the hose and install the clamp.
Install the camshaft, for this:
- apply assembly grease to the rear bore for the camshaft;
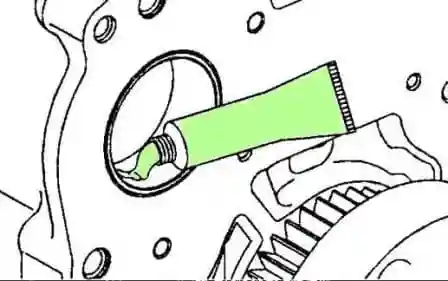
- - lubricate the cams, necks and thrust washer with assembly grease;
- - install a puller on the end of the camshaft;
- - slightly pressing and turning the shaft, carefully insert it through the holes for the camshaft.
As each shaft journal passes through the holes, it will drop slightly, and the cams will touch the bushings.
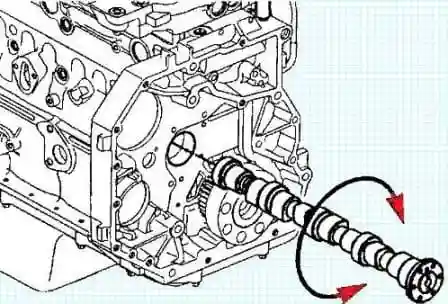
Turning the camshaft will move the cams out of contact with the bushing, and allow the camshaft installation to continue.

Installing the thrust plate. The tightening torque of the thrust plate mounting bolts is 24 Nm.
After that, you need to make sure that the camshaft rotates freely.
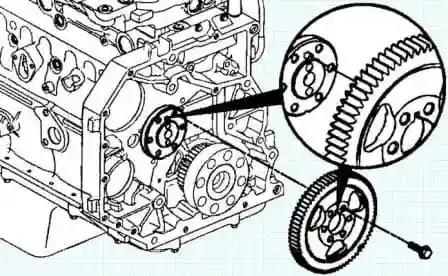
Turn the camshaft until its pin aligns with the gear groove. Installing the gear.

Combine the alignment marks of the gears of the crankshaft and camshaft.
Tighten the camshaft mounting bolts.
If an air compressor is installed on the engine, you need to make sure that the marked marks of the camshaft and compressor gears were aligned during installation.
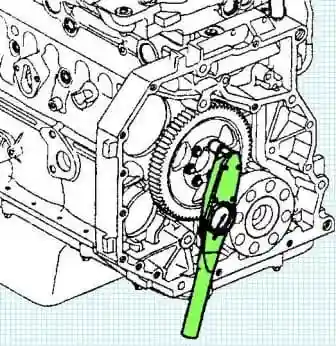
Tighten the camshaft gear bolts. Tightening torque - 36 Nm.
Install the crankcase ventilation disc, for this:
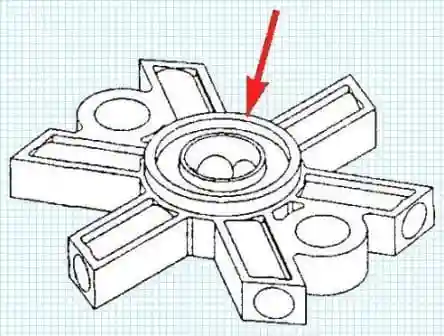
- you need to make sure that the gland is installed in the disk;

- install the crankcase ventilation disk on the camshaft gear and tighten the bolts of its fastening. Tightening torque - 28 Nm.
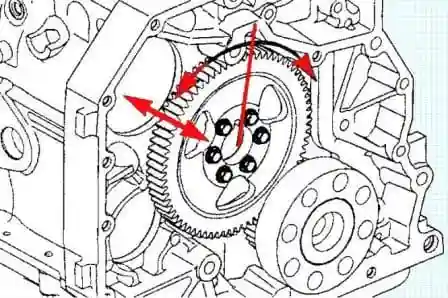
Checking the axial and radial play of the camshaft gear:
- - axial play - 0.100 - 0.360 mm;
- - radial play - 0.076 - 0.280.
After this:
Tightening the air compressor mount (if installed)
Lower the pushers
Installing the rods
Installing the rockers
Installing the cylinder head cover
Installing the flywheel housing
Installing the flywheel or torque converter drive plate (depending on the gearbox)
Installing the transmission
Connect the battery and start the engine. We inspect for leaks.


