


We replace the shock absorber in the event of severe fluid leakage, the appearance of unusual noises, or a significant loss of damping properties.
We replace the stabilizer bar if it is severely deformed, has cracks, or if the rubber bushings and links show critical wear.
Shock absorber replacement
Position the vehicle on a lift or in an inspection pit.
Thoroughly clean dust and dirt from the shock absorber mounting points (upper bracket and axle eye).
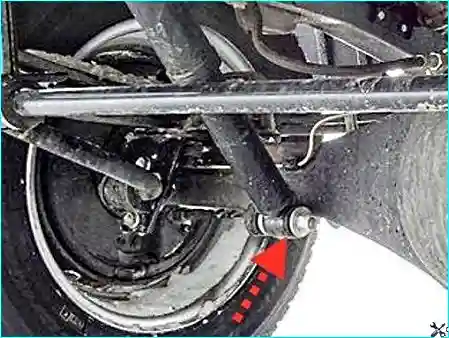
Unscrew the lower mounting nut of the shock absorber. Remove the thrust washer and detach the lower end of the shock absorber from the bracket pin.
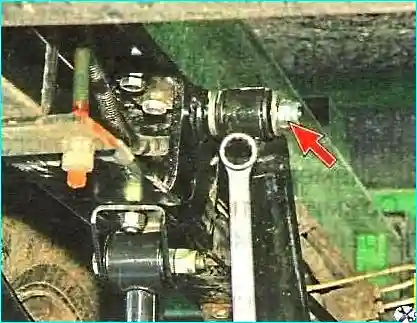
Unscrew the upper mounting nut, remove the thrust washer, and pull out the shock absorber.
Important: When installing a new shock absorber, it is recommended to use new self-locking nuts. Tighten the threaded connections to a torque of 40–60 N·m.
Install the shock absorber in the reverse order.
Stabilizer bar replacement
Clean dust and dirt from the mounting points of the stabilizer components.
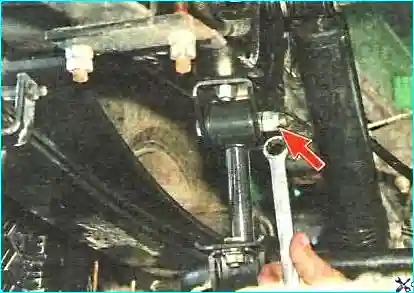
Unscrew the nuts securing the ball joint ends of the links to the suspension arms.
Unscrew the nuts of the clamps securing the stabilizer links to the stabilizer bar itself.
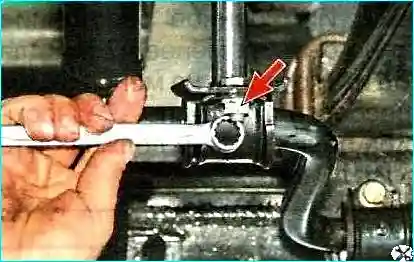
Remove the bolts from the joint holes and detach the stabilizer links.
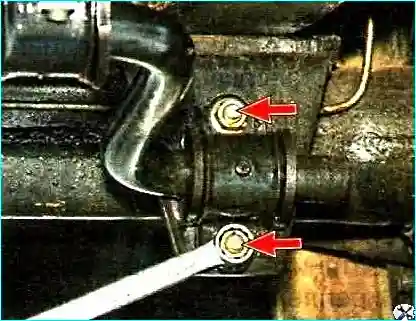
Unscrew the nuts of the clamps securing the bar to the rear axle brackets and remove the stabilizer bar.
Carefully inspect all stabilizer components.
In case of slight deformation of the bar (if its ends are not in the same plane), careful straightening is permitted.
In the event of significant deformation, cracks on the bar, links, or brackets, as well as wear or cracking of the rubber bushings, the defective parts must be replaced.
Recommendation: Before assembly, lubricate the rubber bushings of the bar with soapy water or silicone grease to facilitate installation and prevent squeaking. Tightening torque for the stabilizer clamp nuts: 20–30 N·m, link nuts: 40–60 N·m.
Install the stabilizer in the reverse order.


