We remove the front wheel drives to gain access to other units, as well as for repair and replacement
Removing the left drive
We prepare the car and install it on a lift or an inspection ditch
Remove the engine mudguard
Draining the gearbox oil
Remove the decorative wheel cap
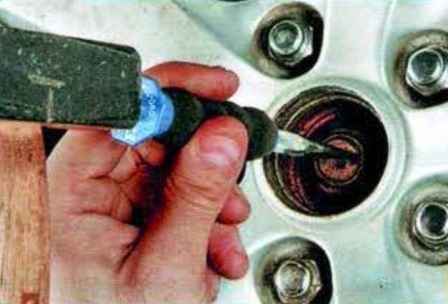
With a thin chisel, we bend the jammed edges of the collar of the wheel hub nut
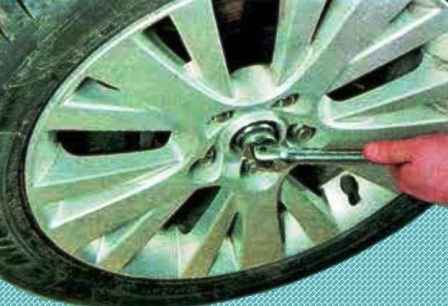
Loosen the wheel hub nut
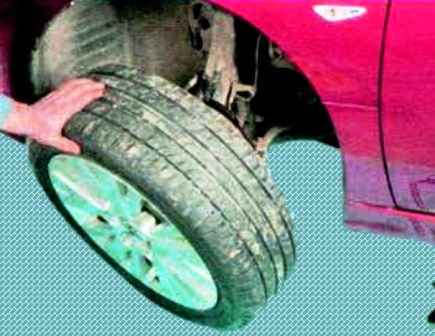
Loosen the wheel nuts, raise the front of the car and remove the wheel
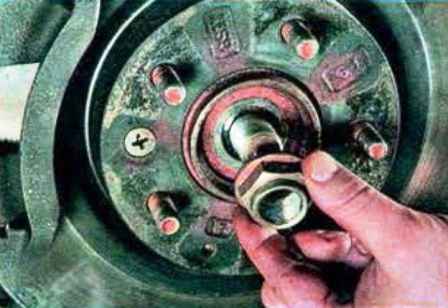
Unscrew the hub nut completely
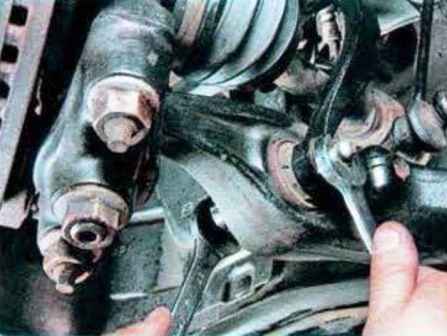
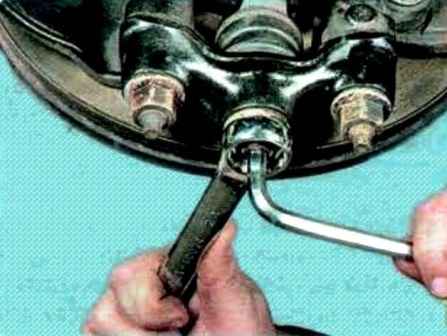
Unscrew the nut and remove the bolt securing the rack support to the lower arm
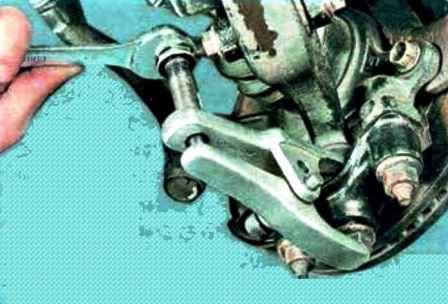
While holding the ball joint pin from turning, unscrew the nut and press the pin out with a puller
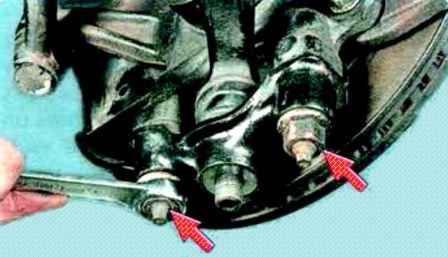
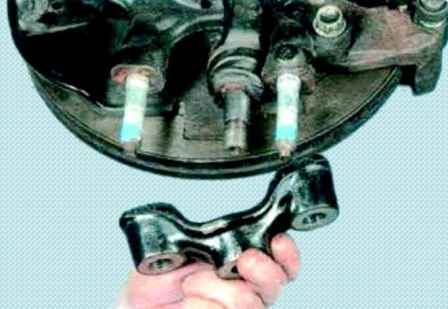
We unscrew the two fastening nuts and remove the bracket for fastening the ball joint of the lower arm
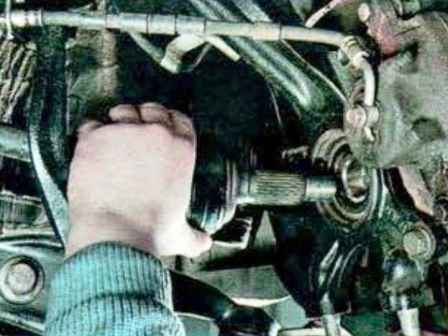
Slightly move the steering knuckle aside and remove the outer joint shank from the hub
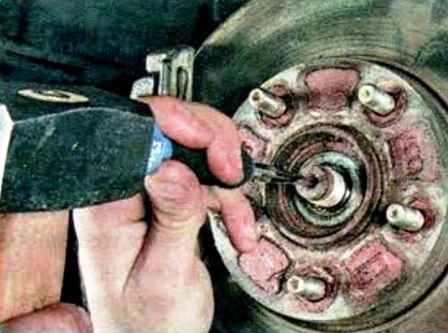
If it is not possible to remove the hinge shank with the force of the hands, we knock it out of the hub with light blows of a hammer through a soft metal drift
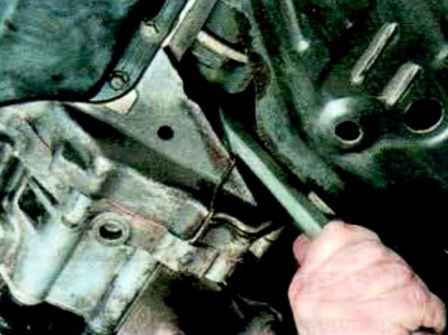
Having rested the mounting blade on the gearbox housing, we press out the internal hinge of the drive from the side gear and remove the left wheel drive
The gap between the inner joint housing and the gearbox housing is small, it is impossible to immediately insert the end of the mounting blade into it.
Having introduced the pointed part of the mounting blade into the gap, with gentle hammer blows along the blade, we drive its end deep into the gap and move the hinge body away from the crankcase with it like a wedge until the retaining ring of the hinge shank comes out of the axle gear. Then we finally push the hinge shank out of the gear with a spatula
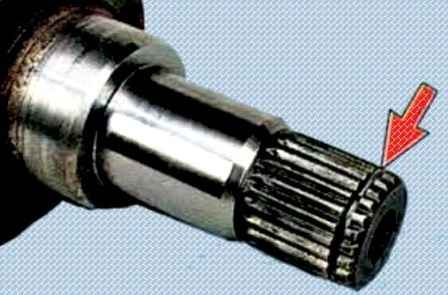
Inner joint shank retaining ring must be replaced every time the drive is removed from the vehicle
Installing the left wheel drive
To install the drive, first insert the splined shank of the outer joint housing into the wheel hub, screw the hub nut until it stops, without completely tightening it.
Insert the splined shank of the inner joint housing into the axle shaft seal and rotate the drive shaft slightly so that the splines of the joint shank and the axle gear are aligned.
Pull down the front suspension arm and with a sharp movement of the steering knuckle, press the drive into the gear of the axle shaft until the drive is fixed with the retaining ring.
With a sharp jerk at the steering knuckle, try to pull the inner joint shank out of the side gear. If this was successful, repeat the installation of the hinge into the gear.
If another attempt fails, replace the inner pivot shank retaining ring.
After installing all the parts, fill the gearbox with oil (working fluid)
Install the wheel (if its disc is stamped) and tighten the wheel nuts until they stop, without completely tightening them.
Put the vehicle on its wheels, off the supports, and tighten the hub bolt.
Finally tighten the hub nut with the vehicle on the ground to 235 Nm (23.5 kgcm). It is strictly forbidden to move the car with the hub nut loose.
Tighten the wheel nuts
Removing and installing the right front wheel drive
To remove the right front wheel drive, follow these steps.
Follow the operations on the right side of the vehicle that were performed on the left side to remove the left front wheel drive (see above).
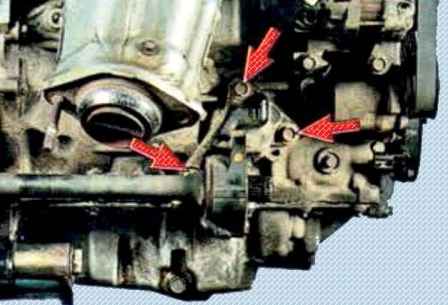
Remove the three nuts securing the intermediate support bracket to the engine block and remove the right front wheel drive assembly.
Install the intermediate support in the reverse order of removal.
To install the drive, first insert the splined shank of the outer joint housing into the wheel hub, screw the hub nut until it stops, without completely tightening it
Then, insert the splined shank of the inner joint housing into the axle shaft seal and turn the drive shaft slightly to match the splines of the joint shank and the axle gear.
Pull down the front suspension arm and with a sharp movement of the steering knuckle, press the drive into the gear of the axle shaft until the drive is fixed with the retaining ring.
With a sharp jerk at the steering knuckle, try to pull the inner joint shank out of the side gear. If this was successful, repeat the installation of the hinge into the gear.
If another attempt fails, replace the inner pivot shank retaining ring.
After installing all the parts, fill the gearbox with oil (working fluid)
Install the wheel (if its disc is stamped) and tighten the wheel nuts until they stop, without completely tightening them.
Put the vehicle on its wheels, off the supports, and tighten the hub bolt.
Finally tighten the hub nut with the vehicle on the ground to 235 Nm (23.5 kgcm). It is strictly forbidden to move the car with the hub nut loose
Tighten the wheel nuts


