Replace the seals if there is a lubricant leak
Please note that if the gas recirculation system is clogged, then oil leakage from under the seals may occur due to increased gas pressure in the engine crankcase
To perform the work, you will need the following tools: socket heads for 15, 18, wrenches for 10, 12, 15, 17, a mandrel for centering the driven disk of the clutch, screwdrivers, a hammer.
Replacing the front crankshaft seal
Prepare the car for the work.
Place the car on an inspection ditch or lift.
Drain the liquid from the engine cooling system.
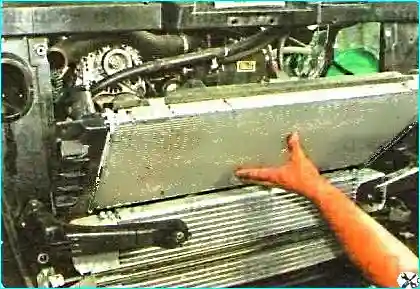
Removing the cooling system radiator
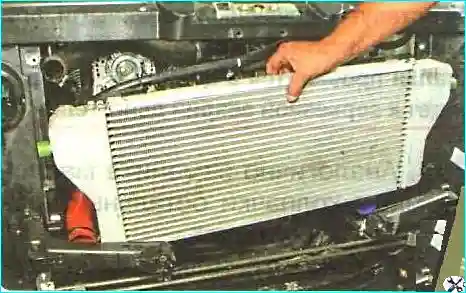
Removing the charge air cooler (intercooler)
Removing the accessory drive belt (article – Auxiliary drive belt replacement).
Unscrew the support from the axis and remove the clutch with the fan.
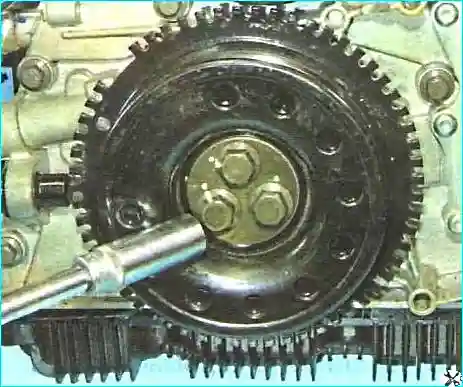
Unscrew the three crankshaft pulley mounting bolts
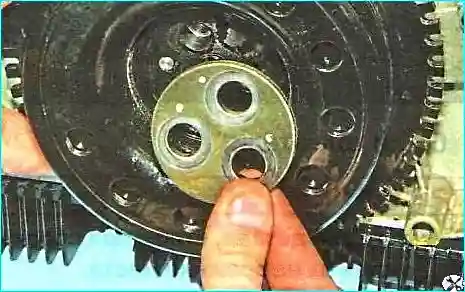
Removing the pressure plate
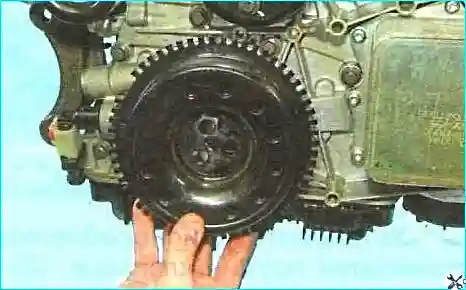
Removing the pulley
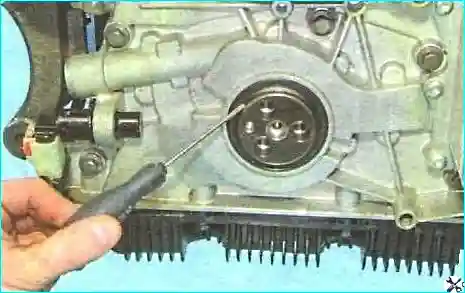
Pry the oil seal out of the oil pump housing with a screwdriver
If you can't remove the oil seal with a screwdriver, read on.
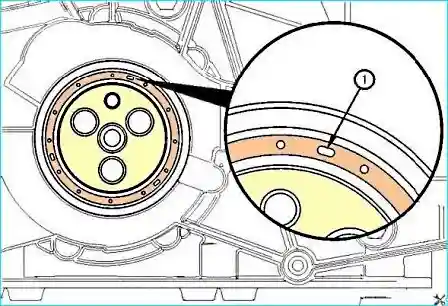
The front crankshaft oil seal of the ISF2.8 engine has drilled grooves in the housing (1), covered with rubber inserts.
These grooves are designed to simplify the removal of the oil seal and eliminate the need to drill out the oil seal.
Clean the surface of the front crankshaft oil seal.
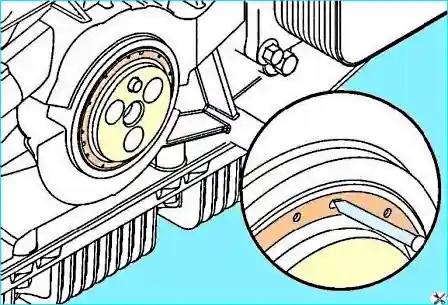
To more accurately determine the position of the drilled grooves, pierce the recesses with a suitable awl.
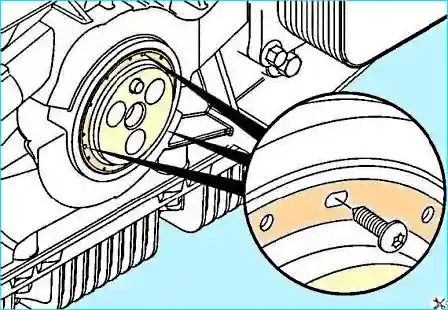
Insert 3.5x20 mm self-tapping screws into the slots drilled in the oil seal housing.
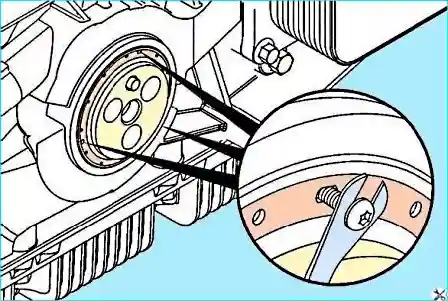
Using a forked-end pry bar, remove the oil seal as shown in Figure 10
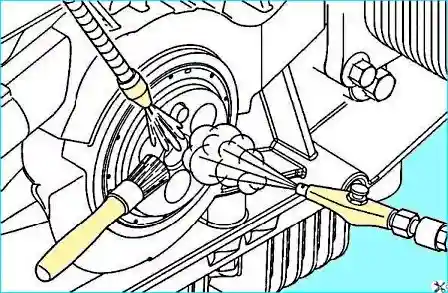
Remove oil and sealant residue from the crankshaft surface with solvent and dry with compressed air.
Check the hole in the front timing gear cover for nicks or burrs.
Remove minor damage with an abrasive block and blow with compressed air.
Check the crankshaft nose for excessive wear. Minor damage should be sanded with fine-grained sandpaper.
The front crankshaft oil seal is supplied with a plastic guide inserted in the center.
Do not remove it before installation, but use it to position the oil seal on the nose of the crankshaft.
Lubricate the working edge of the new oil seal with engine oil. We orient the oil seal with the working edge inside the engine.
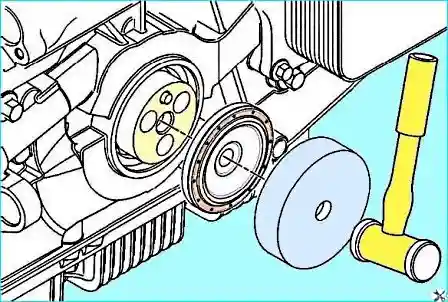
Using mandrel No. 4919374, we install the oil seal in the front timing gear housing.
The mandrel covers the oil seal and installs it to a depth when it is flush with the end of the front timing gear housing.
By tapping the mandrel with a plastic-headed hammer at points 90˚ apart.
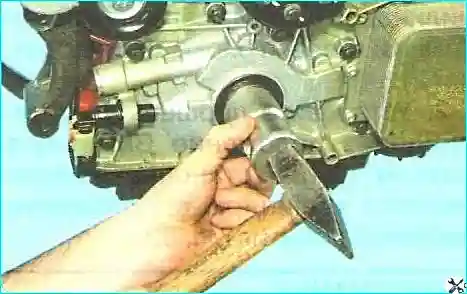
If the original mandrel is missing, you can use the old oil seal as a mandrel.
Replacing the rear crankshaft oil seal
Removing the gearbox
Removing the clutch
Removing the flywheel (article – Removing and installing the flywheel engine)
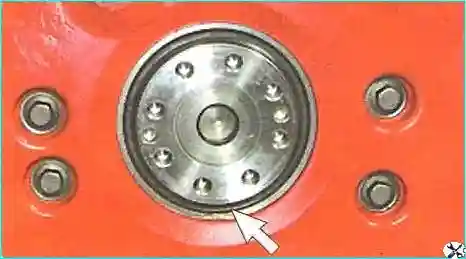
Inspecting the oil seal. If oil leakage is visible at the bottom of the seal, the seal is not tight.
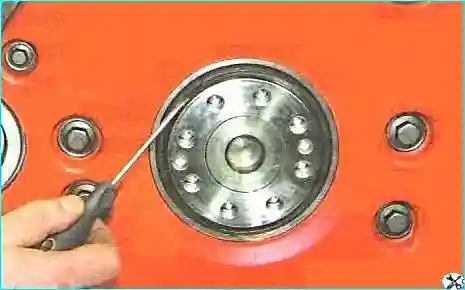
Pry the seal with a screwdriver and remove the seal.
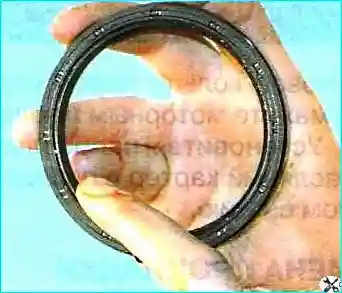
Lubricate the working edge of the oil seal with engine oil
Install the oil seal in the flywheel housing socket, orienting the working edge inside the engine.
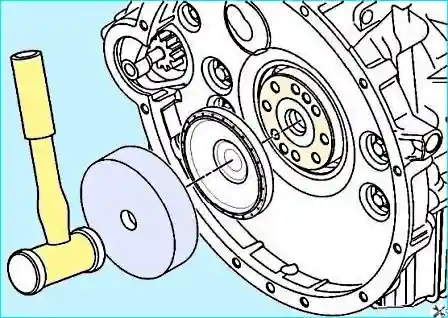
Using the mandrel No. 4919375, hammer the oil seal in with a plastic-headed hammer.
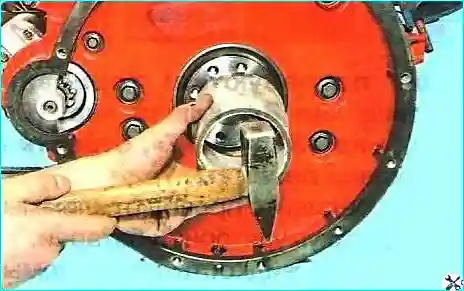
If there is no mandrel:
Carefully insert the working edge of the seal onto the crankshaft journal and press it flush with the surface of the flywheel housing using a mandrel of the appropriate size.
The original seal is sold with a special plastic mandrel installed on it, which does not need to be removed before installing the seal.
The plastic mandrel ensures that the seal is correctly seated to the required size.
Reinstall all removed parts in the reverse order.


