The car is equipped with a three-phase alternator with electromagnetic excitation, with a built-in rectifier unit and an electronic voltage regulator
A fan impeller and a drive pulley are located on the generator shaft.
The shaft is mounted on sealed bearings that do not require additional lubrication during the entire service life.
The shaft is driven from the crankshaft pulley by a V-ribbed belt.
In addition to the electronic regulator built into the generator, the electronic engine block additionally controls the generator's operating modes.
The electronic unit automatically increases the output voltage of the generator at low ambient temperatures for more efficient recharging of the battery.
The electronic unit turns off the generator when the engine is started, and also increases the engine speed at idle when the generator is under high electrical load
If any malfunctions of the power supply system occur and when the ignition is turned on with the engine off, the engine control unit turns on the battery discharge indicator
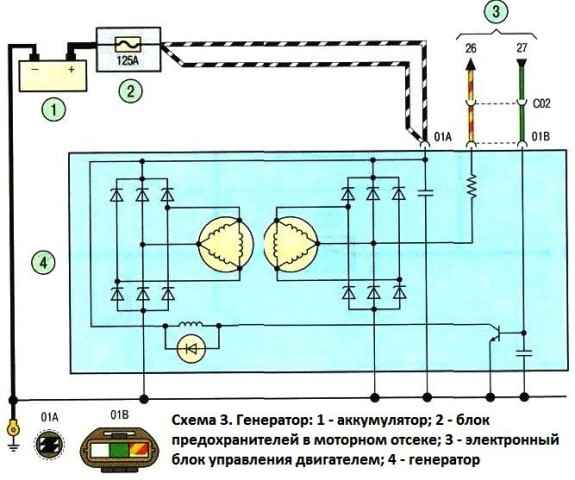
Possible generator malfunctions and solutions
When the ignition is turned on, the battery discharge indicator does not light
- wire break between the engine control unit and the signaling device
Fix the break
- signaling device burned out
Replace the alarm
The low battery indicator does not go out after starting the engine
- weak tension of the auxiliary drive belt
Change the belt
- the generator is faulty (wear of the generator brushes or loose contact rings; the excitation winding of the generator burned out, the diode bridge or voltage regulator is faulty)
Replace or repair the generator
- wire break between the engine control unit and the generator, between the generator and the battery, or between the generator and the mounting block in the cabin
Fix the break
- faulty electronic engine control unit
Replace electronics
- the mounting block in the cabin is faulty
Replace mounting block
The generator does not charge the battery
- oxidation of battery terminals
Clean and lubricate the cable lugs and battery terminals with petroleum jelly
- faulty battery
Replace battery
- weak tension of the auxiliary drive belt
Change the belt
- the mounting block in the cabin is faulty
Replace mounting block
- the generator voltage regulator or the electronic engine control unit is faulty
Replace defective parts
The battery is being recharged
- the generator voltage regulator or the electronic engine control unit is faulty
Replace defective parts
- increased voltage drop in the generator-battery circuit
Check the ignition switch, fuse and relay mounting block, check the connection of the generator housing to the "ground"
Removing and installing the generator
Disconnect the negative cable from the battery
Remove the alternator drive belt, as described in the article "How to check and replace the Mazda 6 accessory drive belt"
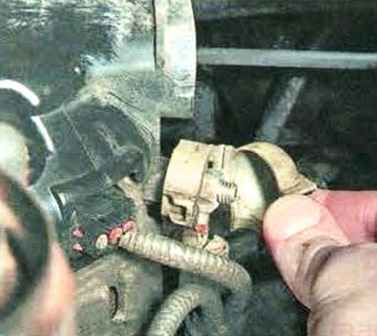
Remove the plastic cap of the generator wire tip
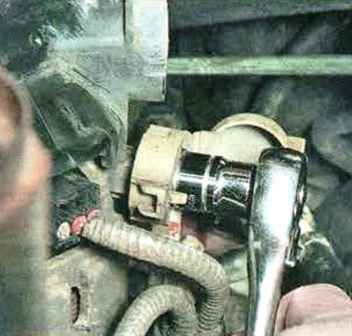
We unscrew the nut that secures the tip of the power wire and disconnect the wire from the generator output
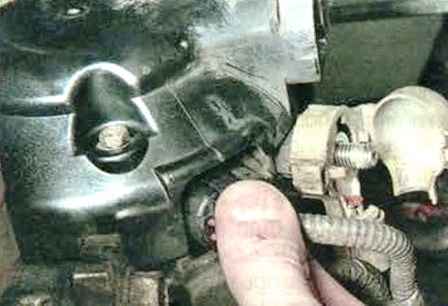
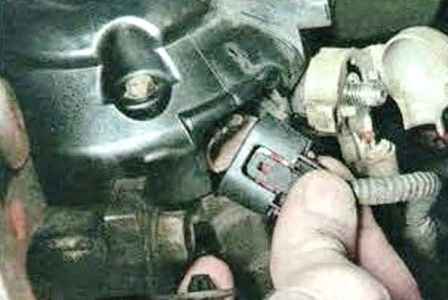
We press the latch and disconnect the tip of the excitation wire of the generator winding
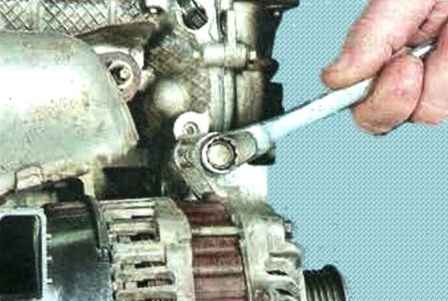
Unscrew the generator mounting bolts
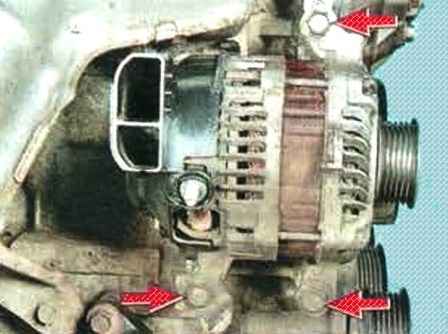
The arrows show the location of the bolts securing the generator to the cylinder block
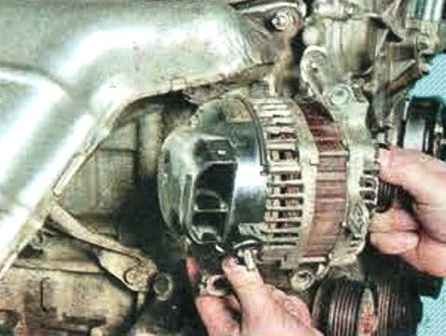
Remove the generator
Install the generator and all parts in reverse order


