
Remove the fuel tank for flushing or replacement
Preparing the car for the task. It is desirable that the tank is empty.
We install the car on a lift or a viewing ditch.
Relieve the fuel pressure in the power system and disconnect the wiring harness connector from the fuel module cover connector (see the article - Renault Duster Fuel Module Repair).
Remove the muffler along with the pipes (article - Removing elements of the Renault Duster exhaust system) and the driveline (article - Replacing the driveline Renault Duster)

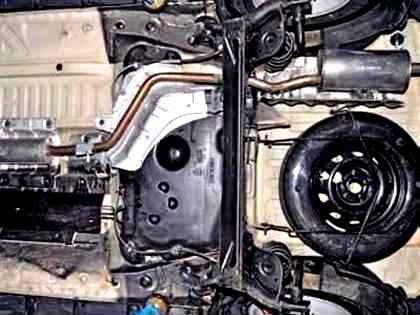
Connecting the filler neck to the filler pipe in the wheel arch of the right rear wheel (Fig. 1)

Disconnect the ground wire tip from the outlet of the filling pipe

Remove the filler cap

Remove the rubber sealing ring from the neck flange.

Using the TorxT-20 wrench, unscrew the two screws securing the neck to the filler pipe

The heat shield of the additional muffler is attached to the bottom of the tank with four caps

Using a Phillips screwdriver, unscrew the piston retainer a few turns

Hooking with a slotted screwdriver, remove the piston.
We also remove three more heat shield clips

Capture screen

Remove one of the parking brake cables from the front holder on the fuel tank

With side cutters, we bite the plastic clamp that fixes the rear holder of the parking brake cable

Remove the cable from the rear holder

We also remove another parking brake cable from two holders on the tank
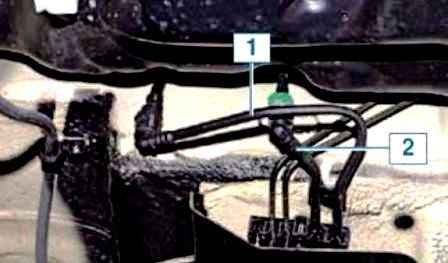
Under the bottom of the car, two pipes fit to the front of the fuel tank, a pipe connecting to the adsorber and fuel filter

By pressing the latch of the tip (gray) of the fuel supply pipe to the filter, disconnect the tip of the pipe connecting to the fitting of the fuel module cover

We also disconnect the tip of the other tube from the tube connecting to the fuel tank
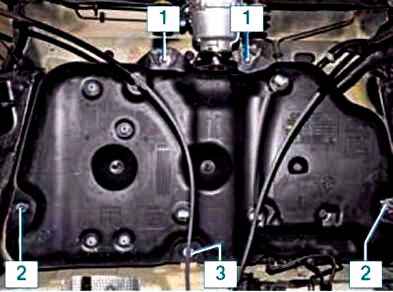
Fuel tank attachment points

We install an adjustable stop under the fuel tank, placing a wooden block so as not to damage the tank

With a high head at 13, we unscrew the two nuts of the side fastening of the fuel tank

We unscrew the two bolts of the rear and the bolt of the front fastening of the tank

Remove the metal gasket from the tank flange.
We also remove another metal gasket.

Slightly lowering the tank on the stop, we transfer the parking brake cables through it

When lowering the tank, we control the separation of the filler neck and its plastic adapter in connection with the body

We lower the fuel tank on an adjustable stop, holding the filler pipe

Remove the tank assembly with the fuel module.
If necessary, remove the fuel module from the tank.
Install the fuel tank in reverse order.
Fill fuel into the tank, turn on the ignition and check the tightness of the fuel line connections.
On a 4x2 car, the operations for dismantling the fuel tank are almost the same (only there is no operation to remove the driveline) as on a 4x4 car

")
")
")
")
")
")
")
")