


We remove the oil separator to clean it of deposits, and also when dismantling the cylinder head cover.
Flushing and cleaning of the crankcase ventilation system must be carried out without fail; otherwise, with a blocked system, the back pressure in the crankcase will force oil out through the engine seals.
For the work we shall need a screwdriver, a torque wrench, sealant and a knife.
We remove the receiver. See the article “Removing and fitting the engine intake manifold”.
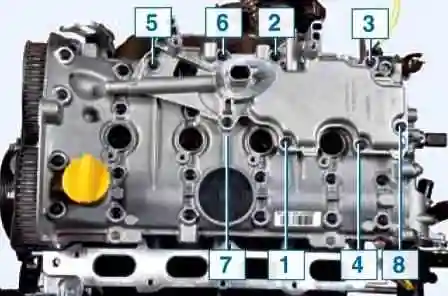
- Using an 8 mm socket (Fig. 1), we unscrew the eight oil separator retaining bolts from the cylinder head cover and remove the oil separator.
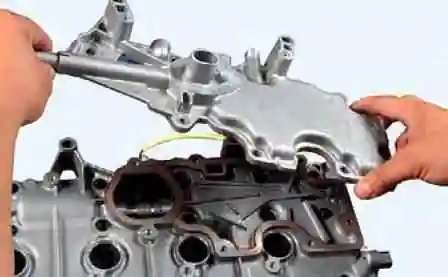
- Before fitting the oil separator, we clean and wash its cavities and channels of deposits with petrol.
- We remove the residues of the old sealant from the mating surfaces of the oil separator and the cylinder head cover and degrease the surfaces.
Important! The surfaces must be clean and dry; no fingerprints must remain on them.
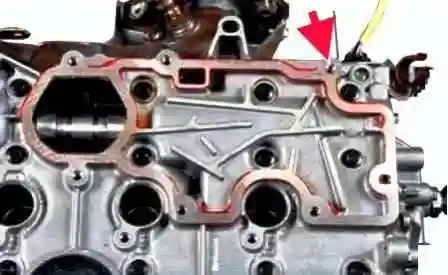
- We apply to the mating surface of the oil separator a special high-temperature sealant for flanged joints until the surface turns reddish.
- We fit the oil separator and tighten its retaining bolts in the indicated sequence to the prescribed torque.
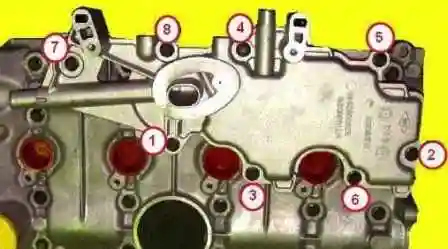
- We tighten the bolts in the sequence shown in Figure 4 to a torque of 13–15 N·m.
- Further assembly is carried out in the reverse order.