Fuel from the tank goes through the fuel line to the diaphragm pump.
It is driven by a camshaft eccentric that acts on the pump drive lever
A filter made of fine brass mesh is installed on the inlet fitting of the pump.
When the engine is not running, fuel is pumped into the carburetor using the manual pump drive lever.
There is a hole in the lower part of the pump housing to check the integrity of the fuel pump membrane.
Removing and disassembling the fuel pump
We conditionally remove the pump from the engine removed from the car.
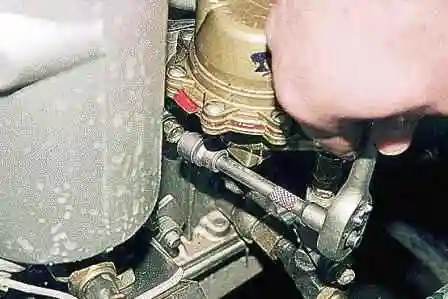
With a 12 head, we unscrew the two bolts securing the fuel pump
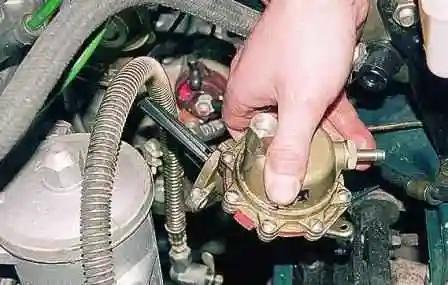
Remove the fuel pump
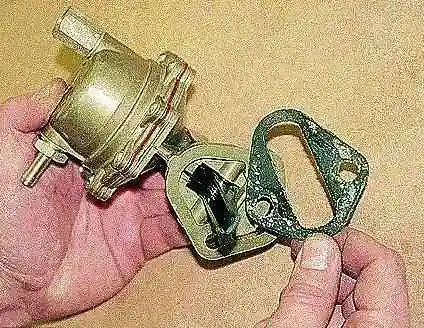
Remove the fuel pump gasket
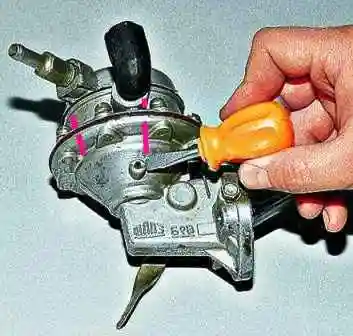
We mark the relative position of the cover and parts of the fuel pump housing
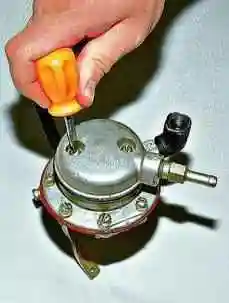
Use a flat screwdriver to unscrew the two screws
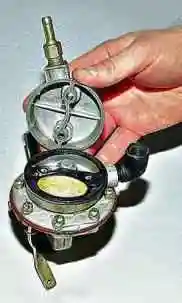
Remove the cover
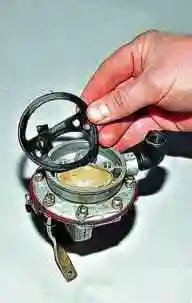
Remove the gasket.
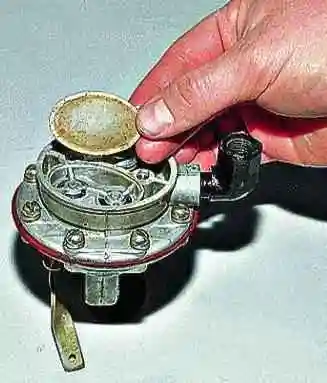
Remove the strainer.
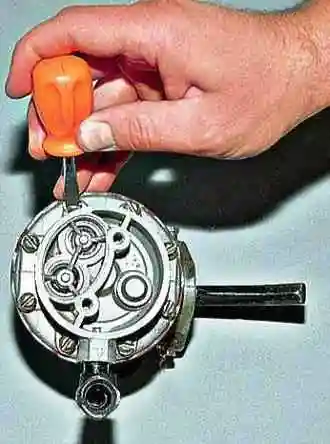
Use a screwdriver to unscrew the eight screws that tighten the halves of the case.
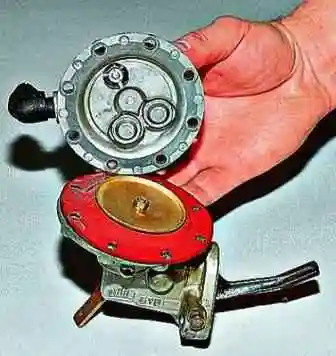
Disconnect the pump body.
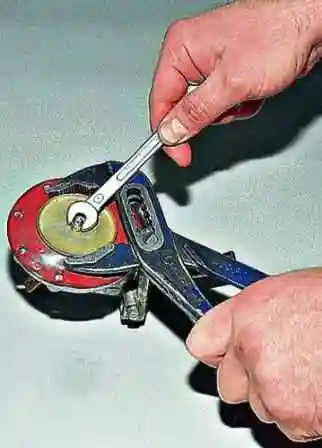
Using the “8” key, unscrew the stem nut, holding the upper washer of the membrane with sliding pliers
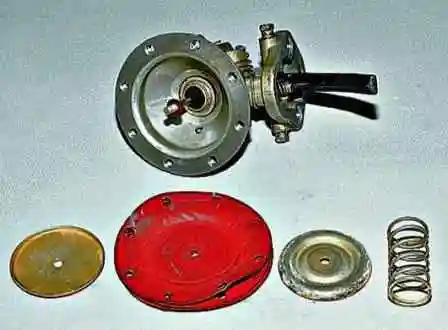
Remove the top washer, three membranes, bottom washer and spring.
If only the membranes are damaged, replace them and assemble the pump in reverse order
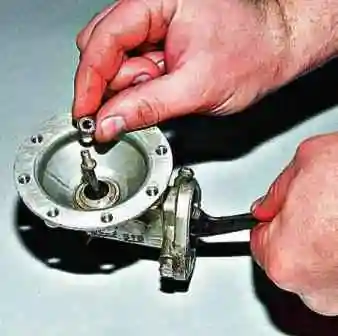
To completely disassemble the pump, remove the diaphragm thrust washer from the stem
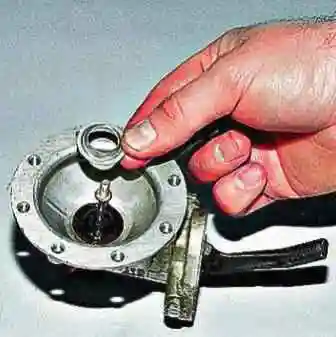
Remove the spring thrust washer.
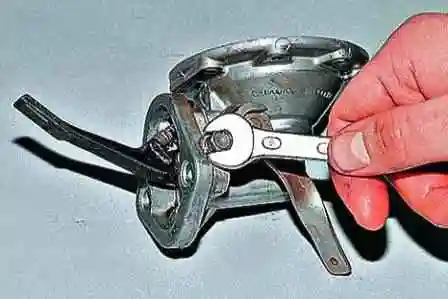
Use the "9" key to unscrew the two screw caps.
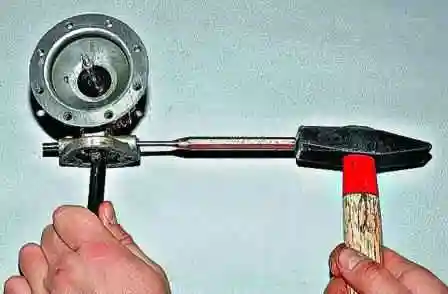
With a thin beard we knock out the axis of the pump drive lever
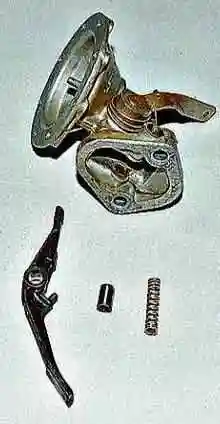
Remove the drive lever, lever bushing and spring
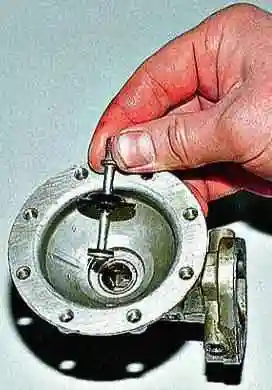
We take out the stem with the seal.
In case of damage, replace the rubber seal
Inspection and Troubleshooting
Rinse all pump parts in gasoline.
Inspect the pump casing. The threaded holes of the body must not be damaged or stripped.
There must be no buckling in the area of the threaded holes on the flange of the pump head.
Inspection port strainer must not be clogged or damaged.
Examine the aperture. If it has cracks, tears or significant abrasions, it must be replaced.
Replace torn strainer.
Check for sticking valves in the pump head.
If there is sticking, correct the cause or replace the fuel pump head.
It is more convenient to assemble the pump in the following sequence:
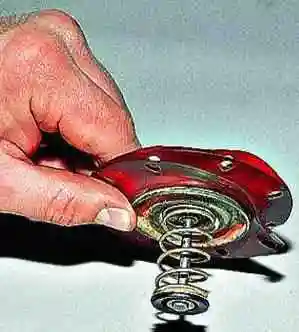
We install the thrust washer, spring, membranes and membrane washers on the rod.
We tighten the nut of their fastening.
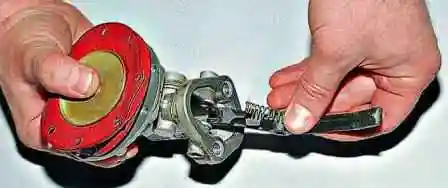
We install the stem with membranes into the pump housing and, having sunk the stem, insert the lever with the sleeve and the spring.
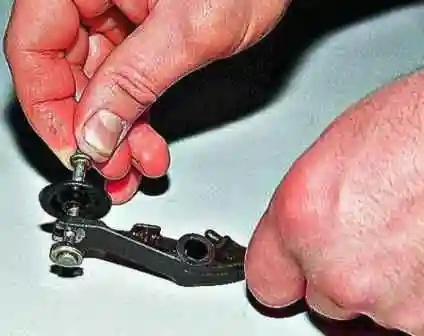
The fork of the lever should engage the stem (as shown in the photo).
Further assembly of the pump is carried out in the reverse order.
When tightening the screws connecting the body halves, we combine the marks and push the hand drive lever up so that the membranes bend and the holes of the membranes and the body line up.
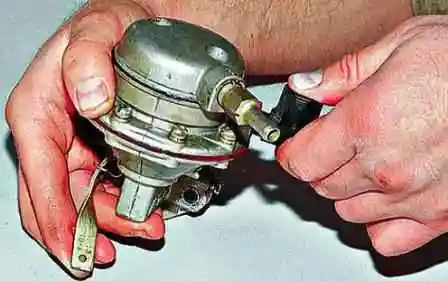
Clamping the outlet pipe with your finger, we create pressure with the hand drive lever by lowering the pump inlet fitting into the fuel.
After holding for 10-15 seconds, release your finger. Fuel should squirt out of the outlet.
Otherwise, we tighten the screws connecting the housing and the pump cover, and re-check the pump's serviceability.
If the pump could not be restored in this way, the valves are leaking.
In this case, we change the pump assembly or half of the housing with valves.
Install the pump in reverse order.
The pump housing has a drain hole for draining fuel in case of damage to the membranes.
Therefore, after starting the engine and during its operation, it is necessary to control the absence of fuel leakage from this hole of the fuel pump.


