
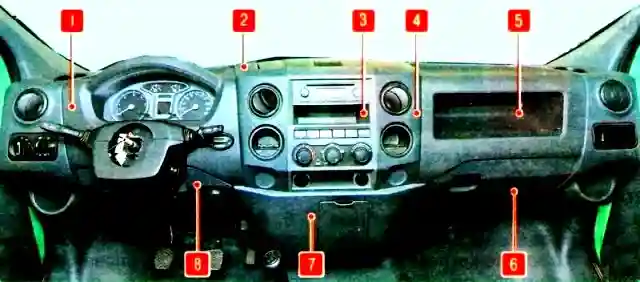
The instrument panel consists of a metal power frame, a plastic frame and removable parts.

The plastic frame is attached to the metal frame with thirteen tear-off rivets.
The assembled frame is attached to the cabin panels with screws and plastic holders.

Disconnect the negative battery terminal

Disconnect the positive terminal battery

In the engine compartment, unscrew the clamping bolt of the terminal connection of the upper and lower intermediate shafts and disconnect the intermediate shaft of the steering

Pull the edges of the two recesses in the lower decorative shield and, overcoming the resistance of the clamps, remove the shield, disengaging its axles from the hinge axles

Open the lower glove compartment

Press the two stops on the instrument panel

Fold the drawer down

Disengage the drawer axles from the hinge axles and remove the drawer

Unscrew the two screws on the left side of the lower trim fastening

Unscrew the two screws on the right side of the lower trim fastening

Pull the edges and disengage from the panel first two spring holders located on the sides of the trim, then the latches located on top and remove the trim

Remove the steering wheel, having previously installed the wheels straight.

Remove the steering column cover. We remove the steering column switch assembly

We disconnect the wiring harness block of the instrument switch and the ignition switch

Unscrew the two bolts securing the ball joint of the upper intermediate shaft under the instrument panel

Unscrew the two bolts securing the steering column to the instrument panel frame on the left

Unscrew the two bolts securing the steering column on the right and remove the steering column

Disconnect the wire harness connectors located under the instrument panel

Press the lock and disconnect the wiring block from the fan motor

Disconnect the wiring block from the additional resistor

Unscrew the mounting bolt and disconnect the panel frame support from the cab bracket.

Remove the plug in the upper central part of the instrument panel (near the windshield) and unscrew the bolt securing the panel to the front shield bracket.

Remove the plugs and unscrew the two bolts on the left that fasten the panel frame to the cabin pillar
Unscrew the two bolts on the right that fasten the panel frame to the cabin pillar
Lift the instrument panel up by six to eight mm, disengaging the side hooks of the panel from engagement with the rectangular holes in the front pillars of the cabin.
Pull the instrument panel back, disengage the panel mounting tabs from engagement with the front shield and remove the panel.
Install the instrument panel in the reverse order.

")
")
")
")
")
")
")
")