Remove the cylinder head to replace the cylinder head gasket.
Also for the repair of the cylinder head itself and for engine overhauls.
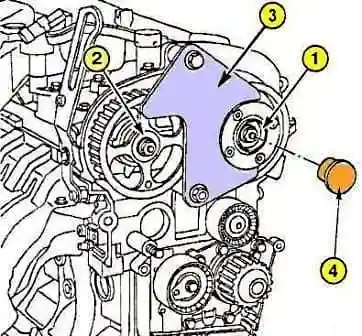
Removing the intake camshaft dephaser and the exhaust camshaft pulley: 1 - pulley mounting bolt. 2 - nut for fastening the toothed pulley; 3 - fixture Mot1490-01; 4 - stub
Installing the tool (picture 1) for locking the camshaft pulleys Mot1490-01.
Remove the plug (4) from the intake camshaft dephaser pulley.
Remove the bolt (1) securing the intake camshaft dephaser pulley.
Remove the nut (2) securing the exhaust camshaft sprocket.
Remove the tool for fixing the camshaft pulleys Mot1490-01.
Remove the intake camshaft dephaser.
Remove the exhaust camshaft sprocket.
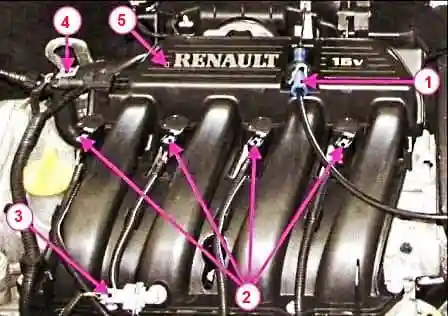
Removing the intake manifold of the K4M engine: 1 - throttle cable; 2 - block of the wiring harness to the ignition coils; 3 - block of the wiring harness to the air temperature sensor; 4 - block of the wiring harness to the incoming air pressure sensor; 5 - intake manifold
Remove the intake pipe (fig. 2).
Remove the ignition coils.
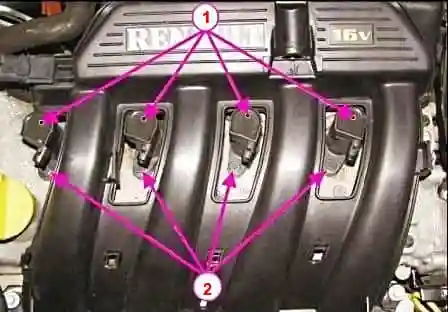
To do this, disconnect the wiring harness pads from the coils 1 (Fig. 3).
With a head of 8, we unscrew the bolts 2 for fastening the coils and remove them.
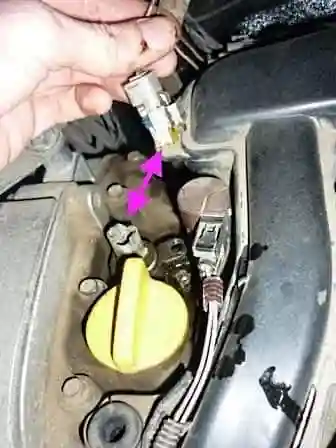
Remove the solenoid valve of the intake camshaft dephaser.
To do this, we press the connector lock and remove the wire harness connector from the phase regulator valve (Fig. 4).
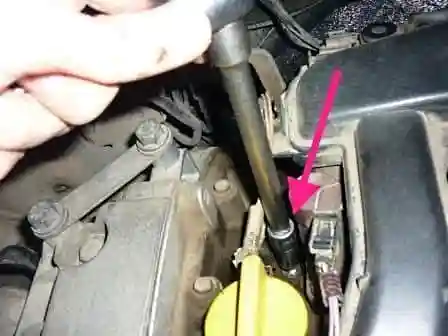
With a head of 10, unscrew the bolt securing the phase regulator valve and remove it.
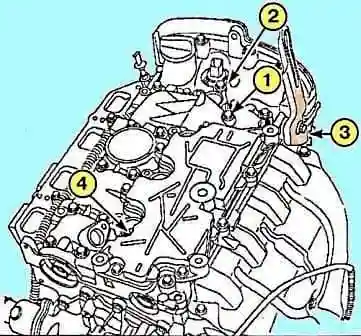
Remove the lifting eye (H) of the engine, located on the drive side of the timing mechanism.
After unscrewing the nine mounting bolts (4), remove the oil separator cover.
It is not necessary to unscrew bolt 1 (Figure 6), which serves as a stop for the eccentric cam follower.
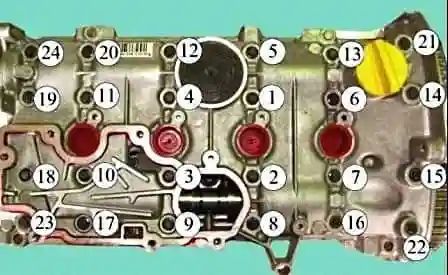
Remove the twenty-four bolts (Fig. 7) securing the cylinder head cover.
Remove the cylinder head cover (see the article "Removing the cylinder head cover ").
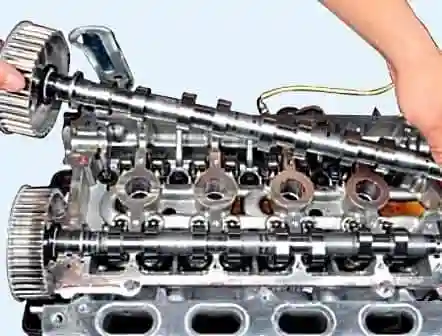
Remove the intake and exhaust camshafts.
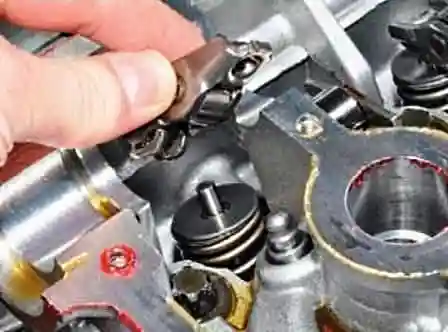
Remove the valve levers
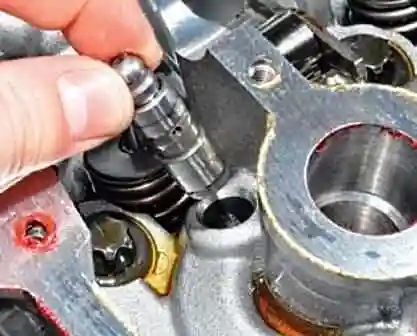
Remove the valve lifters.
After removing the hydraulic pushers, they must be placed in a vertical position, in order, in order to be installed in their original places during assembly.
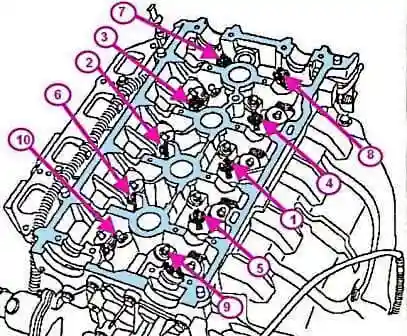
We unscrew the cylinder head bolts in the reverse order of tightening (Fig. 11).
Remove the cylinder head and install it on wooden stands. We prepare it for disassembly.
Remove the cylinder head gasket.
Gently clean the seating surfaces on the cylinder head and cylinder block from traces of the gasket.
Installation of the cylinder head is discussed in the article "Installation"
Installing the head of the block and repairing the head will be discussed in the next article.


